Reporting
The Reporting capabilities of Event Manager allow you to schedule and export custom reports built from data that has been recorded in Event Manager.
Schedule Reports
Scheduled reports are built by extracting key data from the Event Manager or Forensic Analysis displays and compiling it into a report.
Reports are given a unique name and can be scheduled to run in the which is can then be run at a scheduled time of your choosing in the future if required.
A range of formats in which the report can be output are available.
Creating a Schedule Report
Reports are created using the available filters in the secondary menu bar on either the Event Manager or Forensic Analysis pages.

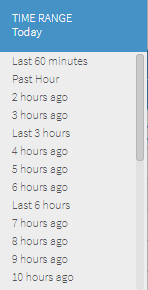
Time Range
The default setting is Today. Click Today to reveal a drop-down menu from which a new time-range can be selected. Use the vertical scroll bar on this menu to see alternative time ranges not visible on the initial display. Selecting a custom range allows you to define a more precise set of time criteria.
Regulations
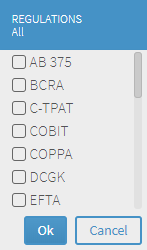
The default setting is All. This specifies that the report covers all the regulations with which compliance is a requirement. Click All to reveal a drop-down menu to select specific security regulations with which the report relates.
Controls
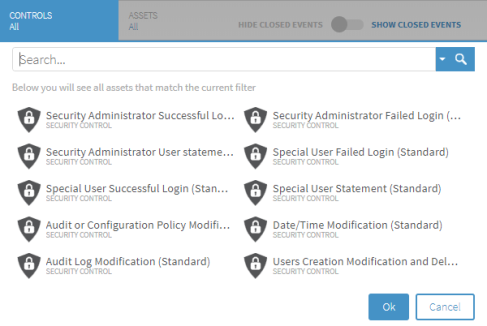
The default setting is All. This specifies that the report covers all the possible control mechanisms. Click All to open a window into which you can type a specific control filter for the report.
Assets
The default setting is All. This specifies that the report covers all defined assets. Click to open a window into which you can type a specific asset or asset set.
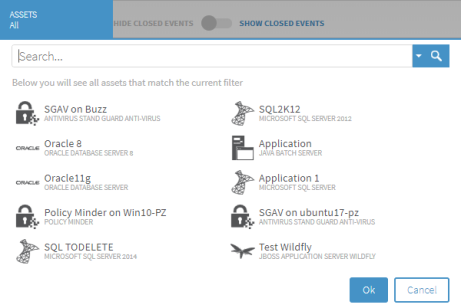
Hide/Show Closed Events
Use the toggle switch to determine whether Closed Events are included or omitted from the report.
Once the selections from each filter has been chosen, click the ![]() Schedule icon on the menu bar. The Schedule Report window opens.
Schedule icon on the menu bar. The Schedule Report window opens.
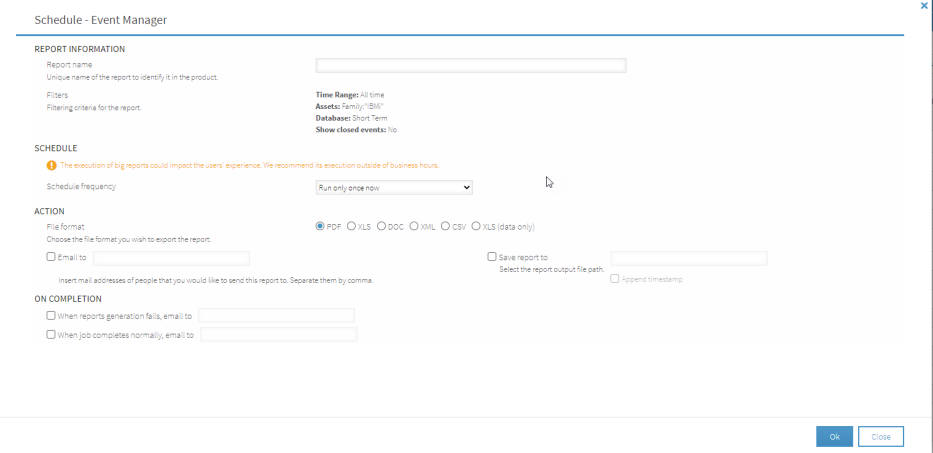
The following parameters are available on this display.
Report Information section
This section contains the basic identity and filtering information of the report.
Report Name
Enter a unique name by which this report is identified within Event Manager. It is recommended that you use something meaningful in this field so that the reports purpose is clear from the name.
Filters
Displays the current filtering criteria under which this report runs. These cannot be changed on this display. Please refer to the section 'Advanced Reports Configuration' in the Event Manager Configuration Guide.
Groups (For Forensic Analysis Reports Only)
The grouping facility allows you to select from the corresponding drop-down menu, the criteria by which the report is grouped together. More than one criteria can be selected for a single report. The report grouping is by the order of listed criteria. The available criteria are:
-
Action
-
Audited System
-
Complete Message
-
Destination Machine Name
-
Event Time
-
Event Type
-
Object Name
-
Operator Name
-
Platform Information
-
Security Control
-
Source Machine Name
-
Subaction
Click to select a criteria and a new drop-down list appears allowing to select further grouping criteria. Continue selecting criteria until the grouping selection you require is complete.
Click ![]() to remove a selected criteria from the grouping.
to remove a selected criteria from the grouping.
Top X (For Forensic Analysis Reports Only)
Displays only the number of bars entered in this selection within the summary chart. The default setting is 10 which we recommend for a correct readability of the report.
Display only summary information (for Forensic Analysis Reports Only)
Select this option to hide the event details list from the report so that only the summary information is included and displayed.
Schedule section
This section contains the details of the schedule under which the report is generated.
Schedule frequency
Use the drop-down menu to select the frequency with which this report runs. Additional fields may be displayed depending on the selection made in this field.
- Run only once now: The report is run on a one-off, ad-hoc basis
- Daily: The report is run every nn days at the specified time (where nn is the number of days)
- Weekly: The report is run on the specified days of the week, indicated by the highlighted days and at the specified time.

- Monthly: The report is run on either the days specified, the first, second, third, fourth or last selected day of the week or the last day of the month and at the specified time.

Action section
This section contains the file format parameters and the email and storage requirements of the generated report.
File format
This field is used to select the file format in which the generated report is exported.
- PDF: The report is saved in Portable Document Format
- XLS: The report is saved in Microsoft Excel Format
- DOC: The report is saved in Microsoft Word Format
- XML: The report is saved in Extensible Markup Language Format
- CSV: The report is saved in Comma Separated Value Format
- XLS (Data only): The report (data only) is saved in Microsoft Excel Format
Email to
Click this option so that it is enabled. Enter the email addresses of the people to which the report is to be sent. If multiple email addresses are used, use a comma (,) to separate them.
Save report to
Click this option so that it is enabled. Enter the path of the directory into which the report is saved.
Click Append timestamp to add a timestamp value to files that are generated so that they can easily be identified.
On Completion section
This section is used to enter the email details of the person who should be notified if the report generation fails or completes successfully.
When report generation fails, email to
Enter the email address of the person to notify if the report generation fails.
When job completes normally, email to
If required, enter the email address of the person to notify if the report completes normally,
Click OK to complete the scheduled report.
Scheduled reports can be maintained using the Advanced Reports Configuration menu option from the Event Manager- Configuration - Settings section. See the Event Manager Configuration Guide for more information.
Export Reports
The Export Reports option of Event Manager allows you to generate a one-off report based on the current filtered contents of the Event Manager or Forensic Analysis display.
The same filter settings can be applied as when creating a scheduled report.
For example, the following settings would generate a report showing all open control events logged in the last 60 minutes against the Localhost asset that affected all regulations.

When the filter settings resolve to the data that you want to include on the report, click the ![]() Export icon.
Export icon.
The report begins generating, as indicated by an animated ![]() Cog icon displayed on the header bar of the display.
Cog icon displayed on the header bar of the display.
When the cogs stop spinning, the report has been generated. Click the ![]() Cog icon to open a drop-down menu.
Cog icon to open a drop-down menu.
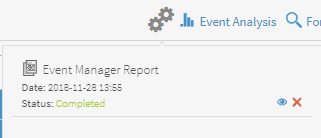
Click on the ![]() Discard icon to delete the report.
Discard icon to delete the report.
Click on the ![]() View Result icon to view or share the report.
View Result icon to view or share the report.
Viewing and Sharing Report Results
Shortly after running the report, and once it is completed, click the ![]() View result icon against the report you want to view from the drop-down menu accessed by clicking the
View result icon against the report you want to view from the drop-down menu accessed by clicking the ![]() Cog icon.
Cog icon.
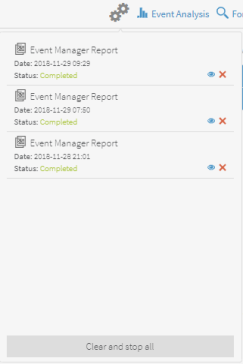
Once the report results appear on screen, click the buttons at the top of the screen to display the results in the desired format:

- Screen: The report is displayed on screen
- PDF: The report is displayed as and Adobe Acrobat file (default setting)
- XLS: The report is displayed as an Excel spreadsheet
- DOC: The report is displayed as a Word document
Sharing Reports
When you run a report the results are displayed in your browser by default.
You can then share the report results by sending the PDF, file, excel spreadsheet, or Word document to your colleagues, or include the information in other reports.
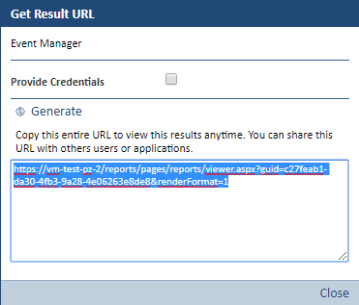
Click Share this Report to open the Get URL Result dialog.
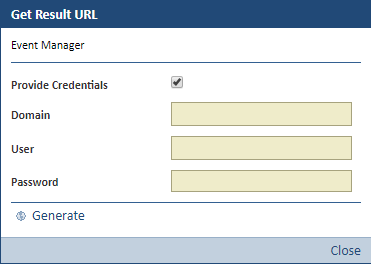
If your require the user to which you are sending the report to complete a set of required credentials to be able to view the report, ensure that the Provide Credentials option is enabled and then complete the Domain, User and Password fields with the applicable details. Then click Generate to generate the URL at which this report can then be found,
Alternatively you can send your colleagues a URL where they can find the report results, without requiring any credentials to be input.
Remove the tick mark from the Provide Credentials option and click Generate to reveal the URL which can then be copied and sent to other users.
