Client Side Attack Phase: Phishing
Once the target email addresses have been identified and added to Core Impact's database, you can then use the Client-side Phishing RPT process to attack one or more end-users with a Phishing attack. This wizard guides you step-by-step through the process of selecting email address targets, selecting the Phishing type (browser redirect or web page clone), and selecting an email template to use for the Phishing attack. You can customize each email to increase the authenticity of the attack and the likelihood that an untrained end-user will fall for a social engineering attack. You can even import an actual email (from Outlook or Thunderbird) to create your Phishing email. If an end-user is fooled by a Phishing attack and clicks the link or enters sensitive information, Core Impact will record this information.
The Client-side Phishing wizard has many option paths that can vary depending on the settings you choose. To begin the Phishing attack:
- Ensure that the Client-side RPT is activated.
- Click Phishing to open the wizard and press Next to start..
-
On the Phishing Type Selection form, select which type of Phishing attack you want to run.
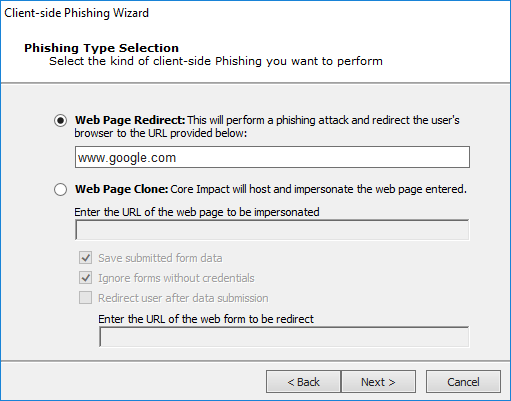
Web Page Redirect - This option will simulate the first component of a Phishing attack whereby users receive an email containing a link and, if users click the link, their email address will be flagged in the Client Side entity view. This test will illustrate how careful your user community is when receiving links via email. If selecting this test, enter the URL where the browser is redirected after the user clicks the link.
Web Page Clone - This option will simulate a complete Phishing attack whereby users receive an email containing a link and, if users click the link, they are taken to a false front web page and are prompted to enter sensitive data (username, password, etc). If selecting this test, enter the URL of the web form that you want Core Impact to impersonate. For example, if you want the test to impersonate a bank login screen, enter the URL for the actual site (e.g. http://www.samplebank.com). When Core Impact executes the test, it will navigate to and copy the framework of the actual page and host it as a landing spot for users who click the link within the test's email. The page that Core Impact hosts will look exactly like the real site.
If any users enter data into the test's web form, Core Impact will save the data they entered, illustrating how a real Phishing attack can capture sensitive data. Uncheck the Save submitted form data option if you do not want Core Impact to save this data.
Redirect user after data submission: If users enter data into the test's web form - falling victim to your simulated Phishing attack - you might want to redirect them to a web page that tells them of their error and reiterates the caution one must take when clicking links within emails. Check this option and enter a URL for the redirect page.
Press Next to continue.
-
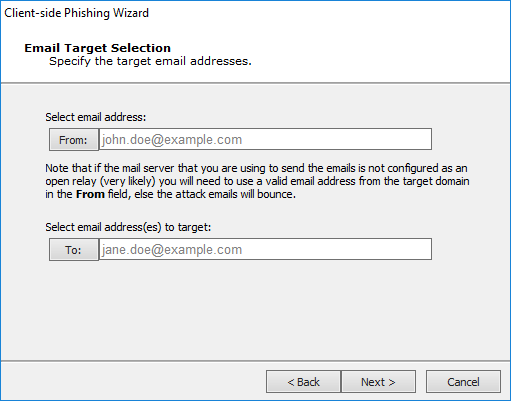
In the Email Target Selection screen, press the From: button to select an address that will appear in the header of the email being sent. Press the To: button to select recipient email addresses from the Entity Database's Client Side View.
If the desired addresses are not yet in the Client Side View, you can add them using the same procedure as if you were working in the Client Side View directly. Right-click in the view, then select New..., then select Email.
Press Next to continue.
-
Email Template Selection
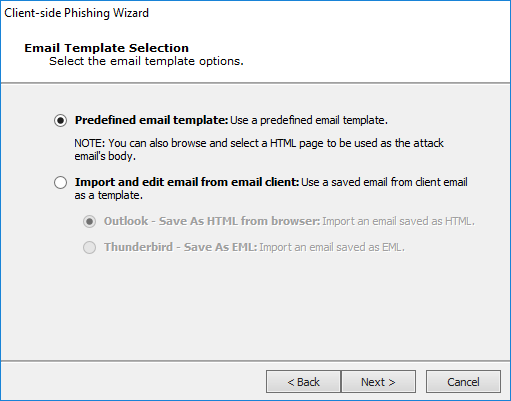
Predefined email template:Core Impact includes several email templates that you can use to craft your Client-side attack.
Import and edit email from email client: You can use an actual email (from either Outlook or Thunderbird) as the basis for a new template.
Press Next to continue.
-
Complete the End User Experience form.
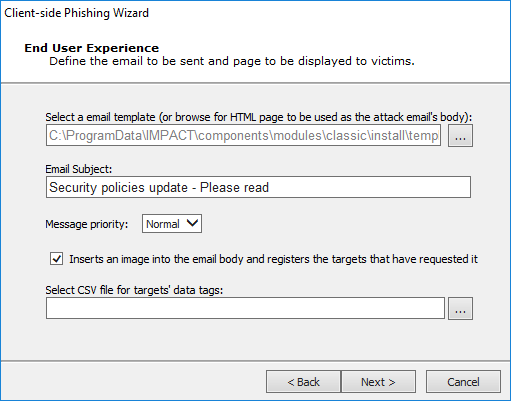
Core Impact ships with several email templates that are located in:
%ProgramData%\IMPACT\components\modules\classic\install\templatesYou can customize these templates to maximize the chance that your users will take action in the email. Click the Change button to select a new template, or to modify the one that is selected.
Email Subject: Enter the text you would like to appear as the subject of the email. This will be populated by default but you can over-write the text.
Select CSV file for targets' data tags: By default, the email templates only include a handful of basic tags. If you'd like to add more tags to the email, you can import the tags and their values using a .csv file. The .csv file must be formatted in the following way:
- Row 1: the names of the tag fields. The first tag name must be 'target'
- Rows 2 - x: the values of the tags. The 'target' value must be the email address of the target
Below is an example of how the .csv may appear:
target, nickname, company, position john.doe@example.com, Johnny, JD Corp, VP of Customer Support az@core.sec, Azzo, JD Corp, Secretary After importing the .csv file, you can edit the template and reference content from the .csv file by using the custom tag:
<%csv:[field_name]%>. For example,<%csv:nickname%>or<%csv:position%>.-
The template form has Preview and Edit tabs. Make any changes on the Edit tab and use the Preview tab to see how your email will appear to recipients.
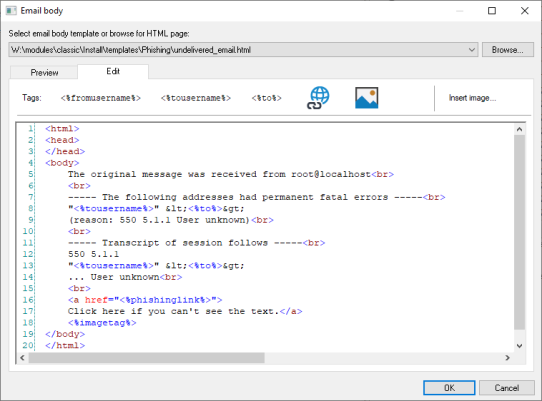
Within the email template file, you can include several tags that may bring further authenticity to the email:
-
<%fromusername%> Replaces the name property of the entity selected as Sender
-
<%tousername%> Replaces the name property of the entity selected as Receiver(s)
-
<%to%> Replaces the email property of the entity selected as Receiver(s)
-
<%phishinglink%> Replaces the malicious-url
-
<%imagetag%> Renders a 1px image used to detect if victims opened the email
If the email recipient allows their email client to display external elements, this image will be requested of the Core Impact web server. Core Impact will then record that the email has been viewed.
-
<%headinsert%> Used internally by some exploits to append content in the <head> of the message
-
<%bodyinsert%> Used internally by some exploits to append content in the <body> of the message
NOTE:The following legacy tags are supported for backward compatibility only:
-
<%username%> Identical to <%tousername%>
-
<%linkbegin%> Replaces the beginning of an anchor link (<a href="">) with the malicious-url
-
<%linkend%> Replaces the end of the anchor link (</a>)
Press the OK button when your template is complete.
-
Press Next to continue.
-
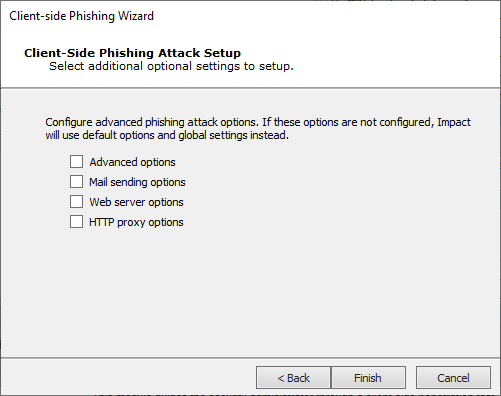
Client-side Phishing Attack Setup
Select additional options to configure and press Next to continue.
NOTE:The HTTP Proxy Options is only available for the Web Page Clone phishing type (step 3).
-
Advanced Options
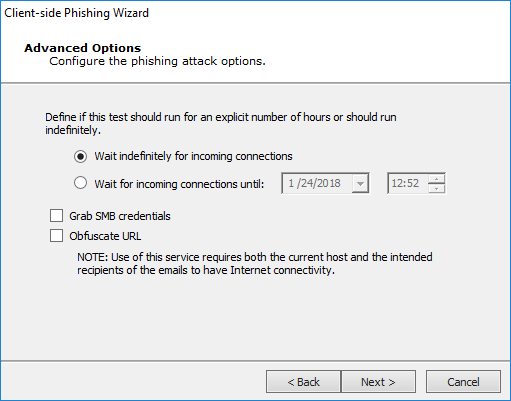
Wait indefinitely for incoming connections - Core Impact will wait indefinitely for connections from email recipients.
Wait for incoming connections until -You can specify the date and time when Core Impact will stop accepting incoming connections from email recipients and, optionally, whether the deployed agents should expire following the completion of the attack.
Grab SMB credentials - With this option checked, Core Impact will attempt to force the target to authenticate to the web server with its encrypted SMB credentials (NTLM challenge/response). If successful, Core Impact operators can export these challenge/responses in John the Ripper format. Check the SMB Encrypted Credentials Exporter module for more information.
Obfuscation URL - Optionally select a URL obfuscation service to mask the URL that will be used in the email.
Press Next or Finish to continue.
-
On the Email Sending Settings form:
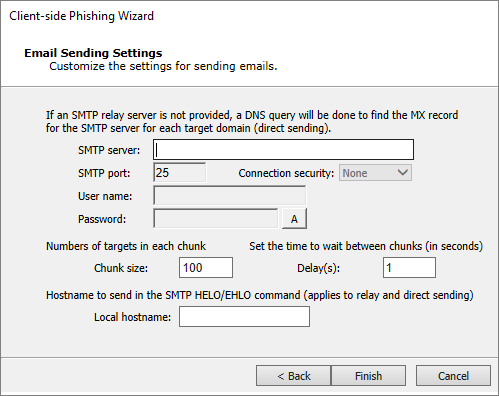
Enter the SMTP Server and SMTP Portt for your email SMTP server. Optionally, choose STARTTLS as the Connection security and then enter the Username and Password for your SMTP server.
If you want to limit the number of emails that are sent at one moment, set a Chunk Size. This value will determine the maximum number of emails that will be sent at one time.
Enter the Delay (in seconds) that you want Core Impact to wait in between sending chunks of email in this attack.
Set a Local Hostname if the fully qualified domain name (FQDN) of the machine where Core Impact is running doesn't work with the SMTP server (for example, messages are ignored).
Press Next or Finish to continue.
-
Web Server Settings
The web server used in the attack can be run on any active agent that was previously deployed. This feature is convenient in situations where the potential targets might not be able to connect directly to the machine where Core Impact is running. When using the localagent (the default) for the web server, make sure the target workstations will be able to connect to it. If the computer running Core Impact is sitting behind a NAT device, you must activate and configure the NAT support in Network Options and configure your NAT device to redirect the appropriate ports back to the computer running Core Impact. Check to ensure that the Port value of the Web Server module (80 by default) is also redirected.
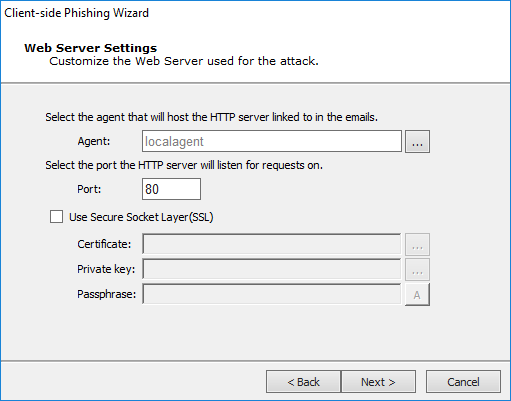
Enter the Agent and URL components to be sent to attack target users:
Agent: Select the agent that will host the HTTP server linked to in the emails.
Port: Enter the port on which the HTTP server will listen.
Check the Use Secure Socket Layer option and configure, if using.
Press Next to continue.
Web Server Settings(contd)
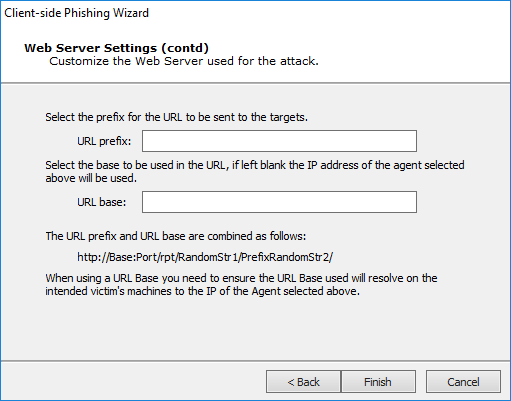
URL Prefix: Enter the prefix for the URL to be sent to target users.
URL Base: Enter the URL base.
Press Next or Finish to continue.
-
HTTP Proxy Options
NOTE:The HTTP Proxy Options is only available for the Web Page Clone phishing type (step 3).
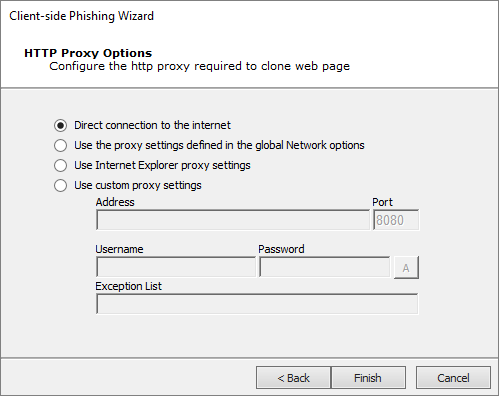
Direct Connection to the Internet - Select to connect to the Internet without connecting to a proxy server.
Use the Proxy Setting Defined in the Global Network Options - Select to follow the settings that are in the Tools -> -> form.
Use Internet Explorer Proxy Settings - Select to follow the settings as defined in your Internet Explorer preferences.
Use Custom Proxy Settings - Select to follow the proxy settings you specify in the fields just below.
- Address and Port:
- Username and Password:
- Exception List:
Press Next or Finish to continue.
-
When you have reached the end of your configurations, click the Finish button. The Wizard will close and the Client-side Phishing modules will begin. You will be able to see progress in the Executed Modules pane. Once completed, the Module Output pane will display the test's findings.