Use Core Impact to Perform Information Gathering
To run the Network Information Gathering step, follow this procedure:
- Make sure that the Network RPT is active.
- Click on Network Information Gathering to open up the Information Gathering Wizard and press Next to start.
-
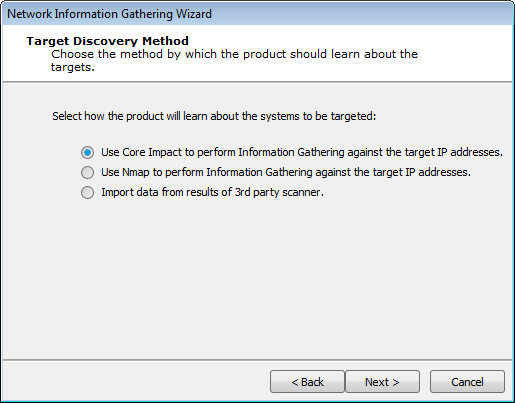
In the Target Discovery Method window, select the Use Core Impact to perform Information Gathering .... option.
-
Press Next to continue.
-
In the Target Network IP Version window, select the IP version of the network where the RPT will run:
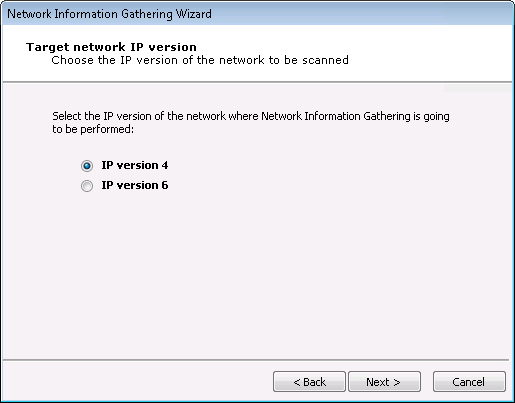
Select one and press Next to specify options for your choice.
IP version 4: Select and skip to IPv4 Network Range Selection.
IP version 6: Select and skip to IPv6 Network Discovery Mode Selection.
-
For IPv4:
Specify the target IP ranges (IPv4) you want to scan.
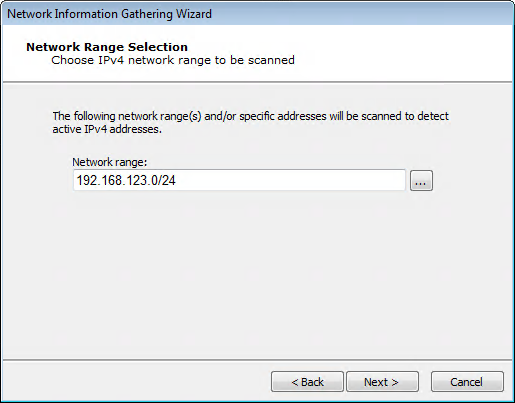
You can also click on the ellipsis (
 ) button to the right of the Network range field to enter a Single IP, an IP Range, or CIDR Notation, as well as import a group of IP addresses from a file in the IP Address Ranges Selection dialog box. See Specifying Host Ranges for more information on IP ranges.
 -
For IPv6:
Select the type of scan you would like to perform:
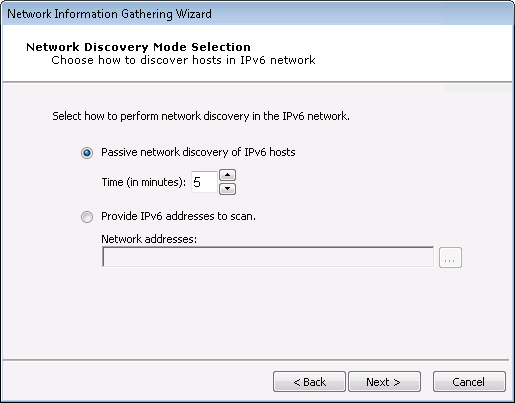
Passive network discovery of the IPv6 network: The RPT will passively listen to network traffic and identify hosts that are transmitting on IPv6.
Provide IPv6 addresses to scan: Manually select addresses for the IPv6 network.
-
- Press Next.
- There are 3 network scan types you can perform:
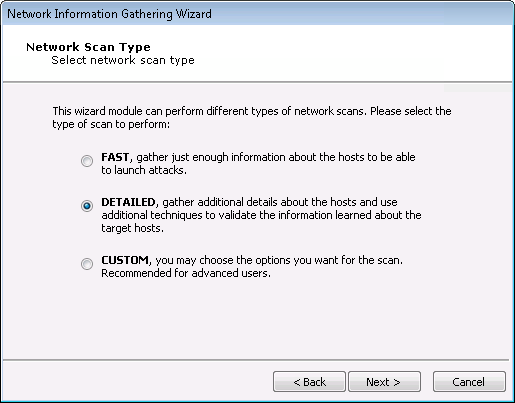
FAST: The test captures the minimal amount of data needed in order to launch attacks. There will be no additional steps in the Wizard if you select this option.
DETAILED: The test runs more modules in order to discover additional, potentially useful details about target systems. There will be additional steps in the Wizard if you select this option.
CUSTOM: You configure how Core Impact will execute the Information Gathering process. There will be additional steps in the Wizard if you select this option.
For a Fast Scan:
Select the Fast option and press Finish to complete the Network Information Gathering RPT step.
Or, if you selected DETAILED or CUSTOM, click Next and proceed to the next steps in this procedure to enter additional information about your scan.
For Detailed Scan:
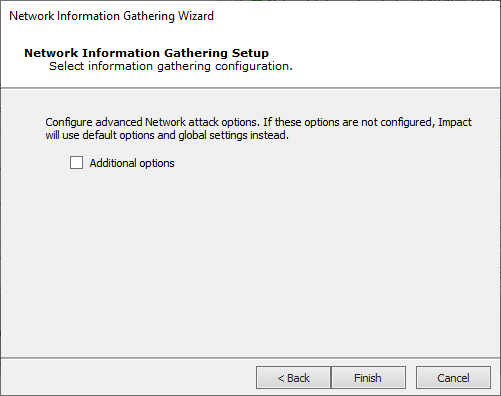
Press Finish to continue without these additional items or check the Additional Options box and press Next.
With the Additional Options, the RPT can also check for Network Exposures in targeted hosts.
Check for Network Exposures: An information security exposure is a system configuration issue or a mistake in software that allows access to information or capabilities that can be used by a hacker as a stepping-stone into a system or network. Whereas an information security vulnerability is a mistake in software that can be directly used by a hacker to gain access to a system or network.
Press Finish and the module will run and information will be displayed on the Module Log Panel of the Console. You have now completed the first step of a Network Rapid Penetration Test.
For a Custom Scan:
Select any or all of the available options shown here. Each has its own panel with options and is explained below.
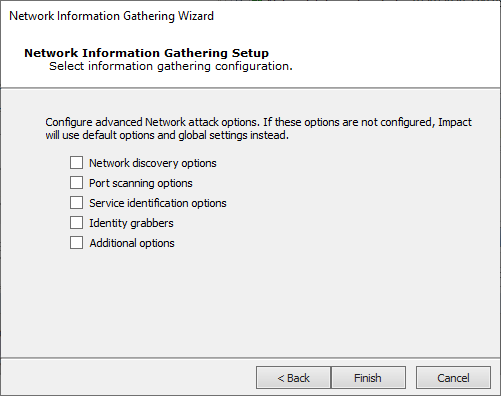
Press Next to enter or review settings for any selected options. If no options are selected the equivalent of a Fast scan will execute.
Network Discovery Options:
NOTE:This option is not available for an IPv6 scan.
Select a scanning method to perform the TCP port scan.
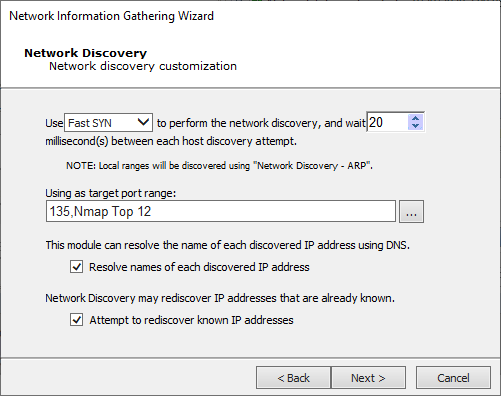
Fast SYN: Selecting Fast SYN will induce Core Impact to use this method if the operating agent has Pcap installed and is not the localagent. If the agent is not the localagent, and it does not have Pcap installed, then the scan method will default to TCP Connect.
TCP Connect: Selecting TCP Connect will induce this method irrespective of the agent in use. This is the slowest performing scan method.
Port Scanning Options:
One or more port scanners may be executed as part of this RPT step. Use the Port Scanning Customization Dialog Box to customize how these port scans are performed.
Select a scanning method to perform the TCP port scan.
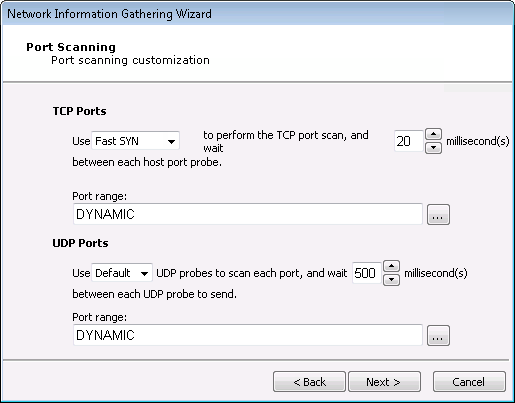
Fast SYN. Selecting Fast SYN will induce Core Impact to use this method if the operating agent has Pcap installed and is not the localagent. If the agent is not the localagent, and it does not have Pcap installed, then the scan method will default to TCP Connect.
TCP Connect. Selecting TCP Connect will induce this method irrespective of the agent in use. This is the slowest performing scan method.
Ultimately, the type of agent being used to launch the scan will influence the port scanning method, and your selection may be overridden. The below table shows which port-scanning methods can be used depending on where the Information Gathering is being launched.
Port Scanning Methods
Launched from ... Fast SYN TCP Connect localagent YES YES Agent with WinPcap installed YES YES Agent without WinPcap installed NO YES Specify how many milliseconds to wait between each discovery attempt.
You can use the ellipsis (
) button to the right of the Port range field to change or add port range groups. See the section called “Specifying Port Ranges” for more information.Service Identifications Options:
A service identification module may be used as part of this RPT step. Use the Service Identification Dialog Box to customize how service identification is performed.
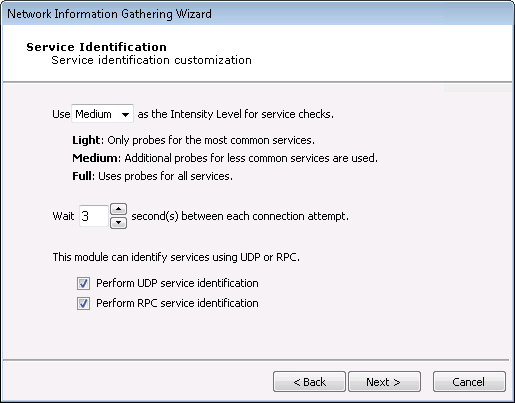
The goal of the service identification module is to identify the network service listening on each available port. You can control the Intensity Level of the service identification module:
Light: This setting will cause the module to use blind identification - each port will be labeled with its corresponding default service (e.g., 80 is assumed to be HTTP, 25 is assumed to be SMTP, etc).
Medium: This setting will cause the module to interact with and try to identify less commonly used ports.
Full: This setting will cause the module to connect to and interact with every open port and attempt to identify the network service listening on that port.
Adjust the interval (in seconds) between connections to a target port.
You can activate UDP and/or RPC service identification by checking the appropriate Perform service identification checkbox(es).
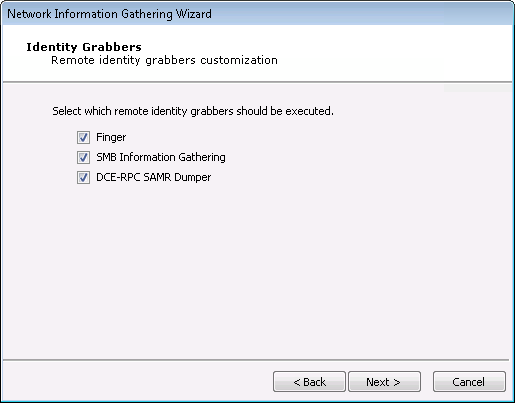
Identity Grabbers:
Core Impact can attempt to gather (grab) credentials from the target host(s). Any credentials that are found will then be stored in the Identities folder in the Network Entity Database. These credentials can optionally be sent to the Core CloudCypher service for cracking. Select which remote identity grabbers should be used during the Information Gathering test. Then click Next.
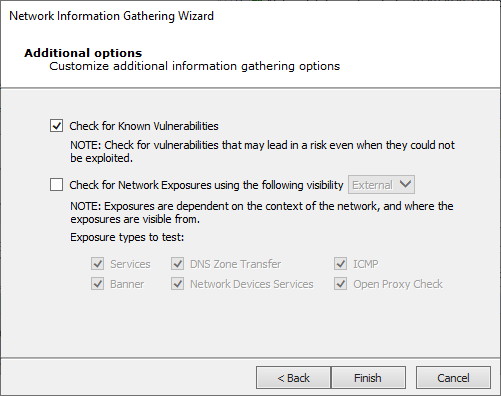
Additional Options:
With the Additional Options, the RPT can also check for Network Exposures in targeted hosts.
Check for Network Exposures: An information security exposure is a system configuration issue or a mistake in software that allows access to information or capabilities that can be used by a hacker as a stepping-stone into a system or network. Whereas an information security vulnerability is a mistake in software that can be directly used by a hacker to gain access to a system or network.
Press Finish and the module will run and information will be displayed on the Module Log Panel of the Console. You have now completed the first step of a Network Rapid Penetration Test.