One-Step Client Side RPT
Core Impact provides 2 One-Step Client Side tests:
- One-Step Client Side Risk Assessment This test targets specific applications on your users' computers. By sending an email to your users, they initiate the test and Core Impact reports back the results to you. Jump to Starting a Client-side Risk Assessment.
- One-Step Client Side Auto Test: If you have a standard desktop image that you deploy to your desktop users, use the One-Step Client Side Auto Test to test a single machine with the build and expose it to many Client Side exploits at one time. Jump to Starting a Client Side Auto Test.
Starting a Client-side Risk Assessment
Before running a Client-side Risk Assessment, you must:
- Prepare a file that contains the email address(es) of your target users. This should be a
.txtfile that contains email addresses separated by commas. - Configure the Outgoing E-mail Information in the One-Step section of Core Impact's Options.
- Determine which application on the users' computers you want to test.
The below steps illustrate how to run a One-step Client-side Risk Assessment manually. You can also execute this test using the Scheduler - see Using the Scheduler for more details.
To manually run a One-step Client-side Risk Assessment:
- Activate the Client Side RPT.
- Click Client-side Risk Assessment under the One-Step heading.
- The Client-side Risk Assessment Wizard will appear. Click the Next button to proceed with the Wizard.
-
Click the ellipsis (
 ) button next to the Import email addresses from a file field and navigate to your email text file.
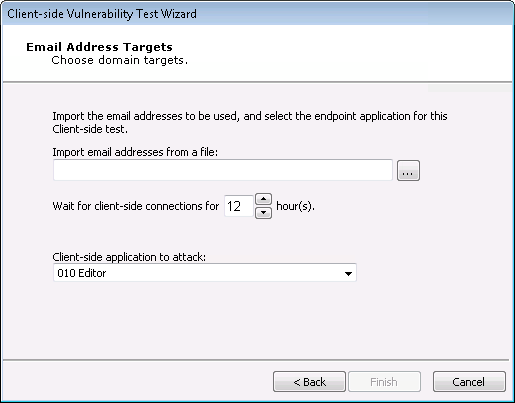
-
Select the file and click the Open button.
Each address in the file will receive an email asking the recipient to click a link within the email, initiating the test on their computer.
- Set the Wait for Client Side connections for x hour(s) value according to your preference. If you set this value to 5 hours, then recipients of the email must act within 5 hours or their test will not contribute to your Client-side Risk Assessment results.
- Select from the Client Side application to attack drop-down menu. This will determine the application that is tested when users click the link within the email they receive.
- Click the Finish button.
To check on the status of your test, click the Module Output tab.
Starting a Client Side Auto Test
The below steps illustrate how to run a One-step Client Side Auto test manually. You can also execute this test using the Scheduler - see Using the Scheduler for more details.
To manually run a One-step Client Side Auto Test:
- Activate the Client Side RPT.
- Click Client Side Auto Test under the One-Step heading.
- The Client Side Auto Test Wizard will appear. Click the Next button to proceed with the Wizard.
-
The test needs an agent to run on the target host. Select an existing agent or choose and configure the Install Agent using SMB option.
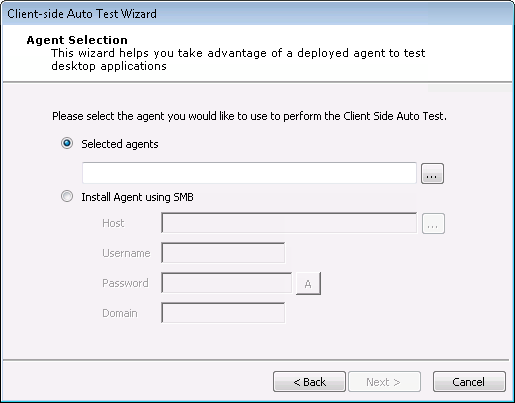
- Click the Next button.
- On the Auto Test Parameters Selection form:
- Check the Use Exploits that require user interaction if you want the test to use exploits that would require a user to take action for the exploit to succeed.
- Select which applications are to be checked for vulnerabilities:
- Execute all available client side exploits (Attach and Web Browser exploits).
- Select a specific application to target from the Application drop-down menu.
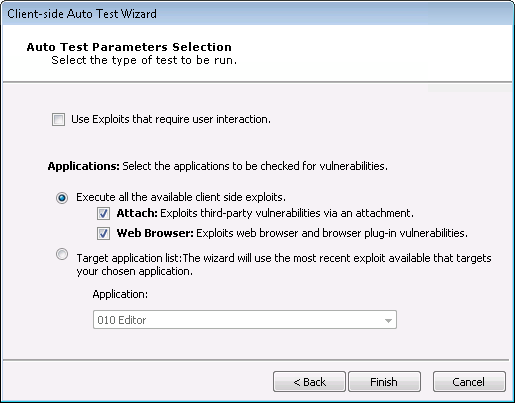
- Click the Finish button.
To check on the status of your test, click the Module Output tab.