Teaming
Core Impact allows more than one user to collaborate on a single workspace for testing, giving teams the ability to share data and delegate testing tasks. To use Core Impact's Teaming capabilities, at least one Teaming Session must be created. Then, users can join that session and share the workspace.
If using Teaming with SQLServer Standard/Enterprise, the following permissions must be granted (manually) to the database engine.
- Mixed mode authentication enabled.
- Grant remote access to the database (in the engine, and in the firewall if any).
Create a Teaming Session
You can open an existing Workspace and enable it as a Teaming Session (see Opening an Existing Workspace). To create a new Teaming Workspace from scratch, start on the main Core Impact dashboard:
-
Select Workspaces on the Navigator panel and press the Create Workspace
 button.
The New Workspace Wizard opens.
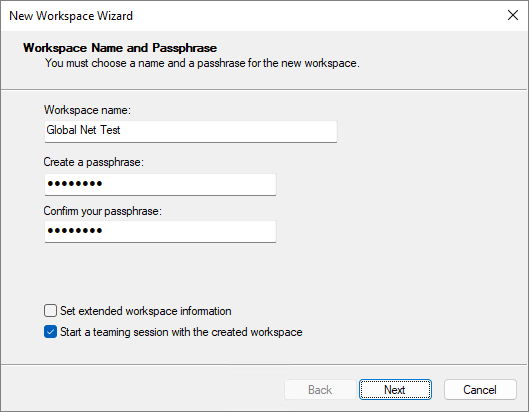
Give the new Workspace a name and enter the Passphrase (twice).
Check the Start a teaming session with the created workspace option.
-
Click Next to continue.
-
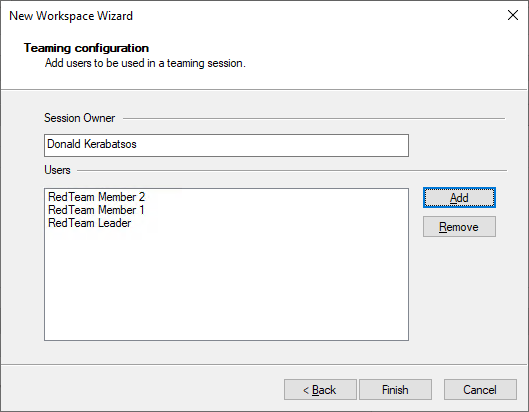
Enter the name of the Session Owner. Then click the Add button to add each user whom you want to be able to use the new Workspace.
-
Once you've added all the necessary users, click Finish.
Core Impact creates the new workspace and starts the Teaming session.
Once the Teaming workspace has been created, other users will be able to join the workspace using the name/passwords you defined. They will also need to know the address of the machine where the Teaming Workspace resides. See Join a Teaming Session for more details on this process.
As the creator of the Teaming Workspace, you must leave the Workspace open in order for other users to join it. If you close a Teaming Workspace, the users you added will be removed. If you want to re-open the Workspace as a Teaming Workspace, use the Open Workspace steps as you normally would (see Opening an Existing Workspace), selecting the Workspace, then check the option Start a Teaming Session with the Selected Workspace. You can then add users to the Workspace and begin a new Teaming session.
Join a Teaming Session
To join an existing Teaming Session, start on the main Core Impact dashboard:
-
Select Workspaces on the Navigator panel and press the Join Session
 button.
 -
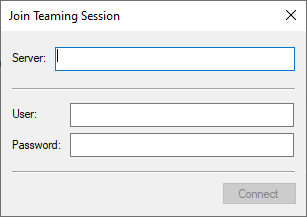
Enter the Server IP address where the existing Teaming Session is running followed by your User name and Password. These details should be provided to you by the user who created the Teaming Session.
-
Click Connect to join the session.
The Teaming Workspace should open and you can take advantage of the collaborative options in addition to all of Core Impact's testing capabilities. See Using a Teaming Session.
Using a Teaming Session
When you are collaborating on a single Workspace - using Teaming - all joined users will see all entities, executed modules and their output. In addition, there are several features that will make the collaboration more successful for you and your team:
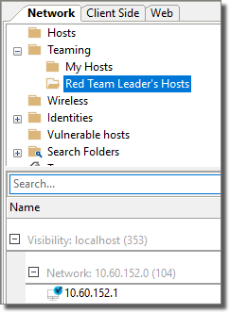
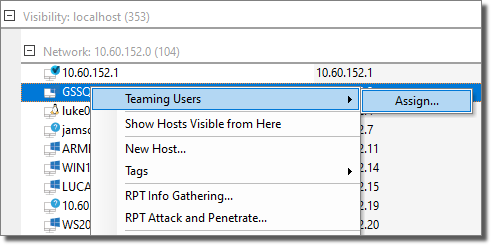
Entity Assignments. To prevent users from working on the same entities (targets), you can assign entities to specific users who have joined the session. To assign an entity to a user, right-click on the host in the entity view, select Teaming Users, and then click Assign. You will then be able to assign the entity to specific user(s).
Entity Filtering. Once you are in a teaming workspace, the entity database will automatically contain a folder called My Hosts of hosts that have been assigned to you. This will make it easier for you to locate and manage the entities for which you are responsible for testing. The screenshot below is from the view of the Teaming Workspace's leader where hosts have been assigned to the user RedTeam Member 1.