Scan Setup
Create Asset Groups
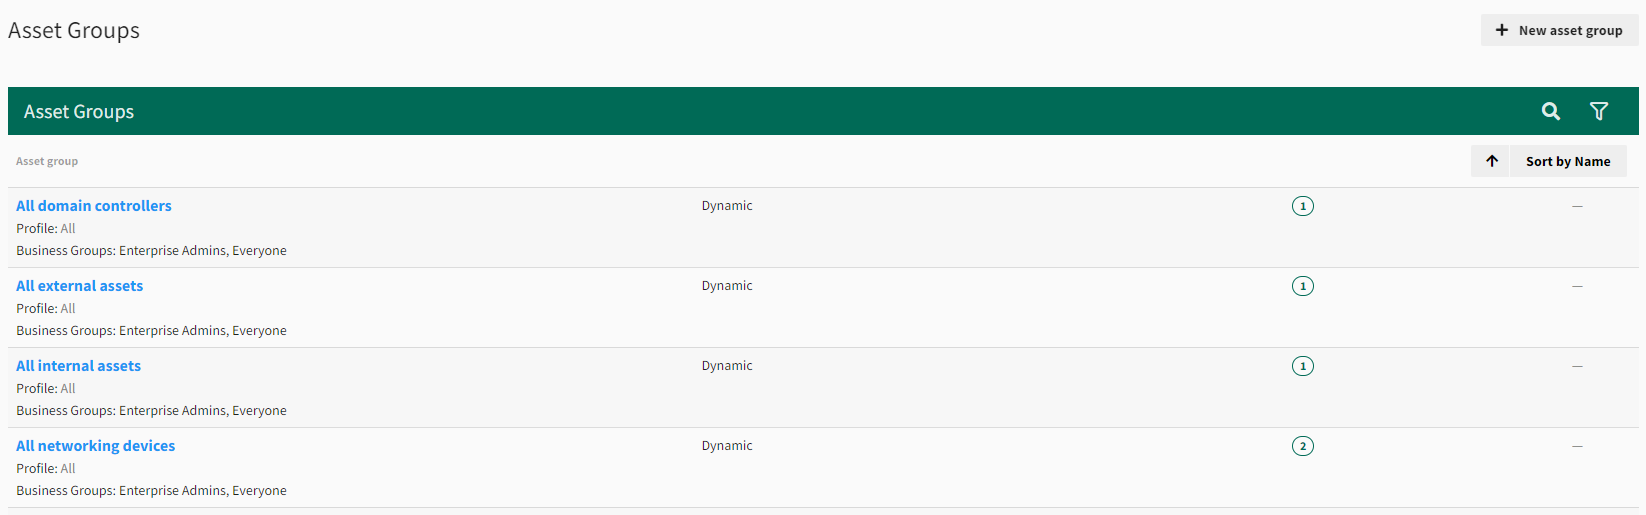
Asset groups help you organize the systems and devices in your environment (for example, domain controllers, servers, networking devices, and workstations).
Following a vulnerability scan of your environment, Fortra VM automatically recognizes what you have, and groups your assets. You also can manually create asset groups that fit how your environment is segmented.
An asset group is created by one of the following methods:
-
Standard (user generated)
-
You create with static IP addresses and hostnames (along with associated ports).
-
-
Dynamic (system and user generated)
- Fortra VM creates automatically following a vulnerability scan.
- You create with conditional filters (for example, Asset: Type + is + domain controller).
Asset groups can be used with business groups depending on how you want to segment your environment.
See related: Business Groups
-
From the navigation menu, select Scan Settings > Asset Groups.
-
Select + New asset group.
-
In the Asset group name box, enter Full Internal Network.
-
Select Save.
-
Select IPs & Ports, and then select Scanner Profiles. The client can enter their own IPs & Ports, or you can.
-
Select +Add Rule.
NOTE: If you cannot select +Add Rule after entering the IP addresses or ranges, the IP addresses or ranges may be written in a way that the system does not recognize. Re-enter the addresses in a different format.
-
From the navigation menu, select Scan Settings > Asset Groups.
-
Select + New asset group.
-
In the Asset group name box, enter Full External Network.
-
Select Save.
-
Select IPs & Ports, and then select Scanner Profiles. The client can enter their own IPs & Ports, or you can.
IMPORTANT: If your client is using an AWS RNA to scan external targets, a request must be submitted to AWS to not block port 25 to prevent the scanner from missing those assets. -
Select +Add Rule.
NOTE: If you cannot select +Add Rule after entering the IP addresses or ranges, the IP addresses or ranges may be written in a way that the system does not recognize. Re-enter the addresses in a different format.
Schedule Scans
Configure Scans for Internal Scanning
- From the navigation menu, select Scans > Scan Activity.
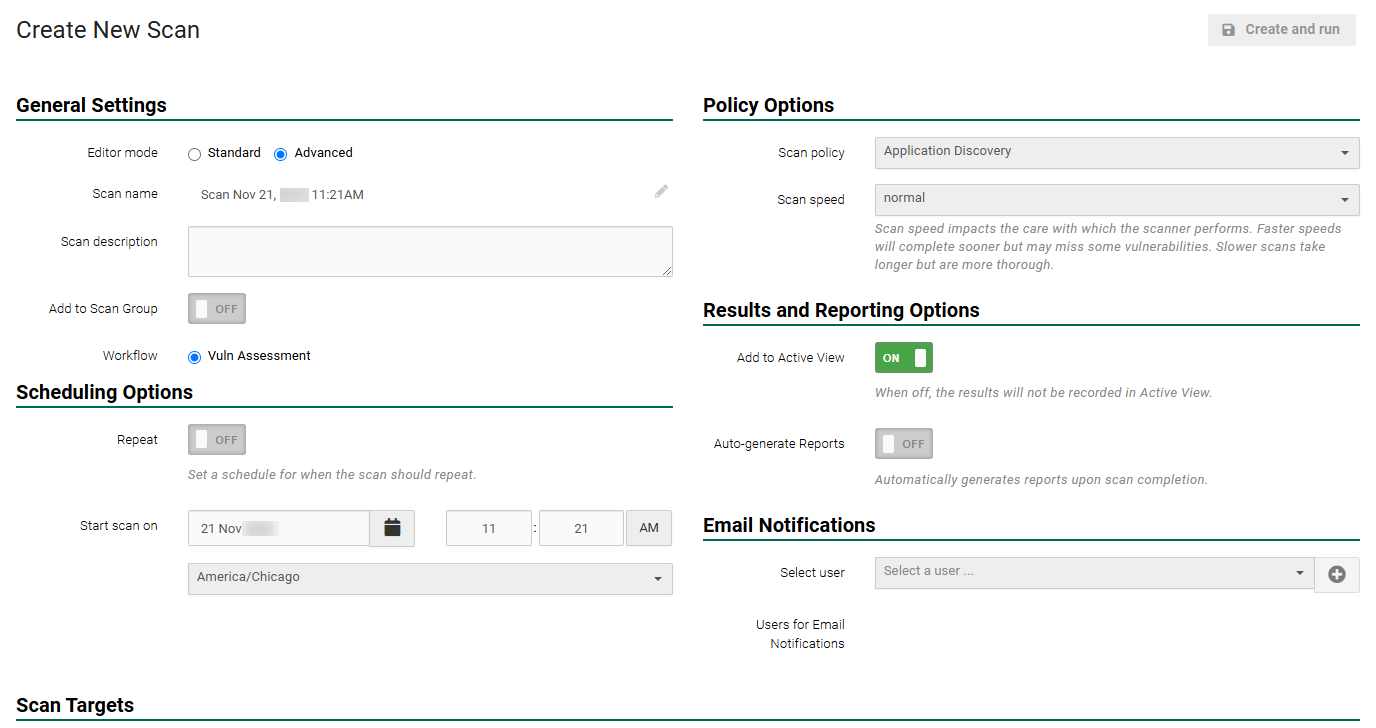
- Select +New Scan from the top right of the page.
- In Scan name, choose an appropriate scan name. An example would be Application Discovery Internal.
- In the Policy Options area under Scan Policy, select Application Discovery.
- If necessary, change the Start scan on to the appropriate settings for the client.
- Toggle Add to Active View to OFF. This ensures Active View only contains relevant results when the full vulnerability scans are performed.
- In Scan Targets select the asset group which contains the relevant internal IP addresses.
- Select Create and run.
Once the scans have completed their run, you should see them listed in the Scan Activity area. There should be a green bar to the right that reads Completed. Based on the total number of IPs being targeted, the scan times can vary. See What is the difference in scan speeds? for more information.
Configure Scans for External Scanning
There are multiple ways to start a new scan. This is just one way.
- From the navigation menu, select Scans > Scan Activity.
- Select +New Scan from the top-right of the page.
-
In Scan name, choose an appropriate scan name. An example would be Application Discovery External.
NOTE: The Repeat toggle is only applicable to Application Discovery scans, future recurring vulnerability scans should have this option ON. -
In the Policy Options area, under Scan Policy select Application Discovery.
- If necessary, change Start scan on to the appropriate settings for the client.
- Toggle Add to Active View to OFF. This ensures Active View only contains relevant results when the full vulnerability scans are performed.
- In Scan Targets select the asset group which contains the relevant internal IP addresses.
- Select Create and run.
Once both scans have completed their run, you should see them listed in the Scan Activity area. There should be a green bar to the right that reads Completed. Based on the total number of IPs being targeted, the scan times can vary. See What is the difference in scan speeds? for more information.
Under average circumstances, follow up about 24 hours after initializing scan.