Scanning
Scan Configuration
Fortra VM scanners provide comprehensive, updated information about your environment’s security posture.
This page details the following topics:
Work with Scan Policies
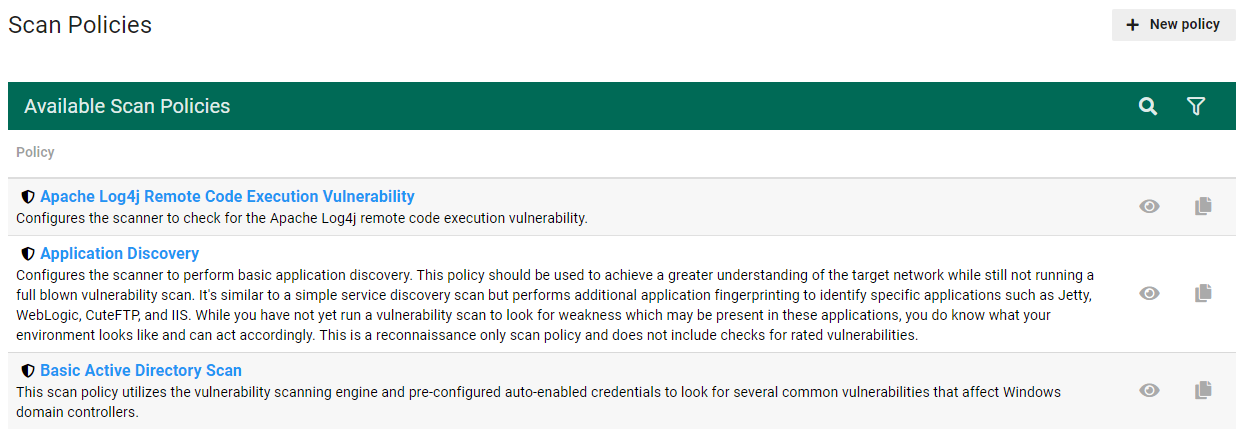
This section describes how to view, modify, and create a scan policy, which is a set of instructions for a scanner. Fortra VM has default policies for several common scanning objectives (for example, application discovery, host discovery, port scanning).
While a scanner only uses one scanner profile at a time, a profile can accommodate many scans—each of which with a different policy. A scan policy essentially tells the scanner how to process the scan by identifying scan speed, ports, scan credentials, password auditing, and vulnerabilities to include or exclude.
- From the navigation menu, select Scans > Scan Policies. The Scan Policies page appears, which describes available scan policies.
- Perform one of the following:
-
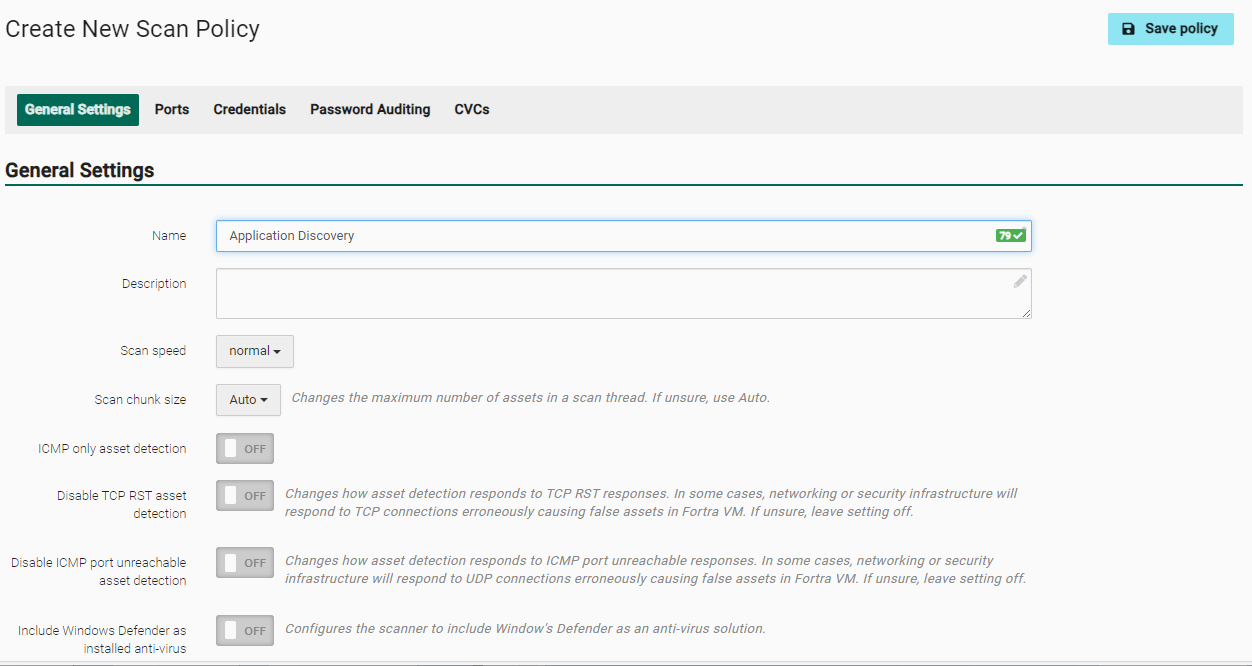
Enter or modify the scan policy settings on the following tabs and associated field (if you are deleting a scan policy, select Delete, which is available on any of the tabs).
- General Settings tab
- Name
- Description
- Scan speed - Choose your scan speed (faster speeds require more processing resources).
- Scan chunk size - Changes the number of assets in a scan thread (select Auto if you are unsure which size to use).
- ICMP only asset detection - Select ON or OFF.
- Disable TCP RST asset detection - Select ON or OFF.
- Disable ICMP port unreachable asset detection - Select ON or OFF.
- Ports tab
- Include ports or Override ports - If you choose Include ports, enter the ports the scan uses in addition to the default ports. If you choose Override ports, enter the ports to override the default ports (this option specifies the exact ports used during scans).
- Exclude ports - Enter the ports to exclude during scans (takes precedent if a port is also included).
-
To modify or a delete credentials, go to the navigation menu and select Scan Settings > Scan Credentials.
-
Patch Scanning - Select ON or OFF.
NOTE: If the Patch Scanning toggle is switched to OFF, no Microsoft update vulnerabilities will be associated with authenticated scanning. - Compliance Scanning - Select ON or OFF. This setting is available only to Fortra VM-Professional users and must be enabled by Fortra Support.
- Threat Scanning - Select ON or OFF. This setting is only available with the Active Threat Scanning service.
- Add Credential - Add a credential for scanning (requires Alias name, system Type to scan, Username, Password, and Domain name to create).
-
- Password Auditing tab
- Brute force level - Select level (default is set to low; the higher the setting, the more processing power is required). Use the following parameters to decide whether the level is low, medium or high.
- Low - This is mostly default credentials and some easily guessable credentials against specific services that don’t generally lock out accounts.
- Medium - Default and easily guessable credentials, more of a middle ground between low and high.
- High - Default and easily guessable credentials, and the scanner would use the full list of available credentials if time permitted.
- Ignored usernames - Enter the usernames you want the scanner to ignore (press ENTER after each username or use commas to separate, then press ENTER). This setting does not check user domain credentials, only default or easily guessable credentials for host configuration (for example, admin/admin).
- Custom passwords - Type the passwords you want to use in addition to what is in the NIRV built-in password library (press ENTER after each password or use commas to separate, then press ENTER). This setting does not check user domain credentials, only default or easily guessable credentials for host configuration (for example, admin/admin).
- Custom SNMP community names - Type the Simple Network Management Protocol (SNMP) community names that allow communication between a host and agent. Press ENTER after each name or use commas to separate, then press ENTER.
- CVCs tab - Allows you configure the consolidated vulnerability checks (CVCs) Fortra VM uses to test for vulnerabilities in your environment.
- Excluded CVCs by name - Select the vulnerabilities you want to exclude during scans (takes precedence if a vulnerability is also included in the policy). Select X next to a vulnerability name to remove it.
- Override CVCs by name - Select the vulnerabilities to override the scanner’s default CVCs. Select X next to a vulnerability name to remove it.
-
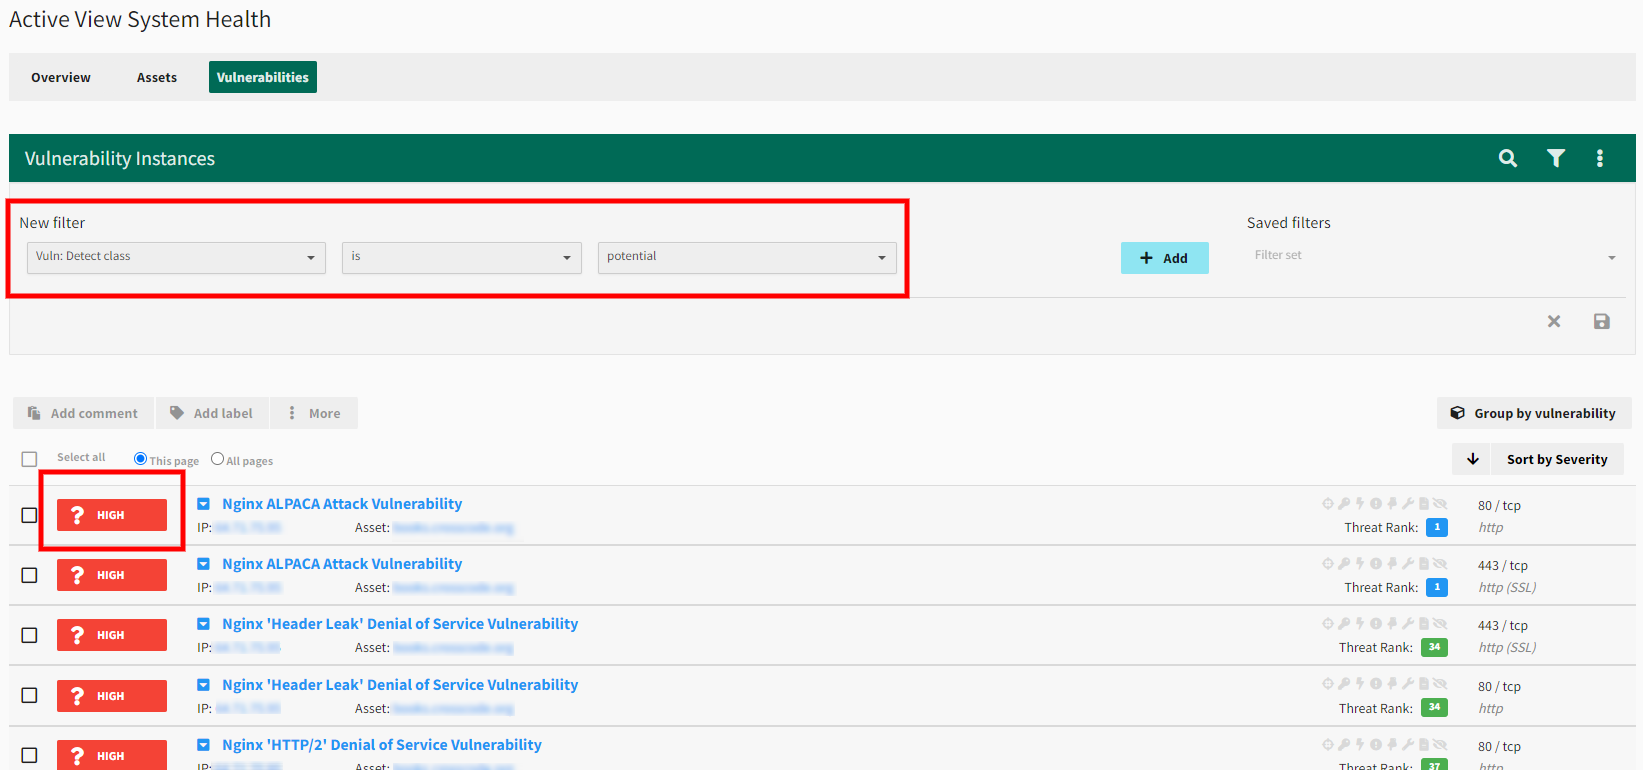
Include potential CVCs - Enable this to check for vulnerabilities that have a high likelihood of being present based on the operating system or software version detected. Potential vulnerabilities appear with a ? icon in Scan Activity and Active View. Users can filter for potential CVCs in Scan Activity and Active View by using the "Vuln: detect class" filter.
- Include superseded Microsoft patches CVCs - Enable to check for Microsoft patches that have replaced older related patches.
-
Enable aggressive mode scanning - Enable to stop the scanner from marking specific devices, such as printers and other network devices, as fragile. Fragile devices are scanned on limited ports to avoid device errors and data printing associated with scanning such devices on these ports.
IMPORTANT: Enabling this setting is not recommended for most customers. -
CVC Families - Enable or disable the CVC families for Fortra VM to use during scans. CVC Families allows you to mass disable groups of vulnerability checks based on the categories provided.
NOTE: Some vulnerability checks relay information for vulnerability checks in other families. Disabling a CVC family may result in vulnerability detection inconsistencies and reduced host matching success in Fortra VM from scan to scan.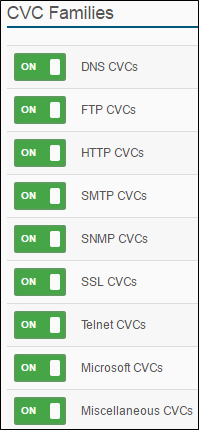
For questions about CVC families, contact Fortra Support.
-
Select Save policy.
Overall, low is the default setting and most suitable setting for most scanning. It covers all the default credentials the scanner has and is the least likely to result in account lockouts (other than brute none, of course). Medium and high are more likely to lock out accounts for services that utilize an account lockout policy. In most cases, it is best to use the medium or high brute level in one-off scans of specific assets that either don’t have a lockout policy or where the client would be prepared to deal with a lockout, should one occur.
This setting is for the NIRV password auditing engine.
Add Credentials
Authenticated scanning gives you safer and more accurate scanning of your environment.
- From the navigation menu, select Scan Settings > Scan Credentials.
-
Select Add Credential.
- In the Add Credential dialog, complete the following fields:
- Alias name - For example, sally.doe@forest.org.
- Type - Select the type of system to scan (options include Windows, Linux, MSSQL, VMware ESX, MySQL, Oracle, PostgreSQL, and SSH Key).
- Username - For example, sallydoe.
- Password Confirm - Confirm password
- Domain - For example, forest.org.
- Description - (Optional) Enter a description for these credentials.
- Select Save or Save and add another to create another set of scan credentials.
While you can add credentials when creating a scan policy, modifying and deleting credentials can only be done through the Credentials Manager. See Scanning for more information.
See Authenticated Scanning for more information.
Configure Scan Results Settings
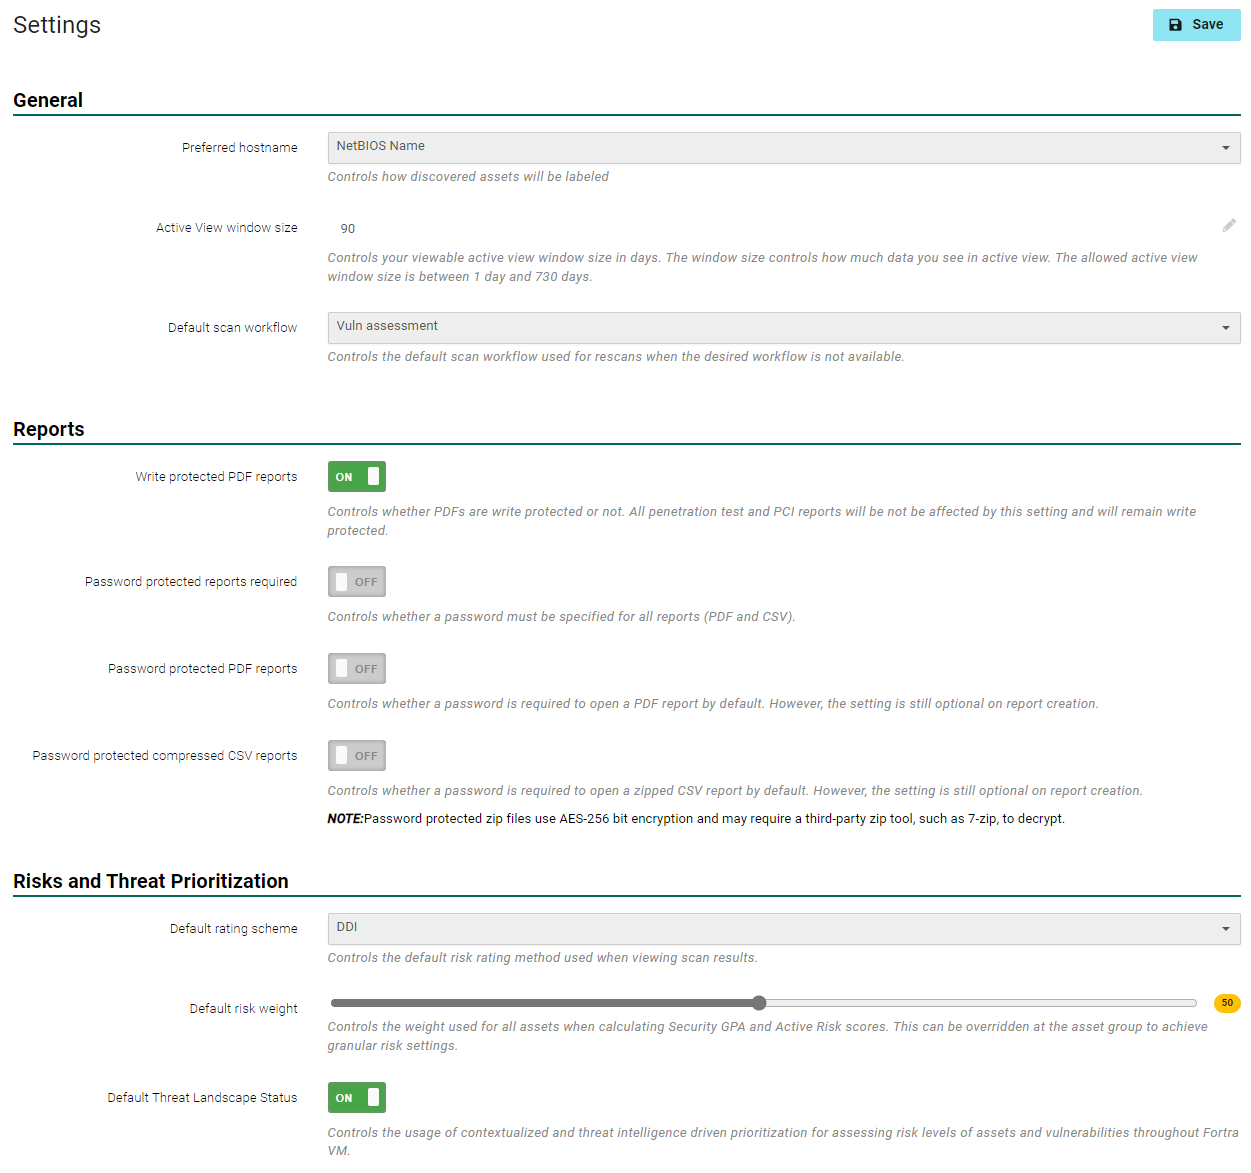
You can configure the type of scan information you receive on the Scan Results page (located by selecting Scan Settings > Settings from the ).
From here, you can configure the following settings:
-
General
-
Risks and Threat Prioritization, including default risk weight
TIP: Be aware that changing your Default risk weight can adversely affect your Security GPA. If you have questions about this feature, contact Fortra Support.You can change the default rating scheme to see scan data with different rating systems.
-
DDI – follows Fortra’s proprietary rating scheme with severities ranging from critical to trivial
-
PCI – follows pass/fail status as determined by PCI Security Standards Council
-
NVD – follows the Common Vulnerability Scoring System (CVSS) as determined by the National Vulnerability Database (NVD)
IMPORTANT: The PCI rating scheme can be used to determine which vulnerabilities would pass or fail in a PCI assessment, but a PCI-ASV scanning subscription is required to run a full PCI assessment and receive an attestation of compliance.
-
-
-
Data retention, including Scan purge days
NOTE: Scan data purged from Fortra VM cannot be restored. -
Matching and Trending, including Use static IP matching internally, Use SLA Security GPA/ SLA Security GPA days.
Frequently Asked Questions
Creating new scans begins in the Scans section on either the Scan Activity or Scheduled Scans page by selecting Create New Scan. You can also begin by selecting New > Scan in the Fortra VM site header.
On the Create New Scan page, the user can configure basic items such as the scan name, the start time and date, and which Assets will be scanned.
See more: Create and Run Scans
Time Zones can be configured by account, scanner, and scan. The account’s timezone is the default time to be used when a local timezone is not available.
The timezone set for the scanner will be used in configuring the scanner’s profile for things like blackout times. It will also impact the local time at which a scan runs depending on the timezone set for the scan. Scan definitions allow for a timezone to be set as well. This timezone is used in calculating the local time for a scan to run on the designated scans.
To understand how timezone settings are applied, consider a situation where a user in one region creates a scan that will run on a scanner in another region. If the user’s timezone is three hours ahead of the scanner, then scans scheduled to start at 5 PM for the user will start at 2:00 PM in the scanner’s timezone. Essentially, the start time can be understood as "start when it is this time for me." To clear up confusion in converting times, if you want a scan to start at a certain time in a remote location, set the timezone for the scan to that timezone. Using the example above, if you want the scan to start at 5 pm at the remote location, schedule that time and update the timezone of the scan to match that of the scanner.
A scanner profile is collection of rules that govern which assets can be scanned and when they are allowed to be scanned. The rules assigned to a scanner profile will define the IP addresses and ports that can be included as scan targets or specifically excluded.
See more: Scanner Profiles
An asset group defines a set of assets (resources) which are pre-configured for use when creating a scan. Asset groups classify resources into logical containers such as Domain Controllers or Company Website. The groups can include both internal and external assets as well as assets from different profiles.
See more: Asset Groups
A scan policy defines how targets are scanned. Several default policies are provided, and custom ones can be configured too. Policies control aspects of the scan, such as speed, port rules, authentication, and specific groups of vulnerabilities (CVCs) to scan for.
See more: Work with Scan Policies
The most direct way of excluding a particular asset from being scanned is to configure an exclusion in the scanner profiles for scanners that can access the asset.
From the navigation menu, select System > Scanner Management and then select the Scanner Profiles tab.
Select the profile to modify; and on its details page, select the IPs & Ports tab and create a rule to Exclude the given asset. This removes the asset from scanning under any circumstance.
Exclusion rules can also be added to asset groups and even for a specific scan. Note that these exclusions are limited to the scans that use the specific asset group or ad hoc rule.
Scanning by DNS hostname lets you specify targets using domain name (for example, www.mysite.com) instead of IP address (for example, 192.168.2.1).
This is helpful in externally hosted environments such as Amazon Web Services (AWS) or Microsoft Azure, in which IP addresses may be unknown prior to scanning. In these situations, you can specify a hostname to scan and Fortra VM automatically resolves the named asset and scans it no matter where it is located (provided that type of scanning has been allowed).
These assets are added to your scan results and Active View (if applicable) as distinct and must be managed individually, even if the IP address is the same. This means, for instance, if you have two hostnames (for example, www.one.com and www.two.com) that resolve to 10.10.10.10, both entries show up in your scan results and Active View.
Scanning for a specific vulnerability is done using a custom scan policy. In the set up of the policy, select the CVCs tab and enter the name of the specific vulnerability in the Override CVCs by name field. Finally, create a new scan and select your custom policy before running.
See more: Work with Scan Policies
The following table provides the approximate packets per second (PPS) sent by the scanner at the various speed options in scan configuration:
| Speed | PPS | Maximum concurrent CVCs per host | Maximum concurrent CVCs |
|---|---|---|---|
| Very Slow | 200 | 1 | 20 |
| Slow | 300 | 3 | 30 |
| Normal (default) | 450 | 6 | 75 |
| Quick | 600 | 9 | 115 |
| Fast | 800 | 13 | 165 |
| Very Fast | 1500 | 15 | 220 |
When the scanner receives a range of IPs to scan, it will break them up into one or more chunks, depending on the configured chunk size and number of IPs to scan. The scanner will then run through all phases of the scan on each chunk of IPs, one chunk at a time. The default setting is Auto, which allows the scanner to determine the most efficient chunk size to use for the scan.
However, there may be cases where network bandwidth limitations may be a special consideration, and this setting can be used to throttle scanner-related network traffic down even further than the scan speed setting alone. Reducing the chunk size can result in an increase in the overall amount of time required to complete the scan.
By default, the scanner sends ICMP along with TCP/UDP probes, to several commonly accessible ports, to determine if there is a live asset at an IP address. By using TCP/UDP probes in addition to ICMP, the scanner is able to detect a live asset that may have ICMP disabled. However, in some cases, there may be a device on the network that responds to the TCP probes for IP addresses that do not have live assets which results in the detection of ghost assets. To prevent the detection of these ghost assets, ICMP-only asset detection can be toggled ON to limit the scanner to only using ICMP for asset detection.
A RNA supports scanning a maximum of 15,000 live assets per scan, for performance optimization. This number is an approximation because the size of the results data is the basis for the limitation rather than the number of live assets. The maximum number of live assets the RNA can successfully scan may differ slightly from network to network. The limit operates per RNA, and one or more RNAs may be associated with a scan. The scan results in Fortra VM could contain more than 15,000 assets when multiple RNAs are associated to a scan.
If the results from an RNA exceed this limit, the scan block will error out in Fortra VM with the message "Scan Error: Scan results were too large to transfer back to Fortra VM." If a scan block errors with this message, additional RNAs may be required to scan your entire network in a single Fortra VM scan. Alternatively, multiple scans of smaller ranges can be used to stay under the limit.
