Fortra PCI Service
Schedule quarterly external scans required for Payment Card Industry (PCI) compliance within Fortra VM. Scan results and reports can be scheduled and reviewed in the platform, and a Fortra PCI analyst will work with you, to validate compliance to auditors and resolve necessary vulnerabilities.
PCI scanning
The following is the recommended process for maintaining PCI compliance through Fortra vulnerability management.
-
Schedule a PCI scan.
Two workflow options:
-
Scan Groups (recommended)
-
-
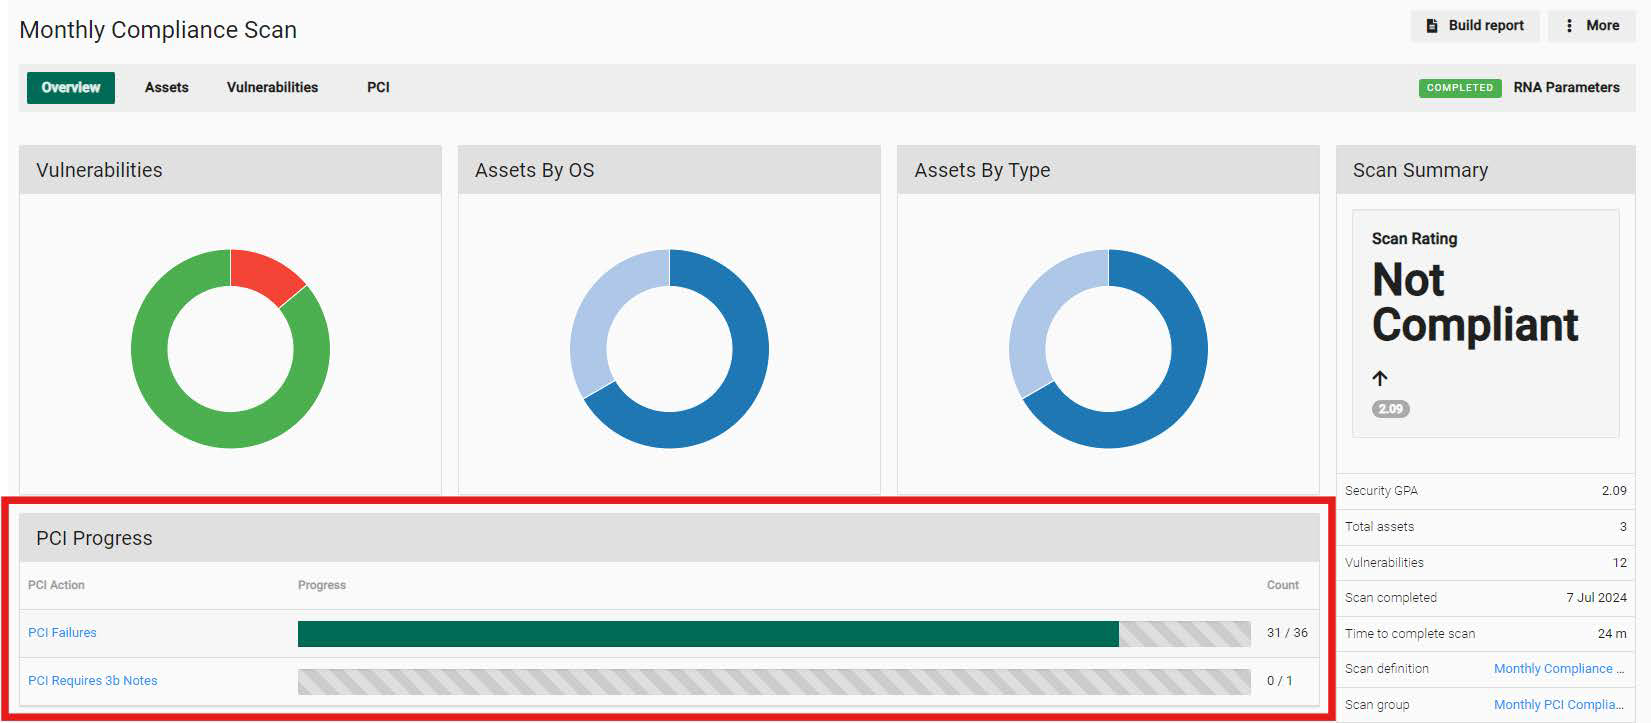
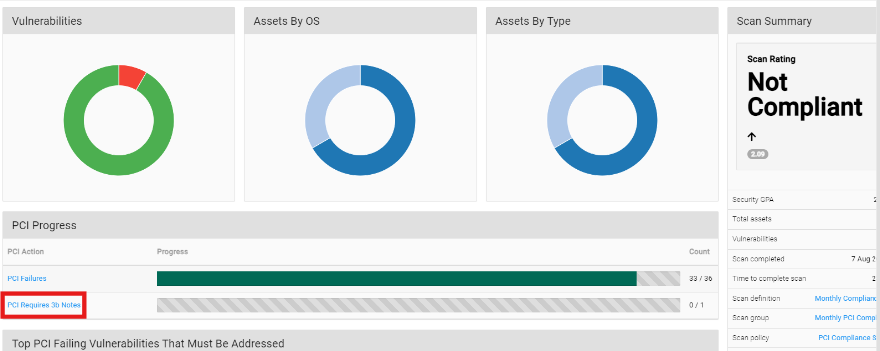
Review scan results for potential compliance issues. The PCI progress bars in the scan overview provides a high-level summary of items needing attention.
-
If compliance is not reflected in your PCI scan results:
-
Resolve PCI relevant vulnerabilities.
-
Submit a PCI Dispute for any vulnerabilities you believe inaccurately reflect your PCI status, by working with your Fortra PCI Analyst.
-
-
Once all vulnerabilities have been addressed re-run your PCI Scan.
-
Requisition a PCI Report and submit PCI compliance documentation.
PCI administration
Users can only perform PCI tasks in Fortra VM with the necessary permissions or role assignment. Permissions can be modified by Enterprise Admins in the Users & Roles section under the System menu. See Users and Roles for more details.
PCI specific roles and permissions
System Roles
PCI User is an extended user role that includes:
-
Scan policy administration including Scan Groups
-
Report administration (including PCI reports)
-
PCI ASV dispute administration
User Permissions
Toggle the following permission to ON to activate the associated Fortra VM tasks in a user's profile:
-
PCI ASV dispute administration: This permission set provides the ability to dispute PCI vulnerabilities.
PCI scan
Run a PCI scan using scan groups
PCI scans can be scheduled by utilizing a scan group. Scan groups utilize schedules to automatically run selected scans and simple report creation by pre-selecting the scans originating from the scan group. This prevents having to search for individual scans listed in the report creation screen. This scanning system is beneficial for any organization running a large amount of scans, or recurring scans with similar names. Fortra VM also allows for notifications pertaining to scan group activity to easily track PCI scans and report activity, when setup through a scan group.
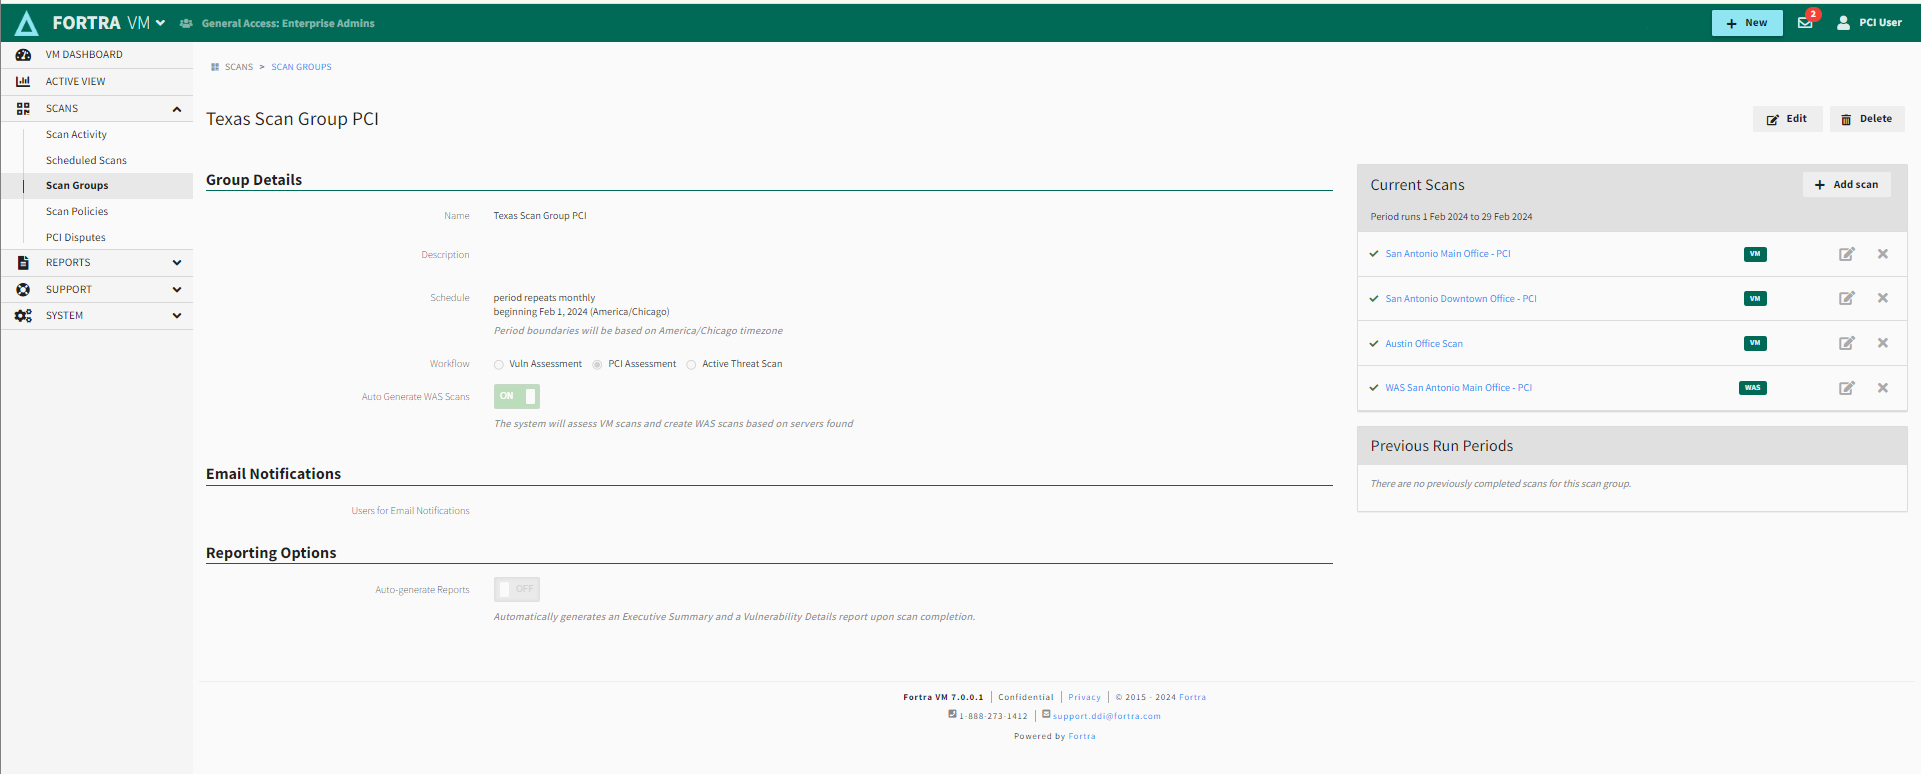
Setup a scan group
-
From the Scan Groups page, select + New scan group.
-
Create a new scan group with the work-flow designation of PCI Assessment.
-
Complete the Name, Schedule, Email Notifications, and Reporting Options.
-
Complete the PCI Report Details and PCI Scope Details. This is required for automatic generation of the PCI-ASV attestation of compliance report. To generate PCI reports manually, see PCI compliance report .
IMPORTANT: If you would like WAS scans to be automatically generated from the VM scan targets, toggle Auto-Generate WAS Scans to ON.
-
-
Save the scan group.
-
Select + Add scan to attach individual scans to the scan group. This will allow all selected scans to run concurrently with the prescribed schedule for your scan group.
NOTE: If auto-generation of WAS scans is toggled to OFF, it is necessary to add both WAS and VM scans to the same scan group for PCI compliance scanning. Use the drop-down menu in the site header to toggle between WAS and VM interfaces and add each scan to the scan group you created.
-
After adding your scans to the scan group, return to the group and fill out the PCI Scope Details to auto-generate compliance reports. Alternatively, after the scans are complete, navigate to Reports > History to start creating your PCI compliance report manually.
Run a PCI scan using the multi-scan method
We recommend you use a scan group for PCI-ASV scans, but PCI compliance reports can be generated for scans that were run independently. Below is a description of how to set up PCI scans without use of a scan group. After completion, the multi-scan method for reporting can be used to generate reports.
Setup a multi-scan
Fortra VM
-
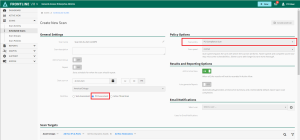
From the Scan Activity page, select New scan and fill in the scan details.
-
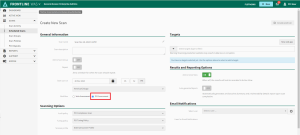
Select PCI Assessment from the Workflow options and use the Scan Targets fields to add a scope to your scan (e.g. host IP addresses, ports, asset groups).
-
Select Create and run when finished to start or schedule the scan.
-
Use the side menu to return to Scan Activity.
-
Once the scan is complete you can select it to access PCI results.

WAS
-
From the Scan Activity page, select New scan and fill in the scan details.
-
Select PCI Assessment from the Workflow options and use the Scan Targets fields to add a scope to your scan with the required web app(s).
-
Select Create and run when finished to start or schedule the scan.
-
Use the side menu to return to Scan Activity.
-
Once the scan is complete you can select it to access PCI results.

Notifications
Fortra VM has preset notifications to alert you to changes in your PCI workflow. If you select your username from the header bar you can select My Profile to find the Notifications tab to make customized selections.
PCI Dispute notifications
-
Disputed vulnerability digest
Sends a daily email with all changes happened to workflow (e.g.,changes, comments, disputes, approvals, and rejections). Default is set to OFF, select the toggle to enable this notification by switching it to the ON position.
-
Disputed vulnerability status
An individual alert email sent for any change to workflow made by analyst. The default is set to ON, but can be turned OFF by selecting the toggle to disable the notification.
PCI Scan Results
Overview (VM) and Details (WAS)
View items needing attention for compliance under PCI Progress. Select PCI Failures and PCI Requires 3b Notes to view and take action on relevant items.
Vulnerabilities
From the scan results, select PCI Failures and PCI Requires 3b Notes (as described above) or navigate to the PCI tab to enter disputes and 3b notes.
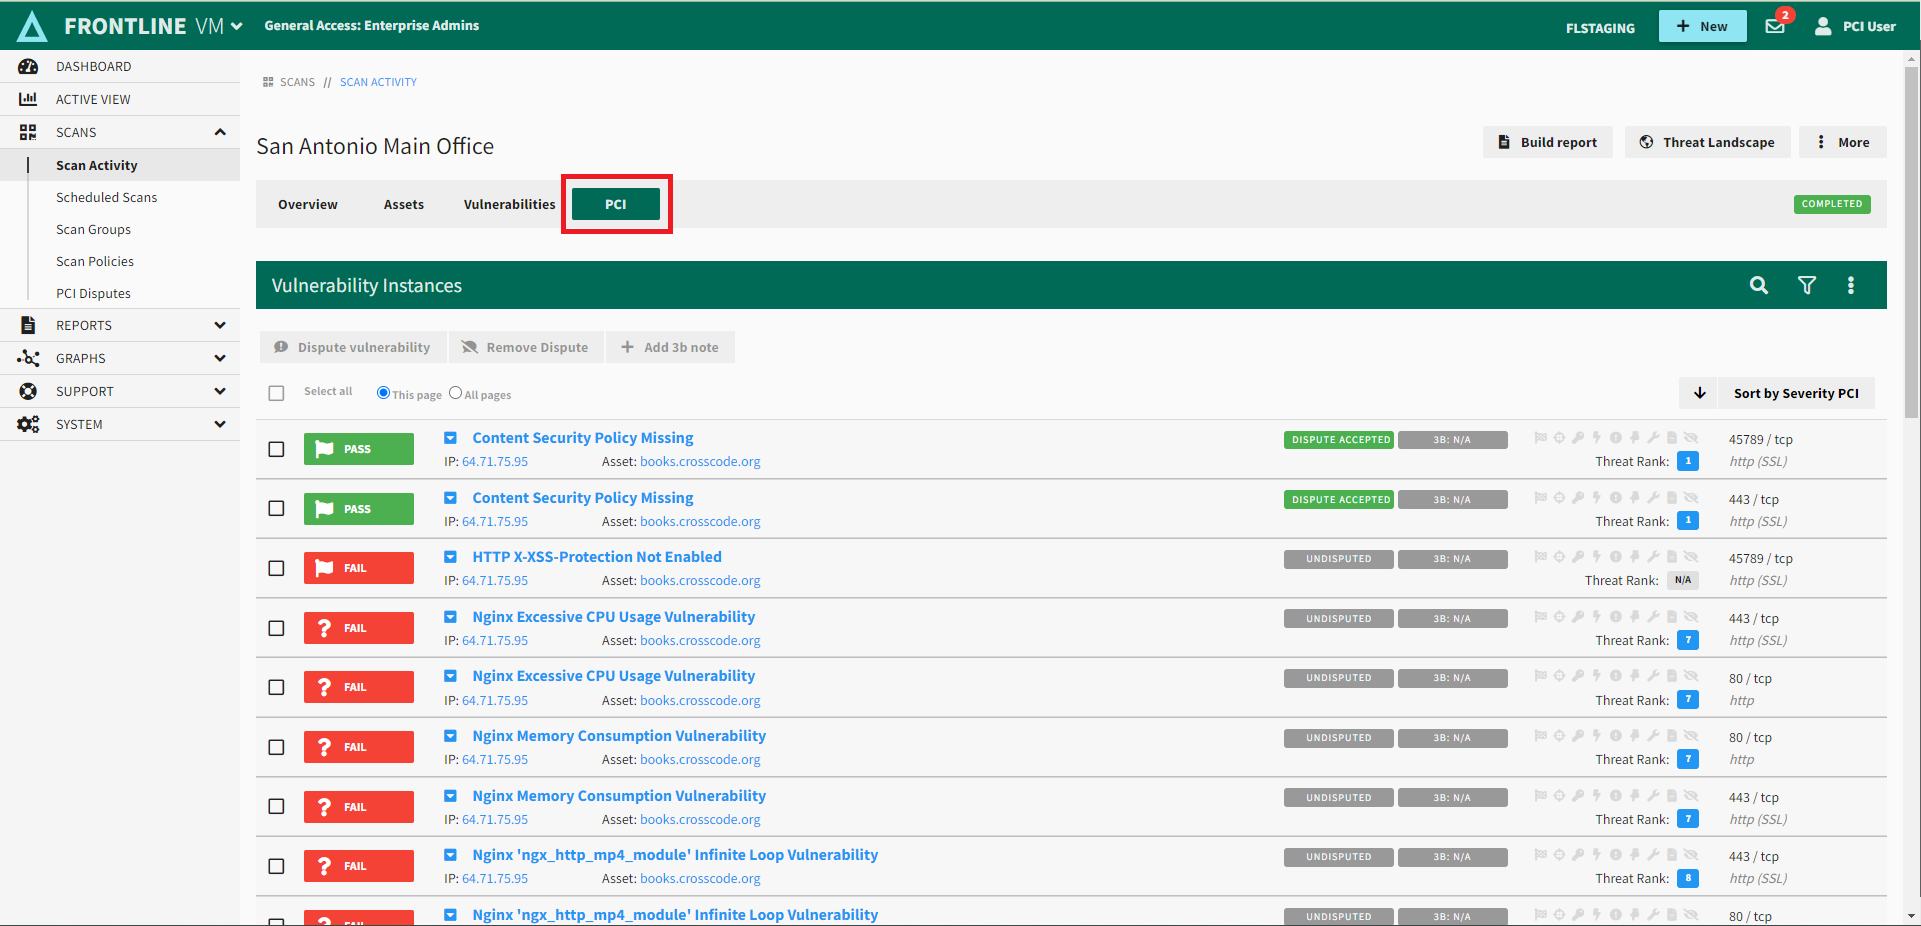
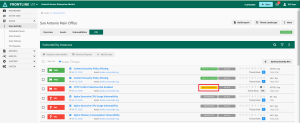
All vulnerability results will be listed and designated with a green PASS or red FAIL badge. All failing vulnerabilities must be resolved and rescanned to show a PASS status for compliance.
-
Right-clicking on each vulnerability provides options for filtering and addressing vulnerability disputes.
-
Selecting the vulnerability expands it to show comments and notes from your PCI Analyst.
Use the quick filter options under the More menu to filter for vulnerabilities that are failing or require additional documentation (3b notes).
Run your PCI scan again, once all failed vulnerabilities have been addressed, to fulfill PCI requirements for a compliant result.
Dispute failed vulnerabilities
The PCI scan may show vulnerability findings you would like to dispute. All requested vulnerability disputes are required to be documented as Exceptions, False Positives, or Compensating Controls.
-
Exception
There are four exceptions provided to the NVD scoring guidance described in Section 6.3.2, Component Compliance Determination, and these are the only exceptions that qualify to supersede CVSS scores. Examples of qualifying exceptions include incorrect or inconclusive findings due to scan interference, or if the CVSS base score is disputed. Supporting evidence must be submitted to prove there is not a risk to Cardholder Data environment.
See " Appendx B: ASV Scan Report Summary" of the ASV Program Guide for further details.
-
Compensating control
If a vulnerability cannot be remediated due to business or technical constraints, but the risk can be mitigated through other measures, a compensating control may be considered.
See "7.8 Addressing Vulnerabilities with Compensating Controls" of the ASV Program Guide for further details.
-
False positive
If a reported vulnerability does not apply to the host with sufficient evidence, a dispute may be submitted for the PCI analyst to review and confirm the occurrence of a false positive.
See "7.7 Managing False Positives and Other Disputes" of the ASV Program Guide for examples of written evidence which can be submitted to dispute a false positive.
In these situations, you can file a dispute in the scan results. The process for disputing VM and WAS vulnerabilities in Fortra VM are the same.
Fortra VM and WAS vulnerability dispute process
-
Open the scan group or the Scan Activity page, and then select the PCI scan in question to open it. Once the scan results open, select PCI Failures under PCI Progress. The PCI tab loads with the relevant vulnerabilities.
-
Address each vulnerability listed as a FAIL.
If a vulnerability listed will not be remediated, an explanation must be filed with your Fortra PCI analyst.
-
Select the checkbox for a failing vulnerability and select Dispute vulnerability at the top of the scan results to open the Dispute Vulnerability form.
-
Complete the dispute by selecting the appropriate type of dispute and use the comment field to provide an explanation of the dispute for the Fortra PCI analyst to review.
After all fields are complete, select Dispute to submit the form.
-
The vulnerability will be flagged with a yellow DISPUTE PENDING icon while it is under review.
-
As the analyst completes their review comments and questions will be posted to the vulnerability which you can respond to you and upload supporting files as needed. The analyst can approve the dispute and move the vulnerability from FAIL to PASS.
-
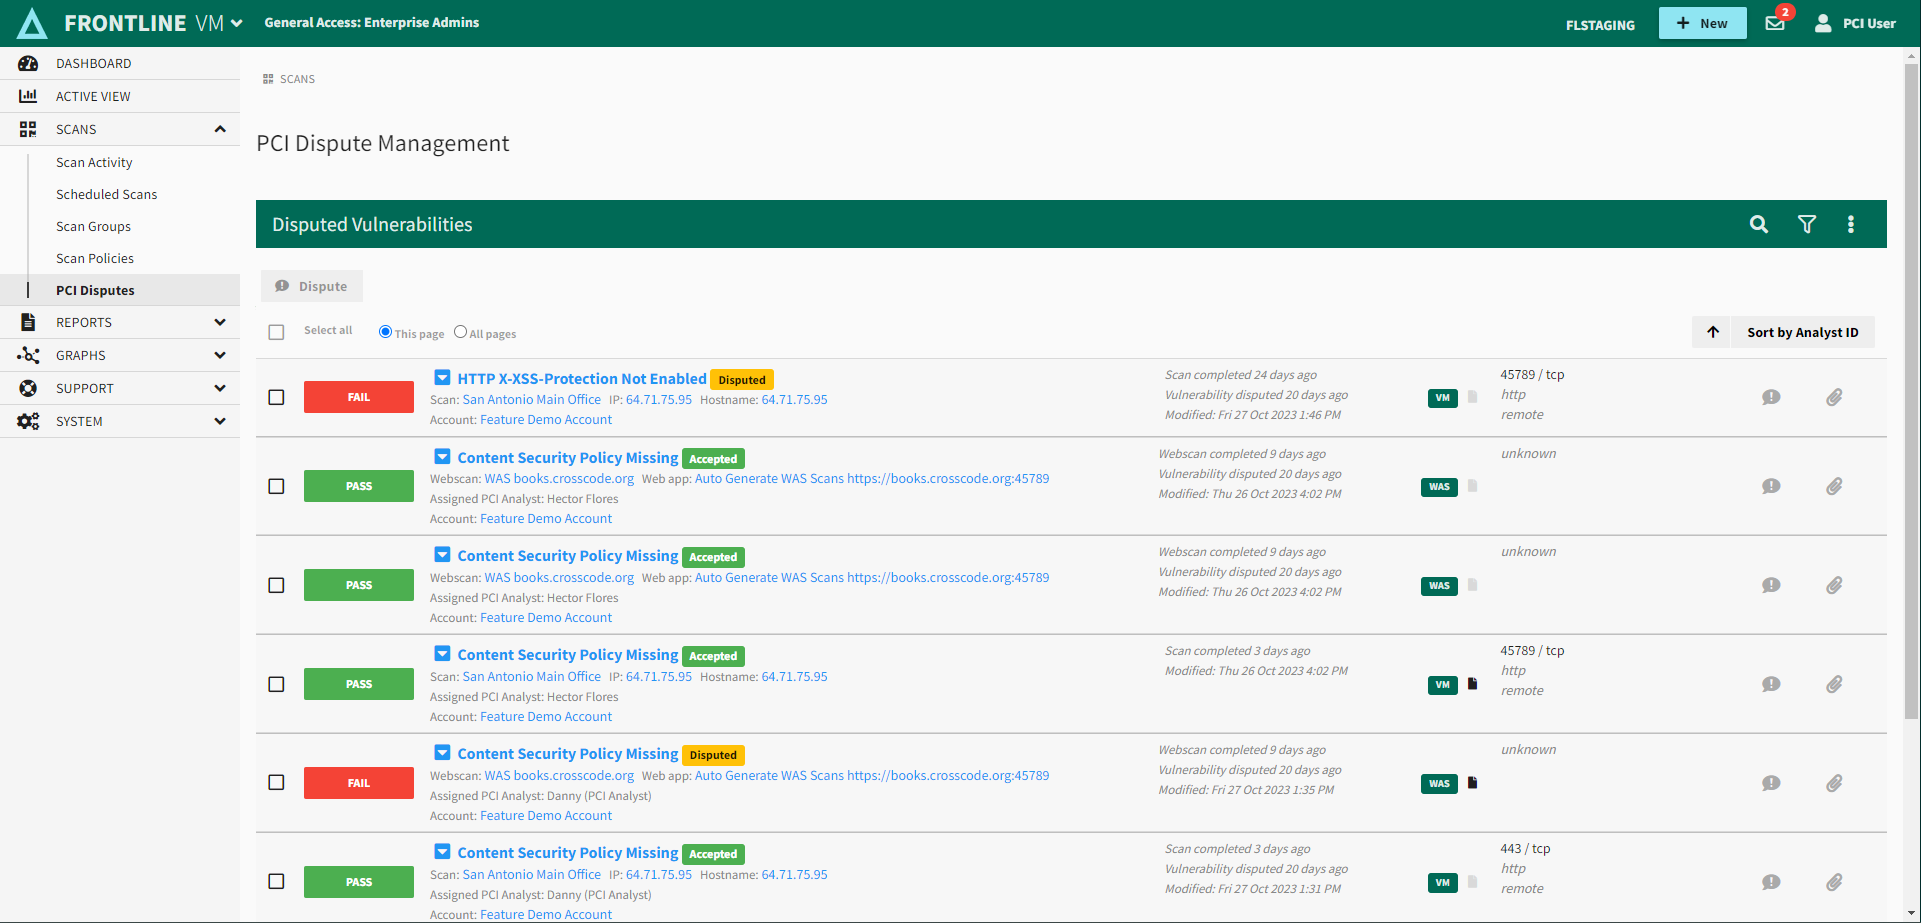
Review dispute status in the PCI Disputes section of the Scans menu.
The PCI Disputes Management page will show a consolidation of all disputed vulnerabilities from both Fortra VM and WAS, no matter which product is currently engaged in Fortra VM.
Select each vulnerability to see analyst inquiries and add additional information to the dispute.
Web app scan results - PCI tab


The analyst may reject a dispute if it does not sufficiently fulfill the requirements. If rejected, the vulnerability will retain FAIL status. You may resubmit the dispute with additional information for the analyst.
Manage Disputes
As the Fortra PCI analyst conducts their review, there will be comments and questions posted to the vulnerability that may require a response or supporting files. A consolidated view is available to manage all disputed PCI vulnerabilities from both Fortra VM and WAS scans.
-
From the Scans menu, select PCI Disputes.
-
Use the filters from the drop-down menu to specify your preference to include or exclude resolved disputes in the list.

-
Select
 to expand the disputed vulnerability and see comments or inquiries from the Fortra PCI analyst.
-
Enter your comments in the text box.
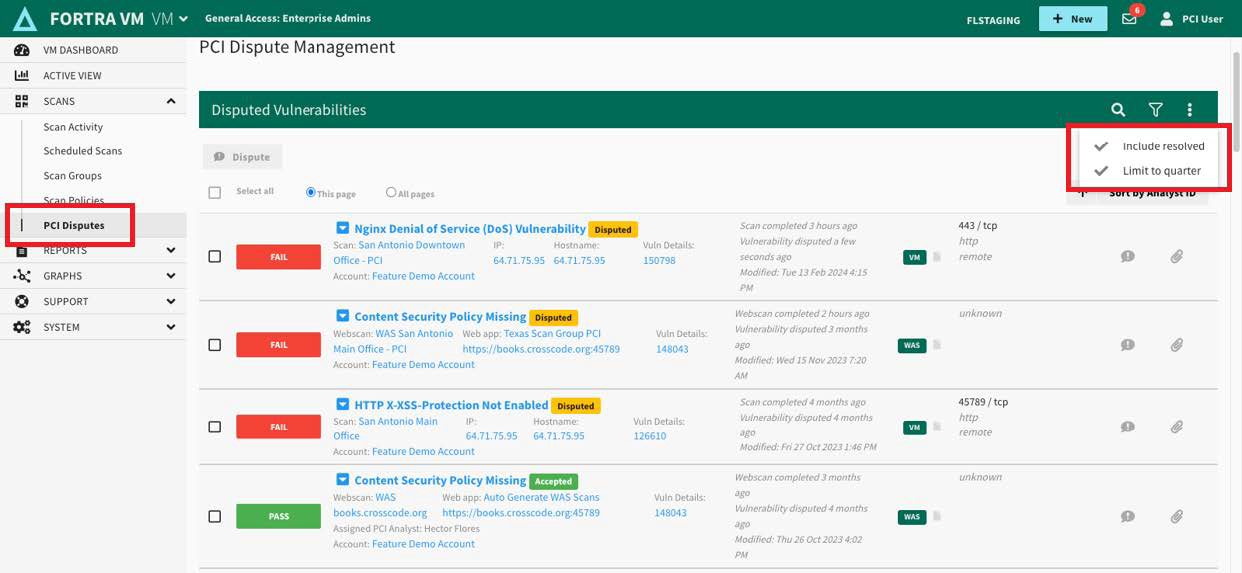
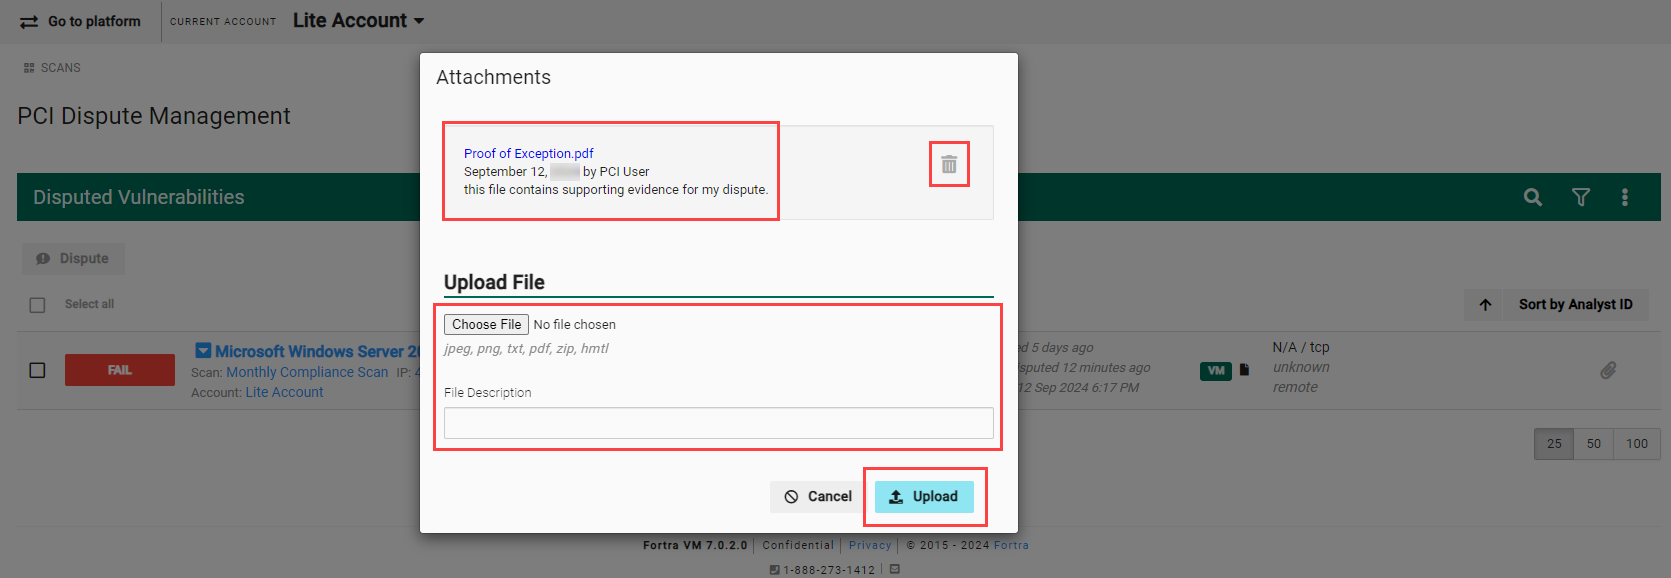
Upload Files for PCI Disputes
The Fortra PCI analyst may request that you provide supporting evidence or documentation for a disputed vulnerability.
-
From the Scans menu, select PCI Disputes.
-
Use the search and filter options to find specific disputed vulnerabilities in the list.
-
Select the
 paper clip icon for a disputed vulnerability.
 -
View or remove existing files that were previously uploaded.
-
Select the file to upload and enter a description.

-
Select Upload.
Redispute Vulnerabilities
Accepted disputes will expire at the end of the current quarter or 90 days from the scan, whichever is less. If the same vulnerability is detected during PCI scans in the next quarter, there is an option to submit the same information from the expired dispute.
-
On the Scan Activity page, select the PCI tab.
-
Expired disputes will appear with a yellow "DISPUTE EXPIRED" flag next to the vulnerability's name.
-
Select the vulnerability’s checkbox, and then select Dispute vulnerability to open the Dispute Vulnerability form.
-
Select True for the "Redispute using last submission" option.
-
Select Dispute.
Addition of a special note (3b)
These are notes designated as "Special Note to Scan Customer" and are required to be disclosed when the presence of certain software or configurations are detected that may pose a risk to the your environment, rather than an exploitable vulnerability.
This special note (3b) must include:
-
Evidence of the removal of the caustic software.
OR
-
A declaration of the need of the software for business.
If the software is required for business operations, include information stating the business need for the software, evidence of software's implementation of security controls, and supporting actions to secure software with details of controls.
Your PCI analyst will validate the relevance of any special note declaration, before a passing scan report can be issued.
To submit a special note (3b):
-
Open Scan Activity, and then select the PCI scan in question to open it. Once the scan results open, select the PCI tab.
-
Select the vulnerability from the list that constitutes a "Special Notes to Scan Customer" (3b).
-
Use the right-click menu or select Dispute to add the required details.
Notifications
Fortra VM has preset notifications to alert you to changes in your PCI work-flow. If you select your user name from the header bar you can select My Profile to find the Notifications tab to make customized selections.
Manage PCI dispute notifications
-
Disputed vulnerability digest
Sends a daily email with all changes happened to a workflow (that is, changes, comments, disputes, approvals, and rejections). To enable this notification, toggle the switch to ON (default is OFF).
-
Disputed vulnerability status
An individual alert email sent for any change to a workflow made by analyst. This notification is set to ON by default. To disable this notification, toggle the switch to OFF.
PCI compliance report
We recommend you fill out the PCI Report Details and PCI Scope Details in the scan group for easier reporting.
To create a PCI report, select + New from the header and then select Report.
-
In the Report type options, select Scan Group if a scan group was used and select Multi-scan if separate scans were created.
-
For Scan Group reports, use the Scan Group source drop-down menu to select the desired scan and run period.
For multi-scan reports, designate the appropriate year and quarter, then add each relevant scan from the Scan(s) Source drop-down menu. You can add scans from WAS and VM to the same report. -
From the Report template options, select the desired report such as the PCI ASV Scan Attestation of Compliance or PCI Compliance Report (bundle).
-
Select any other desired options, and then select Run report.
A box will display for Additional PCI Details Required. If the PCI Contact Details were filled out in the scan group, this information will populate automatically.
-
Fill out the Contact information fields.
-
See scan Scope.
Select the checkbox to attest to the validity of the scope (required). -
Out-of-Scope items can be declared in the designated field.
-
Declare Load balancers, if employed.
-
For best performance, leave Include Passing Vulnerabilities unselected.
-
Unless otherwise specified by the scan customer, the acquirer, or Participating Payment Brand, vulnerabilities that do not impact PCI DSS compliance (for example, low severity vulnerabilities) will be omitted from the ASV Scan Report Summary (Part 3a). Including all vulnerabilities may increase the size of the report significantly.
-
-
Select OK to run the report.
Complete PCI documentation
After you address all PCI vulnerabilities, you need to prepare required PCI compliance documentation and submit it.
To complete final PCI compliance documentation:
-
Prepare final PCI Compliance scan reports.
-
Prepare Self-Assessment Questionnaire (SAQ) and Attestation of Compliance.
-
Submit final PCI scan reports, SAQ, and Attestation of Compliance.
Prepare final PCI scan reports
When your PCI scan results are compliant, you can generate your final reports for submission to an acquirer. The official PCI Compliance report must be submitted through the PCI workflow and is labeled with stamp.