Reports
Create a Report
This section describes the ways you can create reports in Fortra VM. Reports allow users to sort and display information on various datasets for use in audit, compliance, export, and Fortra VM use.
Reports Generation
Generate reports from these access points in Fortra VM:
- Active View
- Scan Activity
- Reports
To create a PCI-ASV compliance report, see Fortra PCI Service.
-
From the navigation menu, select Active View. The Overview tab opens.
TIP: You can also build reports from the Assets and the Vulnerabilities tabs. - Select Build Report.
- In the Build Report dialog, select the desired parameters for the report:
Report template - Select the type of report you need.
TIP: On the navigation menu, select Report > Report template for descriptions of reports available to you.Business group - Select the Business Group users to receive the report.
- Report Name (Optional) - Edit the report name. A default report name is displayed indicating report access point and the selected template.
-
Toggle switches are available on the right to turn the following additional options ON or OFF.
NOTE: Some options are enabled by default or unavailable depending on the selected report template.- Use filters
- Use selected assets
- Include hidden
- Include info vulns
- Include acceptable risk vulns
- Exclude SLA vulns
-
Select Advanced Options to display the following options:
NOTE: Some options are enabled by default or are unavailable depending on selections.- Show TOC
- Asset: Services
- Web App sitemap
- Purpose
- Vuln dictionary appendix
- Include acceptable risk vulns
- Include fixed vulns
- Exclude SLA vulns
-
Select Save.
- From the navigation menu, select Scan Activity.
- On the Scan Activity page, select a scan.
- Select the Build Report icon (available in all tabs including Overview, Assets, and Vulnerabilities).
- In the Build Report dialog, select the desired parameters for the report:
Report template - Select the type of report you need.
- Business group - Select the business group users that will receive the report.
Report Name (Optional) - You can edit the report's name, if desired. The default report name is comprised of the selected scan and the selected template.
-
Toggle switches are available on the right to turn the following additional options ON or OFF.
NOTE: Some options are enabled by default or unavailable depending on the selected report template.- Use filters
- Use selected assets
- Include hidden
- Include info vulns
- Include acceptable risk vulns
- Include fixed vulns
- Exclude SLA vulns
-
Select Advanced Options to display the following options:
NOTE: Some options are enabled by default or are unavailable depending on selections.-
Show TOC
-
Asset: Services
-
Web App sitemap
-
Purpose
-
Scan settings appendix
-
Options and filters appendix
-
Ratings appendix
-
Vuln dictionary appendix
-
Notes
-
-
Select Save.
-
From the navigation menu, select Reports > History.
-
Select + New report.
-
In the Basic Details section, customize the following options:
-
Report type - Select Active View, Single scan, Scan group, or Audit.
TIP: Audit reports do not use Active View or scan data. -
Report template - Select the type of report you need (available options change based on the selected Report).
TIP: On the navigation menu, select Report > Report templates for descriptions of reports available to you. -
Business group - Select the business group users that will receive the report.
-
Report Name (Optional) - You can edit the report's name, if desired. The default report name is comprised of the report type and template.
-
-
Toggle switches are available on the right to turn the following additional options ON or OFF.
NOTE: Some options are enabled by default or unavailable depending on the selected report template.-
Include hidden
-
Include info vulns
-
Include acceptable risk vulns
-
Include fixed vulns
-
Exclude SLA vulns
-
-
In Advanced Options, customize your report with the following options:
NOTE: Some options are enabled by default or are unavailable depending on selections.-
Show TOC
-
Asset: Services
-
Web App sitemap
-
Purpose
-
Notes
-
Scan settings appendix
-
Options and filters appendix
-
Ratings appendix
-
Vuln dictionary appendix
-
-
In the Report Filters panel, you can use filters with logic statements for additional customization.
-
Choose a filter criteria (for example, Asset: Type).
-
Choose a comparison operator.
-
Enter or select a value for the criteria.
-
Select the Add button
 next to your filter to add it to your scan (select the Delete button
  to remove a filter).
 -
Add as many filters as needed.
-
Select Run Report.
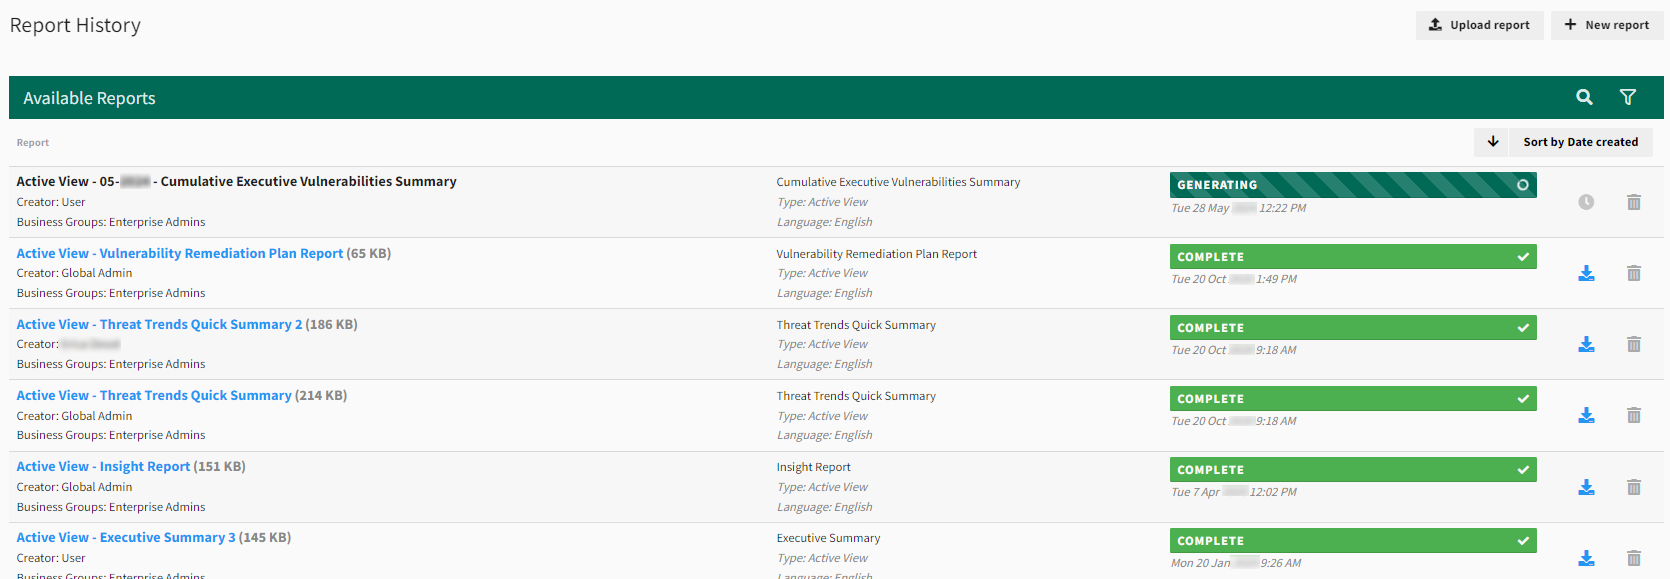
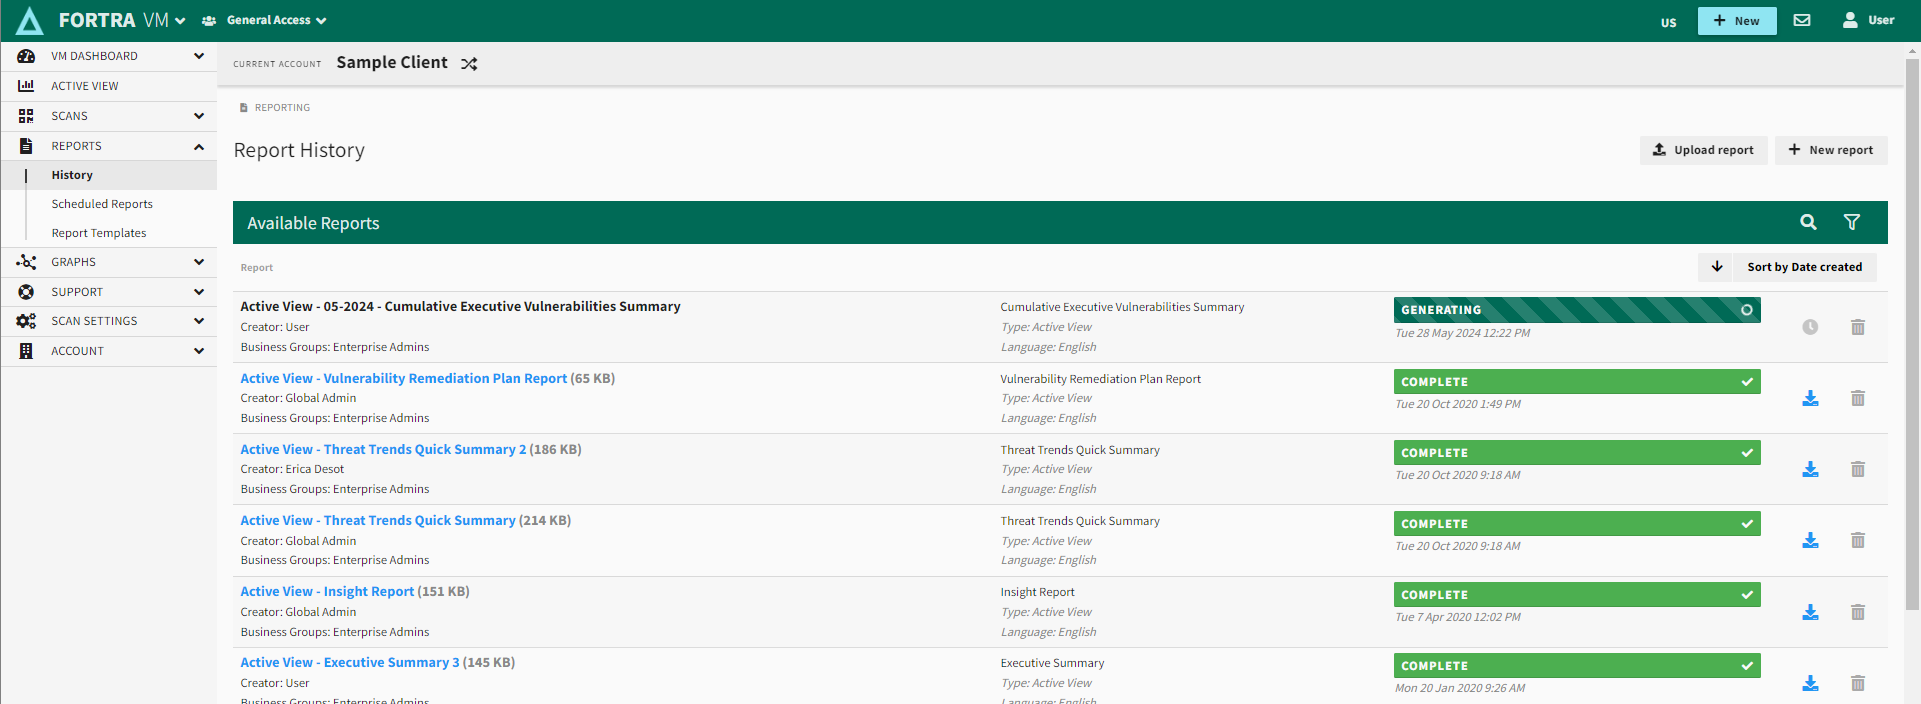
Access Reports
From the navigation menu, select Reports > History.
Reports are displayed with descriptions, status, view filters, view sorting, search option, and buttons to delete or download.
For more information on demand access to peer analysis across vertical and company size, see Insight.