Install RNA Hardware Scanner Appliance
Package Contents
The shipping package includes the following:
- One (1) RNA
- One (1) AC power cable
- One (1) straight through 100BaseT patch cable
- One (1) Return shipping label
Unpacking
- Remove the RNA from the shipping box.
- Peripheral devices (keyboard, mouse, and monitor) are not included and will not be required for installation at any time.
Product Description
The RNA is a network appliance physically deployed on a client’s network to establish a secure connection with Fortra Secure Network Operation Center (SNOC). This secure connection allows for the execution of internal testing on a client’s network. The RNA is wholly owned and maintained by Fortra It must be returned upon completion of the service agreement.
Installation
- Install the RNA to a power connection protected by an Uninterrupted Power Supply (UPS).
- Connect the supplied patch cable to the RNA Ethernet port and to an available network port.
Rackmount Form Factor
| Hardware Specifications | Environment | ||
|---|---|---|---|
| Form Factor | 1U Short Depth | Operating Conditions | 5 C 35 C (41 F 95 F)
8% 90% (non-condensing) RH |
| Dimensions | 1.7"(H) x 16.8"(W) x 14.0"(D) | Storage Conditions | -40 C 60 C (-40 F 140 F) |
| Processor | Intel Core i3 3240 3.40Ghz | Operating Conditions | 5% 95% (non-condensing) RH 8% 90% (non-condensing) RH |
| Memory | 8GB DDR3 1633Mhz | Regulatory (Power Supply Safety / EMC | USA – UL Listed, FCC Canada – CUL Listed Europe / CE Mark EN 60950 / IEC 60950-Compliant |
| Storage | 500GB | ||
| Weight | 11lbs | ||
Small Form Factor
| Hardware Specifications | Environment | ||
|---|---|---|---|
| Form Factor | Small Form Factor Desktop | Operating Conditions | 10 C 35 C (50 F 95 F) |
| Dimensions | 4.0"(H) x 13.3"(W) x 14.8"(D) | Storage Conditions | 10 C (50 F), 10 C 35 C (50 F 95 F) |
| Processor | Intel Pentium G3220 3.0Ghz | Regulatory (Power Supply Safety / EMC) | GREENGUARD R0HS UL Environmental SPC Gold |
| Memory | 4GB DDR3 1333Mhz | ||
| Storage | 500GB | ||
| Weight | 17.2lbs | ||
Placement Consideration
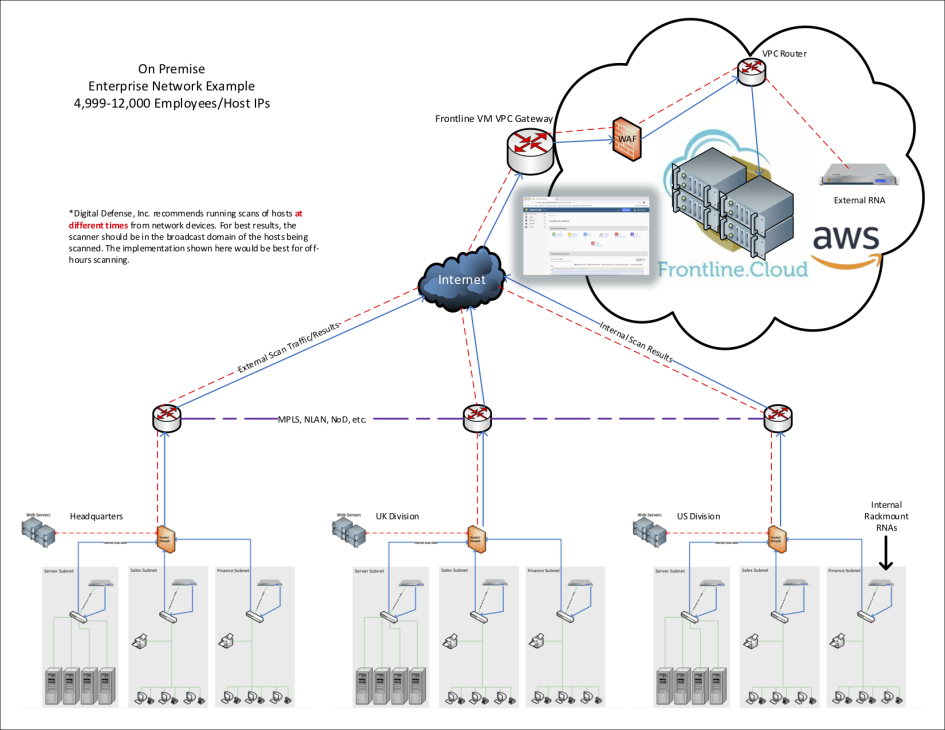
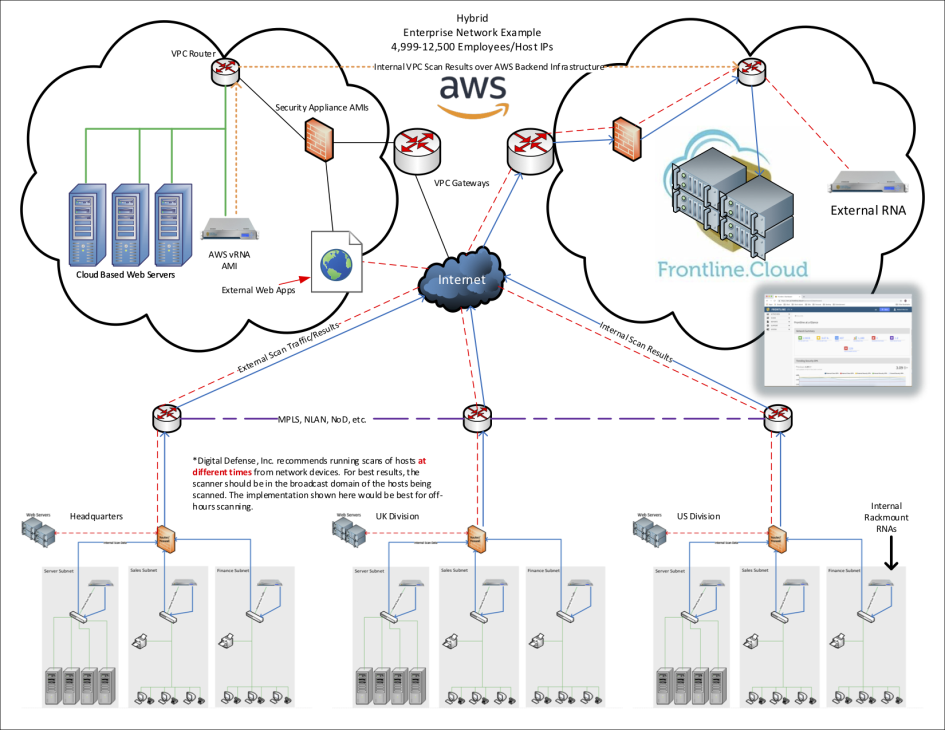
- For optimal results, the RNA should be placed on the protected side of the perimeter security devices.
- Fortra recommends the RNA be plugged into a Managed Power Supply.
- Due to the sensitivity of the data collected by the RNA, it should be installed in a controlled access location, such as a locked server room.
Plug the RNA into the Network Port
- Minimum port hardware requirements are a cat-5 based connection running at least 100 Mbps at full or half duplex.
- The RNA requires ports 443 and 22 for outbound traffic through the Internet gateway.
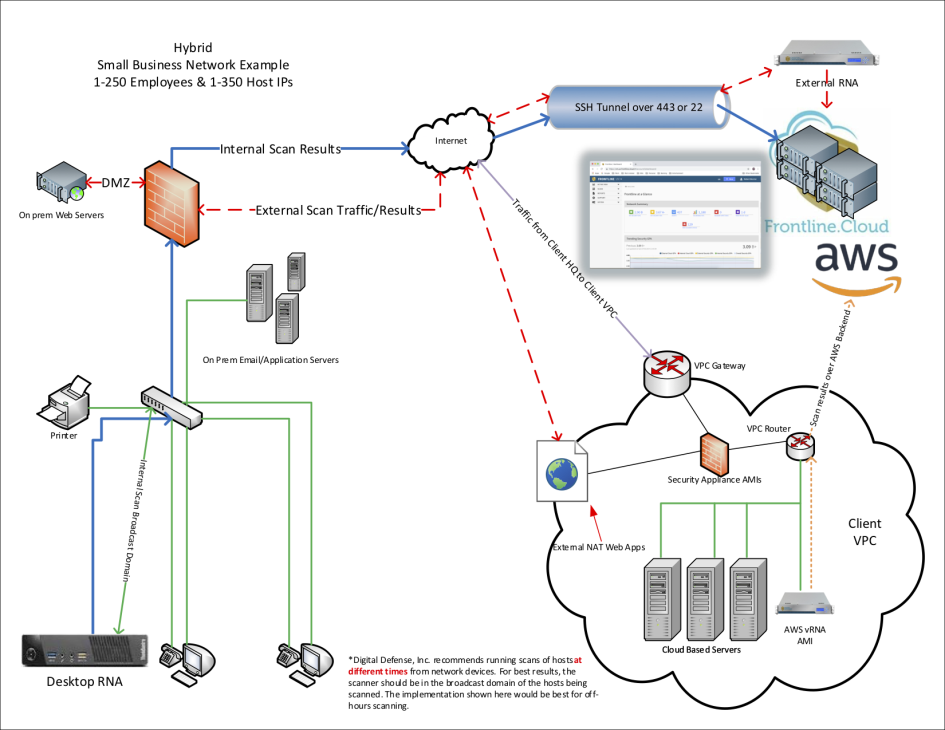
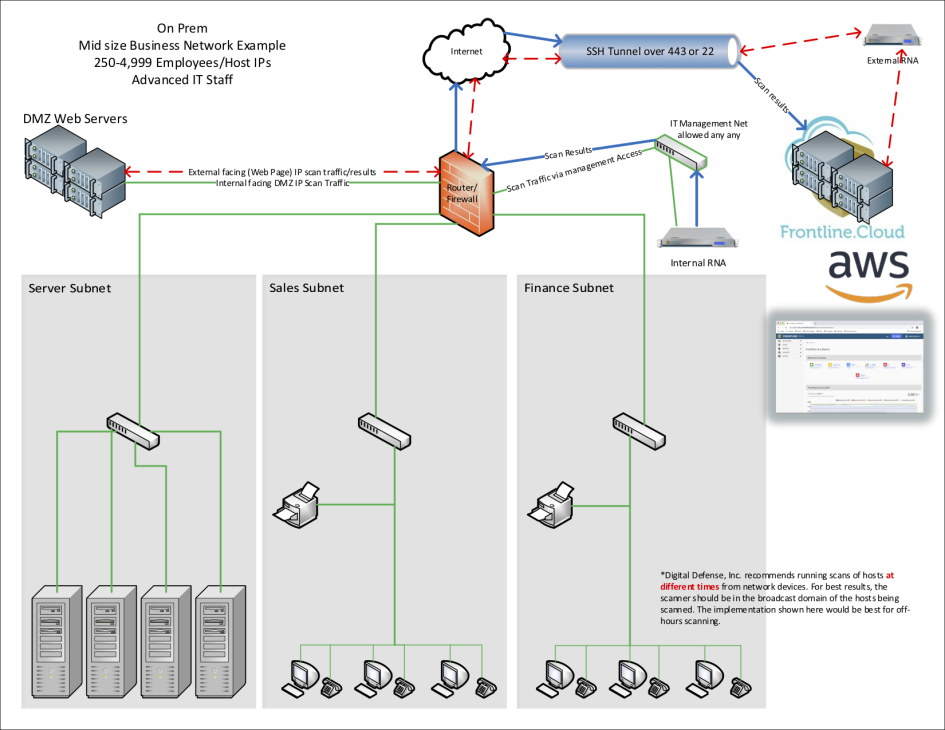
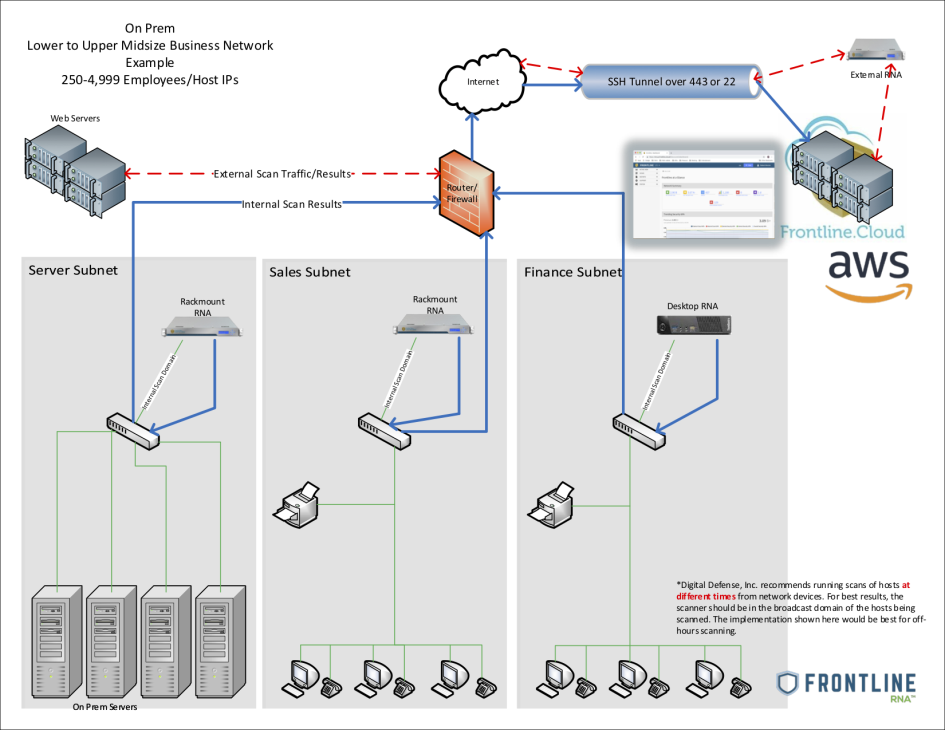
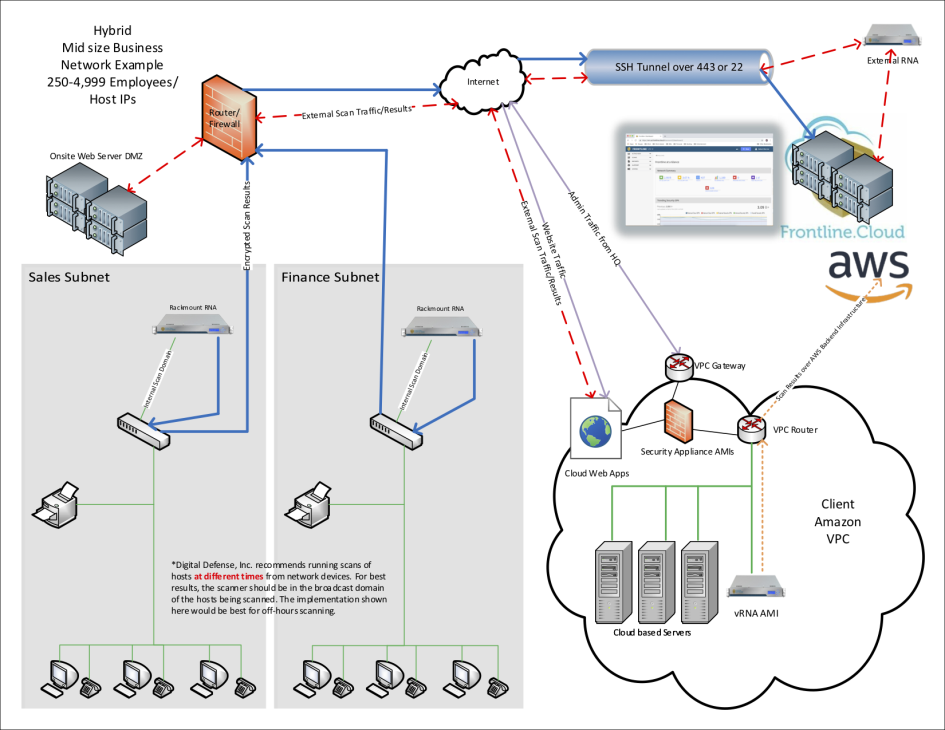
Network Diagrams
Small Business Network Examples
Medium Business Network Examples
Enterprise Network Examples
Powering The Unit On
Once the unit has been connected to the network and powered on, contact Fortra Support to verify connectivity.
See related: Virtual RNA Troubleshooting.
LCD Operation
The Fortra VM RNA has a front-facing integrated LCD screen that is capable of monitoring and reporting on the status of the RNA.
Navigation
- Pressing the left or right arrows on the RNA keypad will show basic system status information. The LCD panel will report the system’s online status, current IP address configuration, and the version of the current scanner software installed on the device.
- Pressing the up or down arrows on the RNA front panel will allow access to features that include the ability to cancel all running scans on the unit or querying the RNA’s serial number.
- Pressing and holding the power button will power off the RNA.
- Alternatively, the RNA can be booted by pressing and holding down the power button in the center of the LCD control buttons.
Return
- Remove the RNA from the network and package it using the original shipping materials.
- Adhere the enclosed prepaid return shipping label to the outside of the box and contact the shipping service for pick-up.
For information regarding connectivity issues and troubleshooting, see Virtual RNA Troubleshooting

