Install RNA Virtual Scanner Appliance
The virtual scanner can be installed on any computer (host) with the required resources. The virtual scanner is intended to be hosted on a client’s VMware
Install and activate the RNA virtual scanner appliance by performing the following steps (see below for detailed instructions):
- Download the RNA virtual scanner appliance.
- Deploy the virtual scanner on your virtualization environment.
- Configure your network RNA profile for a static IP (if necessary).
- Activate the virtual scanner appliance.
Host System Requirements
This section describes the requirements necessary to host the RNA virtual scanner appliance image.
Supported Virtualization Platforms
| Host Operating System | Version | Virtualization Platform (Hypervisor) | Virtual Scanner Appliance File |
|---|---|---|---|
| Windows Server | 2012 and later | Hyper-V Role | Microsoft Hyper-V (VHDX) |
| VMware ESXi Server | 5.0 and later | Native | VMware ESXi (OVA) |
| Windows Desktop / Laptop | 8.1 and later | VMware Workstation 10.x and later Oracle VirtualBox 4.2 and later |
VMware ESXi (OVA) |
| macOS | Big Sur and later | VMware Fusion 6.x and later Oracle VirtualBox 4.3 and later |
VMware ESXi (OVA) |
| Linux Ubuntu | 20.04 Desktop | Oracle VirtualBox 4.3 and later | VMware ESXi (OVA) |
Minimum Hardware Requirements
| Component | Requirement |
|---|---|
| VM Hardware Version | VMware Virtual Machine Hardware Version 7.0 or Later |
| CPU | Intel or AMD x86 processors, 2 or 4 CPUs, 2 GHz or higher |
| Memory | 4 GB RAM (Minimum) |
| Hard Disk | 60 GB free space |
| BIOS Virtualization Technology | BIOS Virtualization Technology must be enabled. By default, this setting is not enabled on most laptops. |
| Peer Images | Other VMware |
| Network Location |
TIP: It is recommended that the virtual scanner be hosted on a machine in a controlled access location due to the sensitivity of the data collected. |
| Physical Connections & Ports | Host system network configuration should be a Cat 5 or above network cable with a network connection speed (throughput) of 100 MB or above. |
Other considerations for macOS: The virtual machine’s available bandwidth is limited by default. If this limitation is exceeded upon initiating a scan, a dialog box displays requesting permission to grant more bandwidth throughput to the virtual machine. Accept the request for the virtual scanner to function optimally.
Download RNA
The following instructions describe how to download the RNA virtual scanner appliance file.
To download the virtual scanner appliance:
- Open Fortra VM.
- From the , select Scan Settings > Scanners.
-
Select the Appliance Tokens tab.
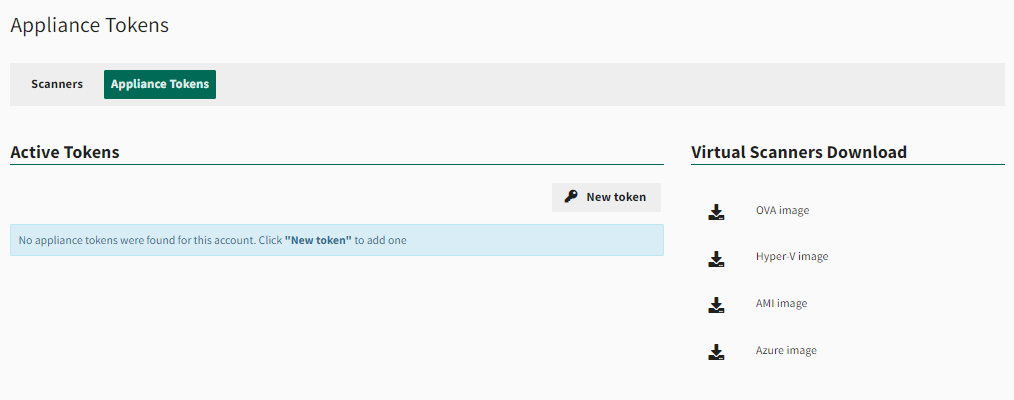
- Under Virtual Scanners Download, select the appropriate file type:
- OVA image for VMware or VirtualBox
- Hyper-V image for Windows Server Hyper-V role
- AMI for Amazon Web Services (AWS). This download will redirect to the AWS Marketplace to subscribe to the AMI and add to your AWS account.
- Save the VHDX or OVA file to your local drive.
Deploy RNA
The following instructions describe how to deploy the RNA virtual scanner appliance on your virtualization environment.
Select the applicable virtualization platform:
- Log in to your VMware ESX Server using the vSphere web client (or VMware Player, Workstation, or Fusion application).
- From the vSphere client window, select File > Deploy OVF Template.
- On the Source page, browse to the downloaded FrontlineVirtualRNA.ova file and then select Next.
- On the OVF Template Details page, select Next.
-
On the Name and Location page, optionally enter a unique name for the scanner. If applicable, select the folder location or data-center for the virtual scanner and then select Next.
NOTE: If the vSphere Client is connected directly to an ESX/ESXi host, the option to select the folder location does not appear. If connected directly to a ESX/ESXi host, skip to the Storage page. -
If applicable, on the Host / Cluster page, select the host or cluster for the virtual scanner and then select Next.
NOTE: To scan the selected host or cluster, it must have access to the network. -
If applicable, on the Specific Host page, select the specific host for the virtual scanner and then select Next.
NOTE: This page appears only if the destination is a resource pool associated with a cluster with DRS disabled or in manual mode. If not applicable, skip to the Storage page. - On the Storage page, select where to store the files for the deployed virtual scanner and then select Next.
-
On the Disk Format page, select the required format for virtual machines and then select Next.
NOTE: Thin provisioning lets you create sparse files with blocks that are allocated upon first access, which allows the datastore to be over-provisioned. The sparse files can continue growing and fill the datastore. If the datastore runs out of disk space while the virtual scanner is running, it can cause the virtual scanner to stop functioning. - On the Network Mapping page, select the destination network you want to scan and then select Next.
- On the Ready to Complete page, select Finish.
-
Right-click the new deployment and then select Edit Settings. Under Virtual Hardware, confirm that the settings for CPU, Memory, and Hard Disk are meeting or exceeding the minimum requirements specified under Host System Requirements.
IMPORTANT: Confirm the CPU, Memory, and Hard Drive settings are correct before powering on the appliance for the first time. While you can increase the CPU and Memory settings afterward, the Hard Disk settings must be accurate before the first initialization. - On the vSphere client window, right-click the virtual scanner on the left panel, and then select Power > Power On.
- Right-click the scanner again, and then select Open Console.
The RNA virtual scanner appliance will boot into a console. The scanner may take a few minutes to start.
If Dynamic Host Configuration Protocol (DHCP) is in use on the network, the scanner should automatically connect to the network and the System Status: RNA Link field will indicate the scanner status. Online displays after the RNA is successfully activated and able to connect with Fortra VM, prior to successful activation the status will display as Offline.
- Double-click the downloaded FrontlineVirtualRNA.ova file.
- The first time this file is invoked, an Import Virtual Appliance window displays. Select Import. The FrontlineVirtualRNA scanner will appear, powered off, in the left pane of the Oracle VM VirtualBox Manager.
- Select the virtual scanner, and then select Start to power it on. The RNA virtual scanner appliance will boot into a console. The scanner may take a few minutes to start.
-
Select the new VM and go to Settings > System. Under the Extended Features section, ensure the check box for Enable EFI (special OSes only) is checked. Two banner messages will display regarding keyboard and mouse integration. Dismiss these messages.
IMPORTANT: If the VM displays an error reading " FATAL: No bootable medium found! System halted.", you must click on the new VM and navigate to Settings > System. Under the Extended Features section, ensure the checkbox for Enable EFI (special OSes only) is selected.
If the RNA starts up and displays a login prompt instead of the standard RNA interface, perform the following:- First attempt to cycle through different ttys. The GUI is typically on ttys2, use CTRL + ALT+ F2 if the login prompt is on tty1.
- If that isn't successful, power off the VM and navigate to Settings > Display . Under the Graphics Controller, VBoxVGA is likely selected by default. Change the selection to VMSVGA and power on the RNA to see if the RNA GUI is brought up. If not, power off the RNA and try VBoxSVGA, power it on and see if the issue of the GUI display is resolved.
-
Click within the virtual scanner display to activate mouse capturing, and then select Capture.
If Dynamic Host Configuration Protocol (DHCP) is in use on the network, the scanner should automatically connect to the network and the System Status: RNA Link field will indicate the scanner status. Online displays after the RNA is successfully activated and able to connect with Fortra VM, prior to successful activation the status will display as Offline.
- Log in to your Hyper-V Server and start the Hyper-V Manager.
- From the Actions panel, select New > Virtual Machine.
- Enter a name for your virtual machine (for example, FrontlineVirtualRNA), and then select Next.
-
Select Generation 1 for the virtual machine generation, and then select Next.
IMPORTANT: Ensure Generation 1 is selected before continuing. The virtual machine will fail to initialize if Generation 2 is selected. - Enter 4096 MB for Start up memory, and then select Next.
- Select the host network adapter (virtual switch) the virtual scanner will use to access the network, and then select Next.
- Select Use an existing virtual hard disk, and then locate and select the VHDX file.
- Select Next, and then select Finish.
- Select the virtual machine.
-
On the Action panel, select Start and then select Connect. The RNA virtual scanner appliance will boot into a console. The scanner may take a few minutes to start.
NOTE: If you need to create a network profile with a static IP, continue with Configure Network Profile. -
Click within the virtual scanner display to activate mouse capturing, and then select Capture.
Configure Network Profile
The following instructions describe how to configure the virtual scanner to use a static IP.
To configure the virtual scanner to use a static IP as indicated by the System Status: Internet Link field
-
From the RNA console, select Edit under Network Status.
-
From the drop-down list, select Static.
-
Enter the following information (consult with your IT department for this information):
- IP Address - The IP address for the virtual scanner.
- Netmask - The subnet mask for the virtual scanner.
- Gateway - The IP address for the gateway device available to the virtual scanner.
- DNS Server - The IP address for the DNS server available to the virtual scanner.
-
Select Save.
Activate RNA
To activate your virtual scanner
-
Once the scanner has network access, leave the RNA virtual scanner appliance console running.
-
Open Fortra VM.
-
From the , select Scan Settings > Scanners.
-
Select the Appliance Tokens tab. The Appliance Tokens page will indicate the total number of activations available.
NOTE: If you do not have any activations available, contact Fortra Support. -
Select New Token to generate a new activation token.
-
On the RNA virtual scanner appliance console, enter the token in the Enter your activation key box.
-
Select Activate RNA.
-
Once activated, you will see the message, "Activation Successful: This device is ready to use." You are now ready to run your first scan.
See related: Create and Run Scans.
Refer to Virtual RNA Troubleshooting for additional guidance and support.
For information regarding connectivity issues and troubleshooting, see Virtual RNA Troubleshooting