Managing Inboxes
Routing Inboxes in Webdocs provide users with different views of the documents that are assigned to them. By Default, each user is given a 'My Inbox' containing all documents they have permissions to see via the route steps they are assigned to.
Add an Inbox
-
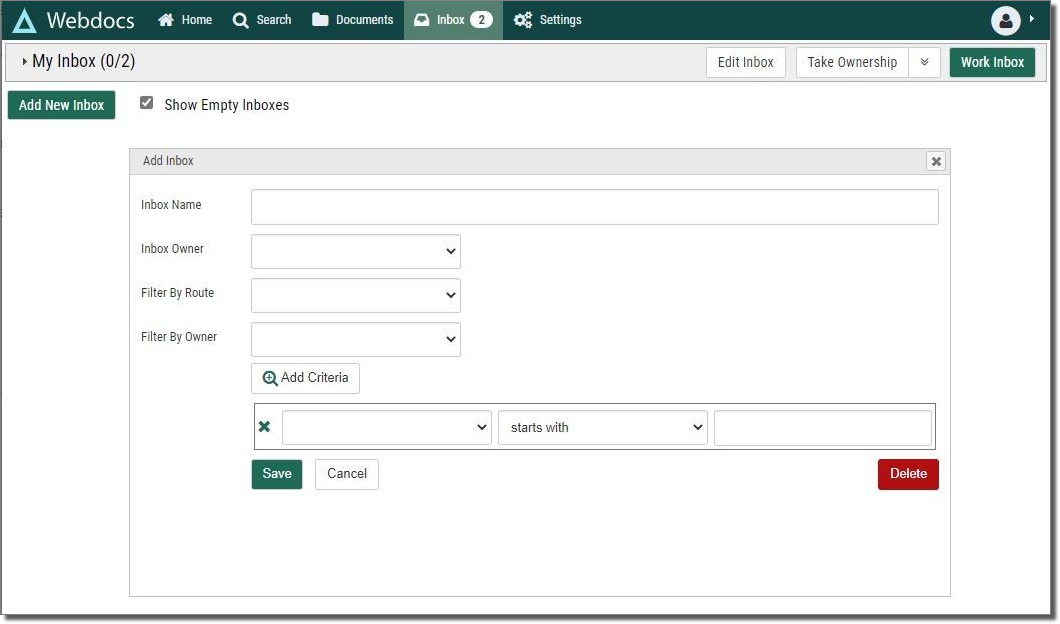
Administrators and groups with the 'Inbox Designer' role can create and share additional inboxes with users using the Add New Inbox button on the Inbox screen.
- Give the inbox a name--this is what users will see on the Inbox screen. It doesn't have to be unique, but consider it good design practice to use unique names.
- Select the owner of the inbox. The owner will always be a group, unless you are the owner. You cannot create an inbox for another user.
-
Use one of the filter options to define which documents should be displayed in the inbox. You do not have to use any filter, but if you don't choose at least one option, a duplicate of the My Inbox filter is used.
Filter by Route: Use this option to limit the inbox selection to only items on the chosen route.
Filter by Owner: Use this option to limit the inbox selection to route documents owned by a specific user. Use the 'Unassigned', option to filter all un-owned route documents.
- Click Add Criteria to add additional search parameters such as Document Title, Keys 1-30, or Step Title.
- Click Save to make the inbox available to the specified owner when they refresh their screen.
Edit or Delete an Inbox
To edit an inbox, click Edit Inbox  on the inbox. While viewing the inbox filters, you can also choose to delete the inbox. Use caution as this will delete the inbox for all users. These options are only available to the inbox owner and only if they have the Inbox Designer role.

