Assigning an SSL Certificate to a Site in EFT Arcus
An SSL Certificate is necessary for FTPS, HTTPS, and AS2 connections. After you create or obtain an SSL certificate, you can assign the certificate to one or more Sites.
To upload your certificate and key, you will need to know the SSL Certificate and the key’s physical path in which they were uploaded. This can be obtained by copying the "EFTFileShareHost" from the EFT Site Root path and then appending
\gsbshare\Config_static\<Certificate or key file name>:
\\<EFTFileShareHostname>\gsbshared\Config_Static\<Certificate or key file>
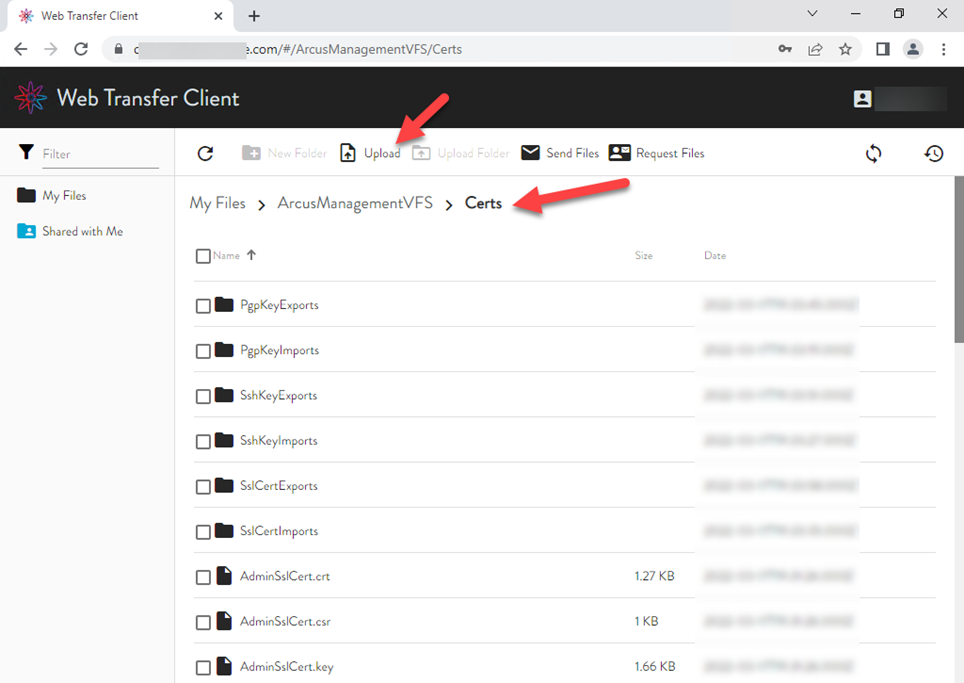
Where <EFTFileShareHostname> is the name of file share location into which you upload the certificate files into the Web Transfer Client, as shown below.
(Note that the Configure button is not available.)
Upload your existing SSL Certificate and key to EFT Arcus
-
Log in to the EFT Web Transfer Client (or use an SFTP client, such as CuteFTP) with your EFT Arcus Management Site user account credentials.
-
In My Files, navigate to the /ArcusManagementVFS/Certs path.
-
Upload your SSL Certificate (certificate and key files).
To assign a certificate that you have created or obtained to an EFTSite
-
Connect to the Arcus administration interface.
-
In the Arcus administration interface, click the Server tab.
-
Click the Site that you want to configure.
-
In the right pane, click the Connections tab.
-
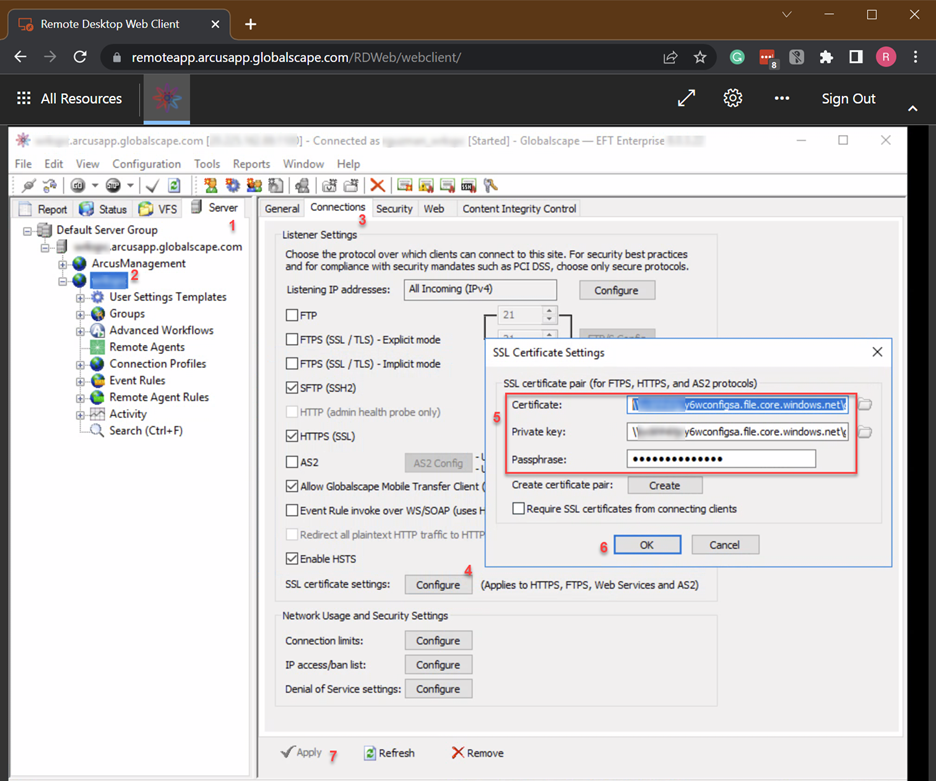
In the SSL certificate settings area, click Configure. The SSL Certificate Settings dialog box appears.
-
To create a certificate:
-
Click Create and follow the prompts in the wizard. (Refer to Creating SSLCertificates for details, if necessary.)
-
-
To use an existing certificate:
-
In the Certificate box, type the physical path to the .crt file. (e.g., \\EFTFileShareHostname\gsbshared\Config_Static\mycert.crt, described above.)
-
In the Private key box, type the physical path to the .key file. (e.g., \\ EFTFileShareHostname\gsbshared\Config_Static\mycert.key, described above.)
-
In the Certificate passphrase and Confirm passphrase boxes, type and confirm the passphrase for the certificate pair.
-
Click OK to close the dialog box.
-
Click Apply to save the changes on EFT.