Example: Archiving Files
This example describes how to create an Advanced Workflow that zips a group of documents together into one file and places it onto a shared drive. The Advanced Workflow can then be inserted into an Event Rule to execute the workflow on a regular schedule.
To define the workflow and insert it into an Event Rule
-
Drag the Compress Files action to the right pane. The Compress Files dialog box appears.
First, select the files you want to zip.
-
To zip just one file, click the open folder button to the right of the Files to compress box. Browse to your My Documents folder, select a document, then click OK. The full path to that document appears in the Files to compress box.
-
To zip multiple files you need to use a wildcard. A wildcard character causes the Server to use any file that matches a mask, replacing an asterisk with any characters required to make the file match. In this example, we want to match any file that ends with .doc or a .txt in our My Documents folder. Start by highlighting all the text that appears after the path to My Documents. In the Files to compress box, type*.doc, and then*.. (The asterisk means to match any filename, in this case ending in .doc or .
-
Click the open folder icon to the right of the Destination file box, and browse to My Documents, name the file (e.g., type archive.zip,) then click Save.
-
Select the text in the Files to compress box, right-click the selection, then click Copy. Copy places the full path to the zip file on the clipboard so that you can use it in the next step.
-
Click OK to save the Compress Files step.
-
When the workflow runs, the Server zips the specified documents into a zip file named archives.zip. Now we need to move it from our My Documents folder and onto the shared drive.
-
In the Available Actions tree, expand the File node, then drag the Move File action to the right pane. The Move File dialog box appears.
In the Move Files dialog box, you need to specify which file should be moved, and where to move it. Right-click in the Source box, then click Paste. The path to archive.zip appears.
-
In the Destination box, browse to or type the shared drive location (be sure that the Server has write permission to the location) and type what you want to name the file that you are moving, in this case, archive.zip. (You can have it renamed it in the Destination, if you want.)
Those two simple steps will compress all of the files in your My Documents folder into a .zip file, and then copy the zip file to the shared drive. The workflow is complete, but now you have to insert the workflow into an Event Rule.
-
Click Update And Close to save your changes and close the interface. The workflow appears in the Advanced Workflows node and in the right pane.
-
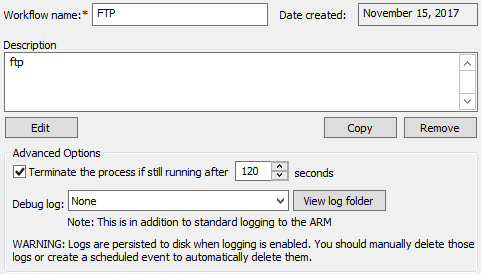
(Optional) In the Advanced Options area, select the Terminate the process check box and specify the number of seconds after which to terminate the workflow if it fails to execute.
-
(Optional) Specify the level of debug logging in the Debug log level box, None, Minimal, Normal, or Verbose (None is the default). When you are logged in to the EFT computer, you can click View log folder to view the logs created by this workflow.
-
Finally, create the Scheduler (Timer) Rule in the EFT administration interface to execute the workflow on a schedule. The completed Event Rule should look similar to the illustration below.