Log File Settings
In the Global Options dialog box, you can specify where and when log files are saved, and how they are displayed.
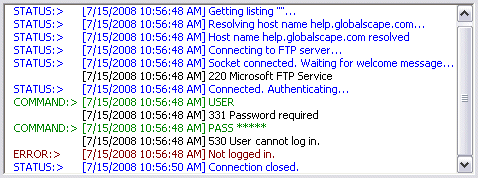
The connection and transfer information that appear in the Log pane is color coded. By default, the following colors are assigned, but you can specify a different color for each log type in the Global Options dialog box.
-
COMMAND logs are in green text
-
ERROR logs are in maroon text
-
other information is in black text.
You can also change the display font type (e.g., Arial), font style (e.g., Bold), size (e.g., 10pt), and script (e.g., Western).
To edit the log display options
-
On the main menu, click Tools > Global Options.
-
Expand the General node, then click Logs.
-
To specify a new color for all log window status messages
-
Click the applicable color icon. The color picker appears.
-
Click a color, then click OK.
-
To change the style of text in the log windows
-
Click Select Font. The Font dialog box appears.
-
Specify the font type, font style, size, and script then click OK. A sample of the selected font appears in the Preview box.
-
Click OK to save changes and close the Global Options dialog box.
To configure the log file settings
-
On the main menu, click Tools > Global Options(or press ALT+F7).
-
Expand the General node, then click Log Files. The Log Files options appear.
-
To specify the location at which logs are saved, in the Log path box, click the folder icon to browse for the folder or type a different path.
-
To delete log files automatically at time intervals you specify, select the Delete saved logs every check box. Specify whether to delete files after a specified number of days, hours, or minutes. Clear the check box to keep all log files, or if you plan to delete them in other ways.
-
To delete error logs automatically when the Transfer Engine shuts down, select the Delete error logs after quitting the Transfer Engine check box. Clear the check box to keep error logs after the Transfer Engine shuts down.
-
To delete the associated logs automatically immediately after a successful task is finished, select the Delete logs of successful transfers immediately after completion check box. Clear the check box to keep the associated logs after a successful task is finished.
-
To remove all log files from your log folder that are currently not in use, click Delete all logs.
-
To remove all remote file and folder listings CuteFTP has saved on your computer for offline browsing, click Delete listing cache.
-
To configure thumbnail cache options, in the When the transfer engine exits box, specify one of the following actions:
-
Retain images in thumbnail cache - Thumbnails stored in the cache are not deleted when you exit CuteFTP or the Transfer Engine.
-
Delete images in thumbnail cache - The thumbnail cache is emptied when the Transfer Engine is exited.
-
Delete images older than value specified - Thumbnails are stored for the time specified by the thumbnail cache expiration drop down menu.
-
-
To empty the thumbnail cache immediately, click Delete thumbnail cache.
-
To access the log display and log saving options, click Logs. The Log options appear. Configure options as described below.
-
To choose a new color for all log window status messages, click STATUS
-
To choose a new color for all log window error messages, click ERROR.
-
To choose a new color for all log window command messages, click COMMAND.
-
To choose a new display color for all other messages in log windows, click OTHER.
-
To change the style of text in the log windows, click Font. The Font dialog box appears in which you can specify a different font face (e.g., Arial, Times), style (e.g., Regular, Bold), size (e.g., 8 points, 10 points), and script (e.g., Western, Hebrew, Arabic). The Preview box displays how the font will appear in logs.
-
To save each session log as a separate text file and to display the log in the individual session log window, select the Enable session (control connection) logs check box. Clear this to stop recording a log for each session, and to show no logs in the individual session log window.
-
To save the log for each item transferred as a separate text file, select the Enable individual transfer item (data connection) logs check box. Clear this to stop recording a separate log for each item transferred.
-
To display all logs in the Log Window in the bottom of CuteFTP interface, select the Enable consolidated transfer logs (both session and all transfers in Log Window) check box. Clear this to leave the Log Window blank and to stop recording all activity in a single log file.
-
To include file lists and permissions as part of session logs and consolidated logs, select the Record/Display raw directory listing in logs check box. This returns a RAW list, which is used commonly for debugging. Clear this to exclude file lists and permissions from session logs and consolidated logs.
-
To show a log window in the remote pane for each Site to which you connect, select the Show individual logs for each connection window check box. Clear this to hide any log windows in the remote pane.
-
Click OK to save changes and close the Global Options dialog box.
This option consumes additional system resources due to insertion of time and date stamp at each log event. The Record/Display time stamps in logs check box is selected by default. Select the check box if you are copying logs to send to customer support for troubleshooting.
Logs for active sessions are not automatically deleted.
Logs can consume a large amount of system resources (memory and hard drive space), depending on the amount and size of files being transferred. It is recommended that you disable most logging (especially data connection logs) when performing a transfer that consists of many thousands of files, especially small files. To further reduce resource use, on the main menu, click Tools > Global Options, expand the Transfer node, click Events, then click Remove successful transfers from the queue automatically.
Related Topics