Editing a Profile
When you create a new Profile, you define the listening IP address for remote connecting clients, the listening IP address and port for the server inside your network, and any IP addresses exceptions. After the Profile is created, you can edit the Profile's configuration as necessary. You can also rename or delete the Profile. When you make a change to a Profile, before you click Apply, an asterisk appears in the tree next to the Profile that you are editing. You must define a unique IP address/port combination for each Profile.
To edit a Profile
-
In the Navigation pane, click the Profile that you want to edit.
-
In the Configuration pane, click the General tab.
- Specify the Listening IP for incoming Clients box and the Listening IP for Server. Refer to Specifying the Listening IP Addresses for detailed information.
- In the Port box, provide the port number over which connections are allowed.
-
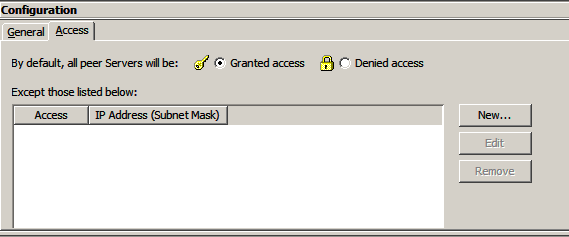
In the Configuration pane, click the Access tab.
-
Specify the IP addresses or IP mask of servers that are allowed or denied access.
-
In the toolbar, click Apply Changes. If the IP address and port are not unique, an error message appears; otherwise, the DMZ Gateway will allow the server to connect.
If you have made multiple edits, you can revert to the last-saved state by clicking Revert Changes (undo) before clicking Apply Changes. However, once you click Apply Changes, you cannot go back.