Configuring SFTP for a Site
(Requires the SFTP module) When you enable SFTP for a Site, you must configure the SFTP settings. You can then configure SFTP options for a Settings Template and/or user account.
Before upgrading from a version prior to v8.x, export and convert your SFTP keys. The new version only creates RSA keys in OpenSSH new format. (You can't generate DSS keys and save keys in SSH.com format.) See also SFTP FIPS.
To configure SFTP for a Site
-
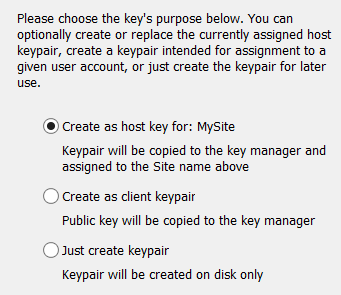
Before you can enable and configure SFTP on the Site, you must create or import an SFTP key defined on the Site. Be sure to select Create as host key for: <site_name> before you click Finish.
-
In the administration interface, connect to EFT and click the Server tab.
-
On the Server tab, click the Site you want to configure, then click the Connections tab.
-
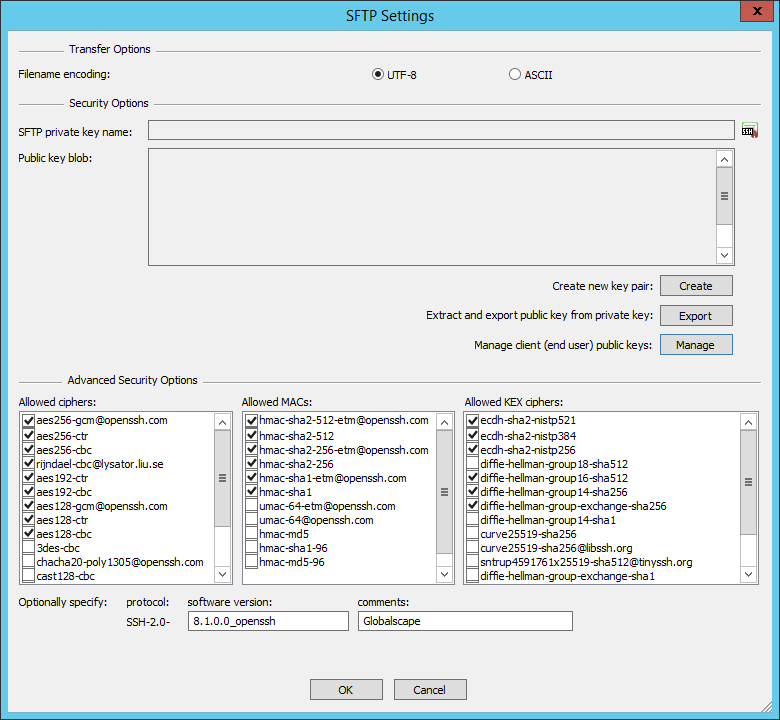
Click SFTP Config. The SFTP Settings dialog box appears.
-
If you enabled SFTP and created keys when you defined the Site, the key name and blob appear in the SFTP Settings dialog box.
-
If you did not enable SFTP when you created the Site, the dialog box is empty. Refer to Creating an SSH Key Pair for instructions to create the keys, if necessary.
-
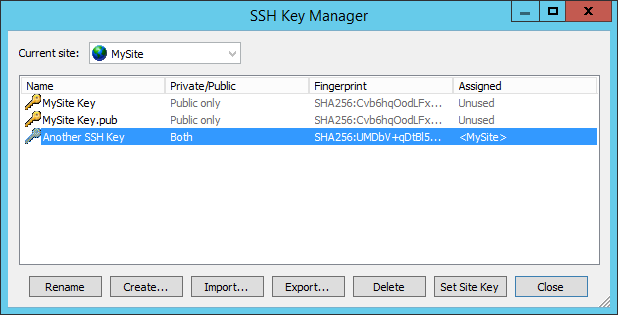
If you have multiple SFTP keys, click the SSH icon
 to the right of the SFTP private
key name box. The SSH Key
Manager dialog box appears.
to the right of the SFTP private
key name box. The SSH Key
Manager dialog box appears. -
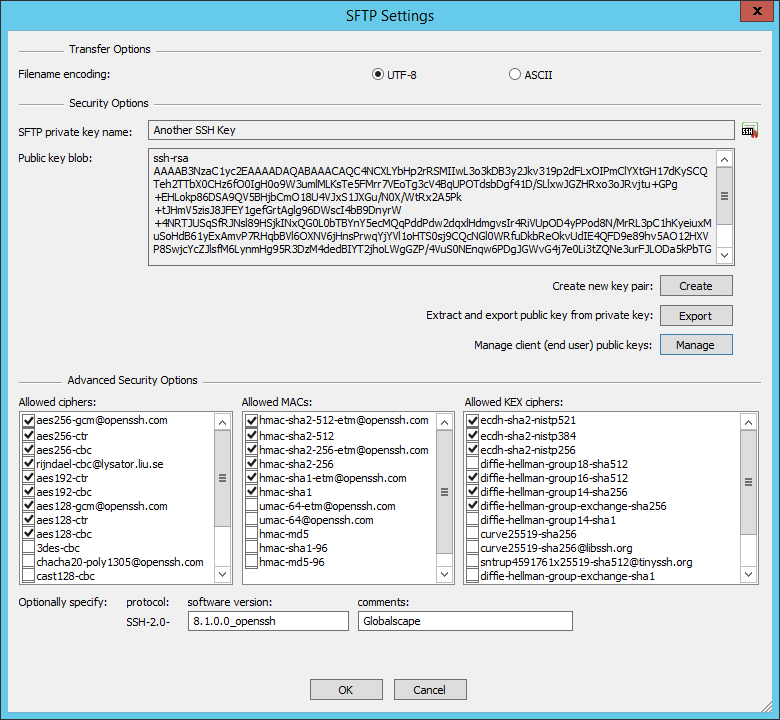
In the SSH Key Manager dialog box, click the Private/Public key that you want to assign to the Site, click Set Site Key, then click Close. The assigned SFTP private key name and blob appear in the dialog box.
-
In the Filename encoding area, click UTF-8 or ASCII.
-
UTF-8—For Unicode-only transfers
-
ASCII—Detects whether to proceed in ASCII mode or switch to UTF-8 mode for the transmission and receipt of path names and other strings communicated between client and server.
-
-
Click OK to close the dialog box.
-
Click Apply to save the changes.
EFT's SFTP library implementation is based on the 8.1 version of OpenSSH portable: https://github.com/PowerShell/openssh-portable, which is a fork of https://github.com/openssh/openssh-portable, which in turn is a fork of the canonical OpenSSH. EFT will be updated once the fork that EFT is using is updated to 8.2, 8.3, or newer version. Also note that the EFT implementation contains some modified OpenSSH files, modified via use of a Fedora patch, for purposes of FIPS certification when FIPS mode is enabled (where EFT leverages OpenSSL’s LibEay32.dll for SFTP’s cryptographic functions).
Related Topics