IP Access Rules for Remote Administration
By default, all IP addresses are granted remote access to EFT. EFT allows you to grant remote administration access to only one specific IP address or a range of IP addresses, or deny access to one specific address or a range of addresses. Refer to Controlling Access to the Site by IP Address for details of banning IP addresses.
To grant/deny access by IP address
-
In the administration interface, connect to EFT and click the Server tab.
-
On the Server tab, click the Server node that you want to configure.
-
In the right pane, click the Administration tab.
-
Select the Allow remote administration check box.
-
Next to IP ban/access list for remote administration, click Configure.
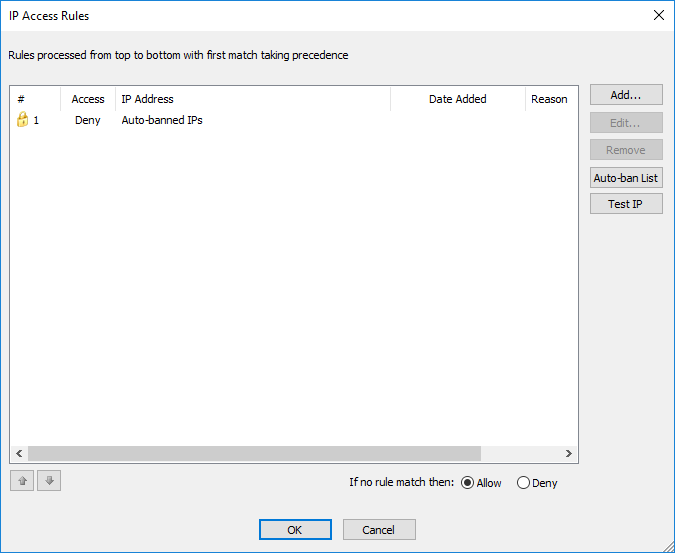
The IP Access Rules dialog box appears. The default configuration is to deny access to automatically banned IP addresses. By default, if no rule matches an IP address, then the IP is allowed.
-
Click Deny if you want to exclude all IP addresses that are not explicitly defined in the Rules list.
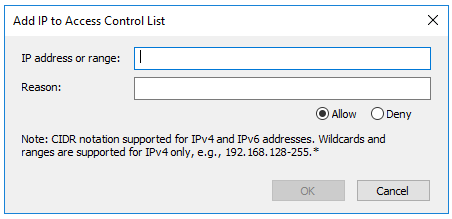
To add an IP address to the rules, click Add. The Add IP to Access Control List dialog box appears.
-
Specify the IP address or mask.
-
Provide a reason for allowing or denying the IP access. (optional)
-
Click whether to Allow or Deny the address.
-
Click OK. CIDR notation is supported for IPv4 addresses (for example, 192.168.29.0/24) and literal IPv6 addresses (for example, 001:cdba:9abc:5678::/64).
To remove a rule, click it in the list, and then click Remove. A confirmation prompt appears. Click Yes. (You cannot remove the default rule.)
To edit a rule, click it in the list, and then click Edit. The Add IP to Access Control List dialog box appears for you to edit the address. Click OK to save your edits.
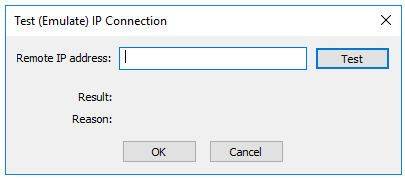
To test whether an IP address is banned or allowed, click Test IP. The Test IP Connection dialog box appears.
-
Provide an IP address to test, and then click Test. The Result (Allowed or Denied) and the Reason the IP is allowed or denied appear in the dialog box. Click OK to close the dialog box.
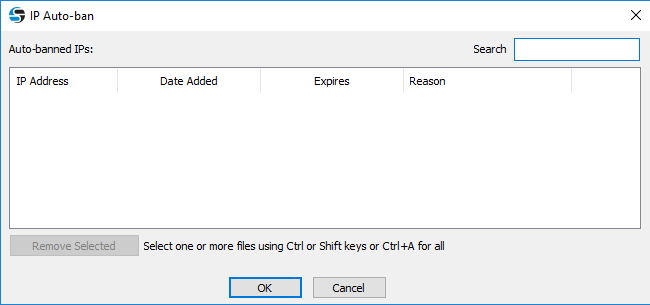
To view the list of banned IP addresses, click Autoban List. The IP Auto-ban dialog box appears.
 NOTE: Temporarily banned IPs are not stored in the database. They are kept in runtime memory. They are also node-specific.
-
The IP Address column lists the banned IP addresses.
-
The Date Added column displays the date and time the IP address was automatically banned, in MM/DD/YYYY hh:mm:ss AM/PM format.
-
The Reason column displays the reason the IP address was automatically banned (for example, DoS/Flood prevention temporary ban, DoS/Flood prevention permanent ban, Invalid password attempts exceeded, Invalid username attempts exceeded, Too many consecutive invalid commands).
-
To find an IP address in the auto-ban list, type it in the Search box.
-
To sort the auto-ban list, click a column header.
-
To remove an IP address from the auto-ban list, click it, and then click Remove Selected.
-
-
Click OK to close the dialog boxes.
-
Click Apply to save the changes on EFT.