Manually Creating the ARM Database in SQL Server
Manually creating the ARM database in SQL Server is for advanced users who are well versed in SQL Server.
-
If you installed ARM when installing EFT, the ARM database was created for you. During installation, all tables were created in the schema regardless of which features and/or modules are actually in use. You do not have to create them manually.
-
If you did not create the ARM database at installation, you can use the installer at any time after the initial installation of EFT to create the database. Alternatively, this manual procedure can be used to create the database user account, create the schema, configure EFT to connect to the database, and then test the connection.
The following instructions use the SQL Server Management Studio application from Microsoft. Optionally, users may prefer to use command line tools such as oSQL to create the database. The oSQL utility allows you to execute Transact-SQL statements, system procedures, and scripts for creating and maintaining the database. For additional information on the oSQL utility, including common script samples, refer to osql Utility on microsoft.com.
First you will create the database, then create the database user account, create the schema, configure EFT to connect to the database, and then test the connection.
To create the database
-
Using the SQL Server Management Studio application, connect to the SQL Server instance using an account that has the privileges necessary to create user accounts and databases. Typically the "sa" account will suffice.
-
In the left pane, right-click Databases, then click New Database.
-
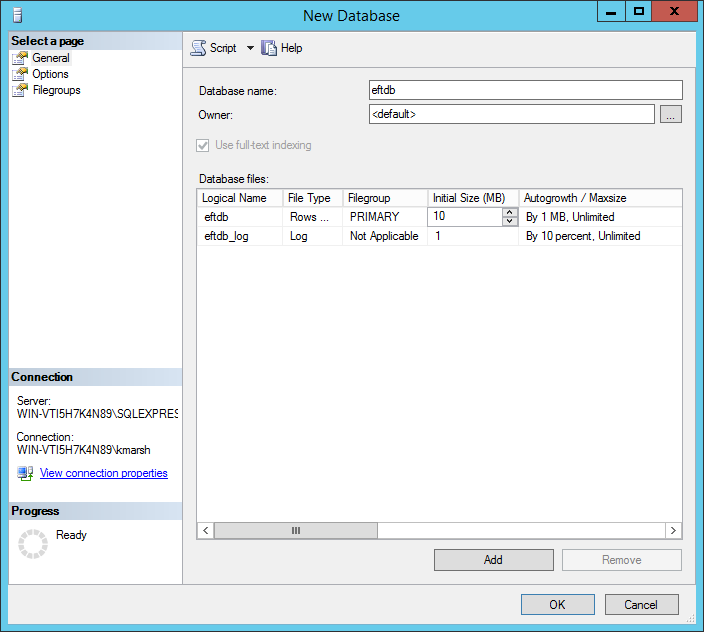
The New Database dialog box appears. Name the database eftdb. (You can use a different database name, but be sure to use the name you chose throughout this procedure.)
-
In the Database files table, change the Initial size value to 10 MB for the eftdb logical name (first row). Leave the eftdb_log row as is.
-
Click OK to finalize creation of the database.
Create the Database User Account
During installation, EFT needs full DB Owner access to the auditing database to set up the schema. During updates or upgrades, EFT needs full DB Owner access to update the schema. Once it is set up, EFT only needs to be able to read, write, and execute stored procedures. For more information on the required database privileges please refer to Database User Account Privileges.
To create the database user account
-
Using the SQL Server Management Studio application, connect to the SQL Server instance using an account that has the privilege to create user accounts and databases. Typically the "sa" account will suffice.
-
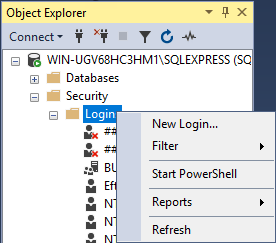
In the left pane, expand the Security node, right-click Logins, and then click New Login.
- Create a new user called eftuser and then click SQL Server Authentication. (You can use a different user name, but be sure to use the same name throughout the procedure.)
-
In the Password and Confirm password boxes, provide a complex password consisting of an alphanumeric and symbol mix of at least 8 characters.
-
Ensure the Enforce Password Policy check box is selected.
-
Ensure the Enforce password expiration check box is not selected. (Optionally, you can enable this setting, but be aware that the eftuser account password will need to be changed periodically to prevent expiration.)
-
Ensure the User must change password at next login check box is not selected.
-
Set the Default database to the eftdb database created earlier.
-
In Default language, click the list to select your language or leave it set to the <default> setting.
-
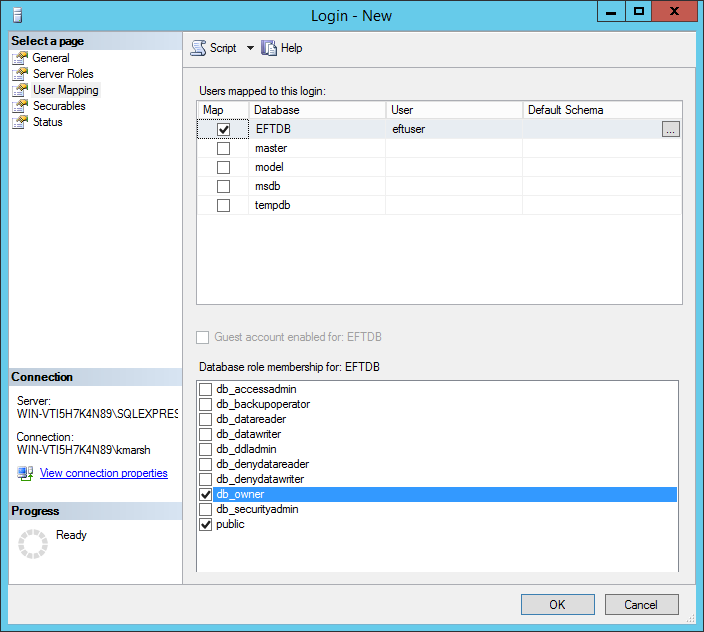
Select the User Mapping node in the left pane.
-
In the Users mapped to this login table, locate the entry for the eftdb database created earlier.
-
Select the check box in the Map column for the eftdb row and set the Default Schema to dbo.
-
While the eftdb row is selected, in the Database role membership for table, select the dbo_owner check box.
-
Click OK to finalize the user creation.
The New Login dialog box appears.
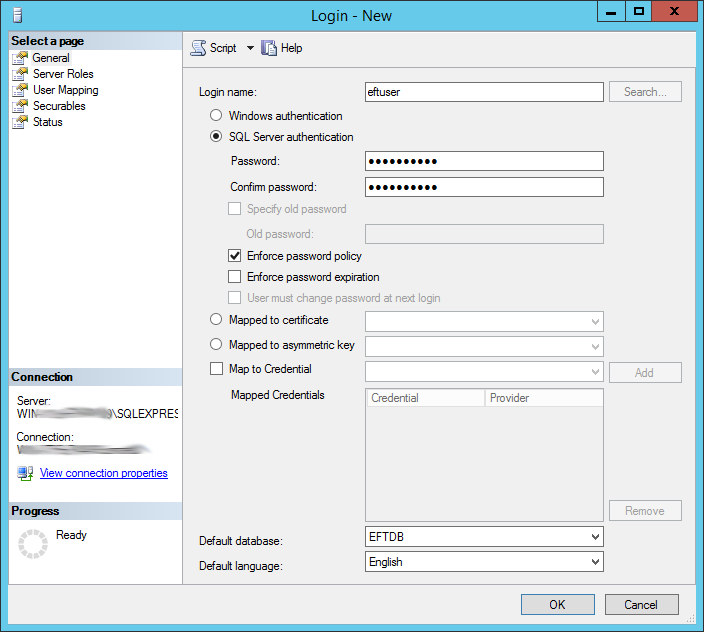
If SQL Server Authentication is not available as a choice, verify that the SQL Server has been configured to support mixed mode.
During installation of the EFT, the installer will place a set of database creation SQL scripts in the GlobalSCAPE\EFT Server\SQL Server subfolder of the system Program Data folder. (Typically, C:\ProgramData\GlobalSCAPE\EFT Server\SQL Server.) The database creation scripts use the "create_#_" filename prefix. The # in the filename represents the order in which each script must be executed.

You will use these scripts to create the schema using the procedure below.
To create the schema
-
Using the SQL Server Management Studio application, connect to the SQL Server instance using an account that has the privilege to create user accounts and databases. Typically the "sa" account will suffice.
-
In the left pane, expand the Databases node, right-click on the eftdb node, and click NewQuery. A blank screen appears in the right pane in which you can type in a SQL query.
-
Execute each creation script in the specified order by copying/pasting the script file contents into the left pane and clicking Execute. A message appears each time you click Execute indicating whether the query was able to complete successfully.
-
In the left pane, expand Databases, then eftdb, then Tables. Verify that the database has populated correctly. (The tables defined in the script should have been created.)
To configure EFT to connect to the newly created database, refer to Audit Database Settings.
To test the connection
-
Create a test connection with your FTP client to EFT and upload and download a few files.
-
In SQL Server Management Studio select the dbo.tbl_ProtocolCommands table under the eftdb database icon. It should return several rows with the commands issued by your client from the test connection.
-
You can now pull reports directly from EFT against data audited to SQL Server.
If you are running the administration interface, you must have an entry in that system's DNS for the name of the SQL Server, otherwise the administration interface will not be able to connect to the SQL Server when attempting to pull reports.