![]()
No configuration is necessary within EFT for integration with Mail Express.
This topic provides information about installing Mail Express Server. For information about installing the Outlook Add-In, refer to Installing the Outlook Add-In. For instructions for uninstalling the server, refer to Uninstalling Mail Express Server.
You can install the Mail Express server with the "stand-alone" installer or the EFT combined installer. When you install Mail Express as a "module" using the EFT installer, the installation process includes a wizard page on which you must specify the EFT host name, administrator account login credentials, and the Site name. Because of this, you should have already installed EFT and created a Site for Mail Express connections before you install Mail Express. However, you can install Mail Express the standalone installer and configure the EFT connection later. You can install Mail Express on the same computer as EFT or remotely. (You must enable remote administration in EFT for remote connections.) For information about using Mail Express with EFT, refer to EFT Configuration. For information about installing and configuring EFT, please refer to the EFT documentationEFT documentation.
|
No configuration is necessary within EFT for integration with Mail Express. |
Before beginning installation, please review the following important information:
Mail Express versions 3.0 and later do not support upgrading from Mail Express v2.2. The installer will abort the installation if it finds Mail Express 2.2 installed. You must uninstall Mail Express version 2.2 before continuing with installation of version 3.0.
Separate installers are provided for 32-bit and 64-bit installations. Please use the proper installer for your operating system. (Mail Express integration with EFT only works with the 32-bit version of Mail Express. If you have the 64-bit installer, the EFT integration options will not be available, because the COM calls required for integration will not work.)
mail-express-windows-x86-32.exe is the installer for use on 32-bit systems.
mail-express-windows-x86-64.exe is the installer for use on 64-bit systems.
You must run the installer with administrative privileges. When the installer is executed, it checks for permission and aborts the installation if you do not have the proper permission.
The installer installs Mail Express Server, the Java Runtime Environment (JRE), Apache Tomcat (webserver), and, optionally, SQL Server 2008 R2 Express.
If you are installing SQL Server 2008 R2 Express:
SQL Server 2008 R2 Express is offered only for evaluation purposes; it is not recommended for production.
SQL Server 2008 R2 Express requires that .NET Framework 3.5 SP1 or 4.0 is already installed.
SQL Server 2008 R2 Express uses TCP/IP to connect to the database so the MAILEXPRESS SQL Server database instance is installed with TCP/IP support enabled. For enhanced security, the TCP/IP settings are configured to listen for connections from the local computer only, using the localhost interface (127.0.0.1). To allow remote connections or to modify the communications settings, use the SQL Server Configuration Manager. A database instance with an instance name of MAILEXPRESS is created when you use the Mail Express installer to install the database. The installer creates the database and creates the Mail Express database user with the username and password supplied during installation. Only the SQL Server Express Database Engine and limited configuration tools are installed, including the SQL Server Configuration Manager.
If you want to create a new Mail Express instance in an existing EFT SQL Server 2008 R2 Express database: When you create the Mail Express database instance, click Use an existing database, use the EFT database server host name and database instance name, and then click Create a new database to create the Mail Express instance (described in detail below).
If you are not installing SQL Server 2008 R2 Express, install SQL Server 2008 R2 or Oracle 11g R1/R2 before installing Mail Express (unless you're using the EFT database).
Service Dependencies: During installation, the installer will automatically create service dependencies for the Mail Express Server Windows service on "Afd – The Ancillary Function Driver for WinSock" and "Tcpip – The TCP/IP service." These service dependencies are created to ensure the Mail Express Server is not started until the networking layer or the operating system is operational.
If you are migrating from development to production or to a new system, or doing a new installation in a different directory while continuing to use the same database, the IP:port bindings in Mail Express will be out of sync with the database settings. To get the system in sync, add a new item to the bindings, which will force a sync between the database and Mail Express.
An installer wizard guides you through the installation process. You will need to provide the following information:
Installation directory (default = \Program Files\Globalscape\Mail Express)
File store directory (default = \<Installation_Directory>\MailExpressAttachments).
This directory will be used to store attachments—frequently, very large
attachments. Ensure this location can provide adequate disk storage
for uploaded attachments.
Initial Mail Express administrator account username (1-256 characters) and password (6-256 characters). The password must contain at least three of the following types of characters: uppercase letters, lowercase letters, numbers, special characters (e.g., #, %, ^). This account will be used for the initial log in to the Mail Express Administration Portal and finalize the initial system configuration.
|
|
|
Using a UNC path to network locations requires running the Mail Express Server Windows service under a true user account instead of Local System. By default, Local System account does not have access to network paths, and giving it access is not recommended. |
If you are connecting to a remote database (supported in v3.2 and later), you will need the database connection information (host name, port, privileged user credentials).
All other configuration, such as licensing, IP address/hostname, port, and so on is configured in the Web administration interface after installation.
|
Before installing, refer to System Requirements. If the system requirements are not met, the installer will fail. |
To install Mail Express Server
Review the important information above before starting the installation. Not reading and heeding the information above could cause your installation to fail. Using the Quick Start checklist can help ensure a successful installation.
If Mail Express version 2.2 is installed, uninstall it before continuing with the installation. If you are upgrading from a previous version, refer to Upgrading Mail Express Server.
Double-click the installer. The Welcome page appears.

Click Next. The License Agreement appears.
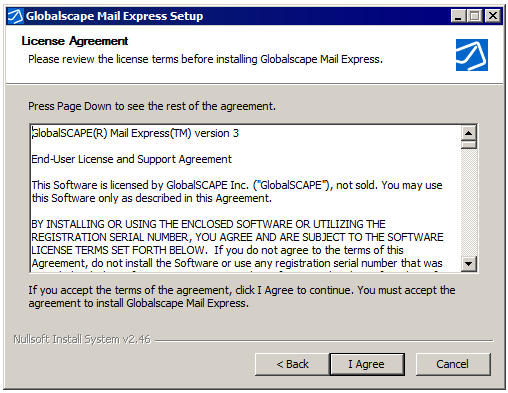
Read the license agreement, and then click I agree. The Choose Install Location page appears.
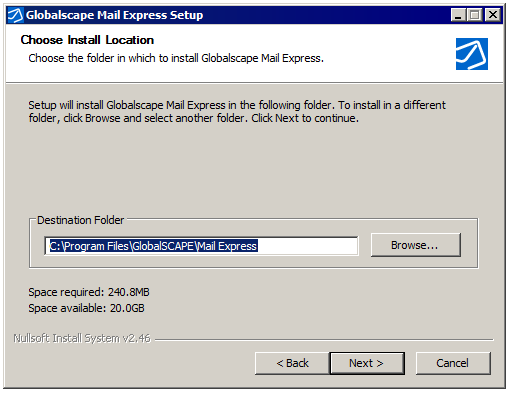
Specify a location for Mail Express Server, or keep the default of C:\Program Files\Globalscape\Mail Express.
Click Next. The Choose Attachment Folder page appears.
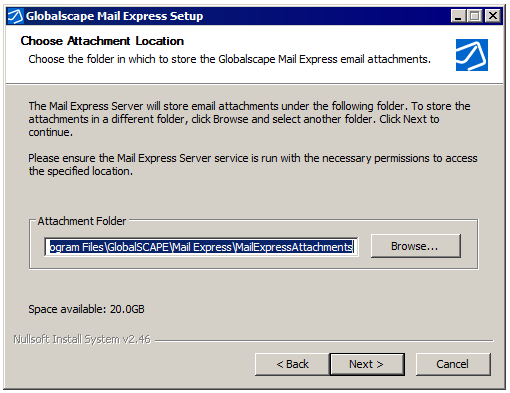
Specify a location in which to store file attachments, or keep the default of C:\Program Files\Globalscape\Mail Express\MailExpressAttachments. This folder potentially requires a large amount of available space.
|
Using a UNC path to network locations requires running the Mail Express Server Windows service under a true user account instead of Local System. By default, Local System account does not have access to network paths, and giving it access is not recommended. Do not use a mapped drive for the file storage location. |
Click Next. The Choose Start Menu Folder page appears.
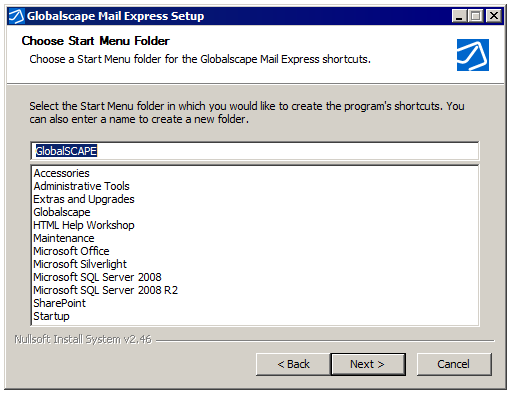
By default, the Mail Express Start menu shortcut is installed in Globalscape > Mail Express.
Click Next. The Mail Express Server Administration Account page appears.
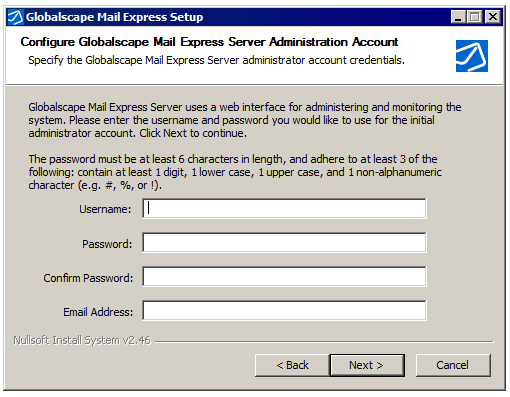
In the Username box, provide a username (1-256 characters) to use when administering and monitoring Mail Express Server. The username is case-sensitive.
|
Do not use an Active Directory (AD) username as the Mail Express administrator account, as this may cause later collisions between internal Mail Express accounts and AD accounts. |
In the Password and Confirm Password box, provide a password to use when administering and monitoring Mail Express Server. The password cannot be blank, is case sensitive, should be between 6 and 128 characters, cannot contain quotation marks, must contain at least three different characters of the following types: uppercase letters, lowercase letters, numbers, special characters (e.g., #, %, ^), cannot be any of the following keywords: password, admin, administrator, sa, or sysadmin and must comply with the computer's Windows account password policy (local or domain policy) for "Minimum password length" and "Password must meet complexity" items. To view the policy, click Start > Run, and then type secpol.msc. The Local Security Policy snap in appears. Under Security Settings, expand Account Policies, and then click Password Policy. Right click the policy, and then click Properties to view the details and to enable, edit, or disable the policy.
|
Choose and type the password carefully; if you do not know your password at initial login, you will not be able to log in and will have to uninstall and then reinstall the application. After you log in to the server, you will have the opportunity to change the password and to create other administrator accounts. |
In the Email Address box, provide the email address that will receive Mail Express administration email notifications. Be sure to verify the email address so that Mail Express can email you if you need to reset the password.
Click Next. The Configure EFT Connection Settings dialog box appears. (This page of the wizard only appears if you are using the EFT installer to install Mail Express.)
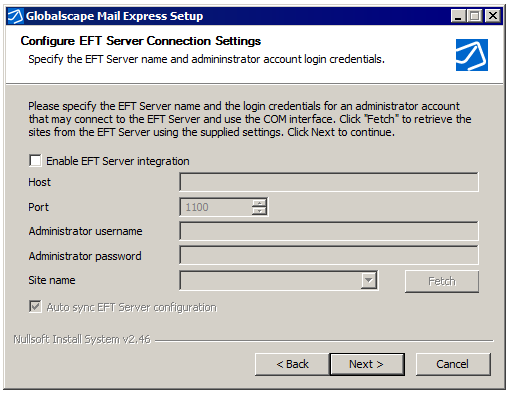
The Enable EFT Server integration check box is selected by default. Clear the check box if you do not want to integrate Mail Express with EFT.
In the Host box, specify the IP address or host name of the EFT service. If you are installing Mail Express on the same computer, the IP address is completed for you (127.0.0.1).
In the Port box, specify the EFT administration port (1100 by default). (If EFT is not installed on the same computer as Mail Express, you must turn on remote administration in EFT.)
In the Administrator username and Administrator password boxes, provide the EFT administrator login credentials. (The administrator credentials must have at least "Site admin" privileges in EFT.)
Next to the Site name box, click Fetch to retrieve the name of the Site(s) configured with the settings you have provided. The installer will retrieve all Sites that fit the configuration. Click the list to specify the Site that you want to use with Mail Express.
The Auto sync EFT configuration check box is selected by default. Clear the check box if you prefer to update configuration manually.
Click Next. The Choose Database Server page appears.
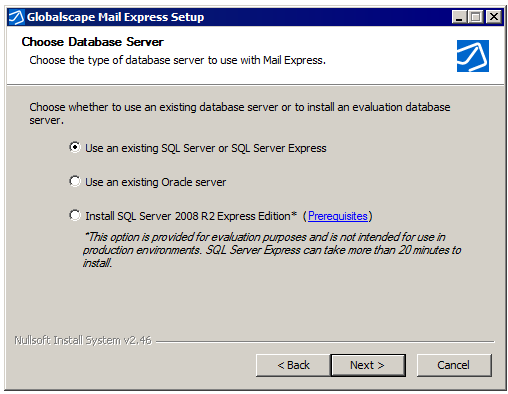
Choose whether to install the evaluation database or to use an existing database, and then click Next
Install SQL Server 2008 R2 Express Edition—Click Install SQL Server 2008 R2 Express Edition, and then click Install. (The Next button changes to Install if you choose this option.) Skip to step14.
Use an existing Oracle server—Click this option to connect to an Oracle database and configure the Mail Express Server to use the database. You will need to provide the installer with the database connection information and privileged user account credentials.
Use an existing Use an existing SQL Server or SQL Server Express—Use this option to have the installer initialize an existing SQL Server or SQL Server Express database and configure the Mail Express Server to use the database. You should use this option if you have previously used the Mail Express Server Installer wizard to create a database or you have manually created the database and database user account for use by the Mail Express Server. You will need to provide the installer with the database connection information and privileged user account credentials.
If you click Use an existing Oracle server or Use an existing SQL Server or SQL Server Express, and then click Next, the Choose New or Existing Database page appears.
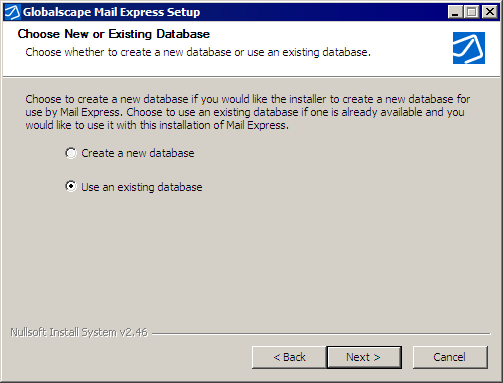
Specify whether to create a new database for Mail Express or use an existing database:
Existing database:
Click Use an existing database. The Configure Database Server Connection Settings page appears.
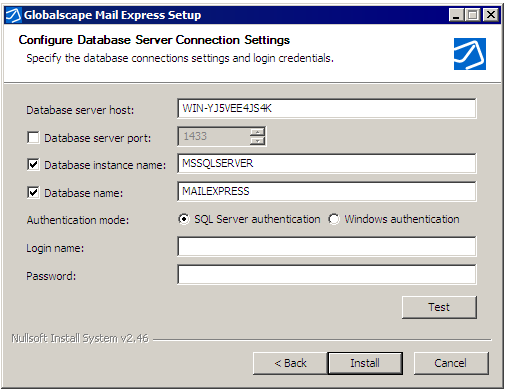
For an existing SQL Server database:
To create a new Mail Express instance in an existing EFT SQL Server 2008 R2 Express database, refer to "To create a new Mail Express instance in an existing EFT SQL Server 2008 R2 Express database."
Provide the connection information:
Database server host name (255 characters is the maximum length for a SQL Server hostname)
Database server port: This option is disabled by default and the value defaults to 1433 (the default SQL Server listener port). When enabled, the port value is required and must be between 1 and 65535. If you are not running the SQL Server Browser Service and not using the default port, then you need to specify the port.
Database instance name: This option is enabled by default; “MSSQLSERVER” is the default instance name for an SQL Server 2008 R2 installation. When enabled, the instance name is required and must be between 1 and 128 characters. If you have not specified a port but are running the SQL Server Browser service, then you need to specify the database instance name so that the browser service can be queried for the correct port.
Database name: This is selected and named MAILEXPRESS by default.
Authentication mode: Use SQL Server authentication when connecting as the privileged user account, which is the default. When SQL Server authentication is selected, you must specify the username and password for the privileged user account to use when connecting to the database. When Windows authentication is selected, the installer will use the active Windows user account when connecting to the database. (The "active Windows user account" is the account running the installer.)
Login name and password: The credentials Mail Express is to use to log in to the database. When Windows authentication is selected these fields are disabled.
(Optional) To verify that Mail Express will be able to connect to the database using these settings click Test.
If the connection is successful, click OK to dismiss the success message.
If the connection fails, click OK to dismiss the error message and then verify that you have entered the configuration correctly.
Click Install. Continue to the final step.
For an existing Oracle database:
On the Configure Database Server Connection Settings page, provide the database instance connection information (the fields are case sensitive):
Database server host name (255 characters is the maximum length for a SQL Server hostname)
Database server port: This field defaults to 1521 (the default Oracle listener port). When enabled, the port value is required and must be between 1 and 65535. If you are not running the Oracle listener service and not using the default port, then you need to specify the port.
Oracle service name: name for the running instance of the database.
Login name and Password: The account Mail Express uses to connect to the database server (with permission to create users, and create or alter users). These fields are case sensitive.
(Optional) To verify that Mail Express will be able to connect to the database using these settings, click Test.
If the connection is successful, click OK to dismiss the success message.
If the connection fails, click OK to dismiss the error message and then verify that you have entered the configuration correctly.
Click Install. Continue to the final step.
New database—Use this option to have the installer create a new database and database user account for Mail Express. The installer will initialize the database and configure the Mail Express Server to use the newly created database user account when connecting to the database. You will need to provide the installer with the database connection information and user credentials. The installer will use these credentials to create the new database, database user, and database objects for Mail Express.
Click Create a new database. The Configure Database Server Connection Settings page appears.

To create a new Mail Express instance in an existing EFT Server SQL Server 2008 R2 Express database:
In the Configure Database Server Connection Settings page, provide the EFT Server Database server host name and Database instance name (GLOBALSCAPE), and then click Windows authentication and Test. If connection to the database is successful, click Next to configure the Mail Express database settings, as shown below.
For a new SQL Server database:
On the Configure Database Server Connection Settings page, provide the database instance connection information:
Database server host name (255 characters is the maximum length for a SQL Server hostname)
Database server port: This option is disabled by default and the value defaults to 1433 (the default SQL Server listener port). When enabled, the port value is required and must be between 1 and 65535. If you are not running the SQL Server Browser Service and not using the default port, then you need to specify the port.
Database instance name: This option is enabled by default and the value defaults to “MSSQLSERVER.” When enabled, the instance name is required and must be between 1 and 128 characters. If you have not specified a port but are running the SQL Server Browser service, then you need to specify the database instance name so that the browser service can be queried for the correct port. “MSSQLSERVER” is the default instance name for an SQL Server 2008 R2 installation.
Authentication mode: Use SQL Server authentication when connecting as the privileged user account, which is the default. When SQL Server authentication is selected, you must specify the username and password for the privileged user account to use when connecting to the database. When Windows authentication is selected, the installer will use the active Windows user account when connecting to the database. (The "active Windows user account" is the account running the installer.)
Privileged username and Privileged user password: The privileged database account, such as the "sa" account, has permission to connect to the database server, create users, and create or alter users. When Windows authentication is selected these fields are disabled. These fields are case sensitive.
(Optional) To verify that Mail Express will be able to connect to the database using these settings, click Test.
If the connection is successful, click OK to dismiss the success message.
If the connection fails, click OK to dismiss the error message and then verify that you have entered the configuration correctly.
Click Next. The Configure Database Settings page appears.
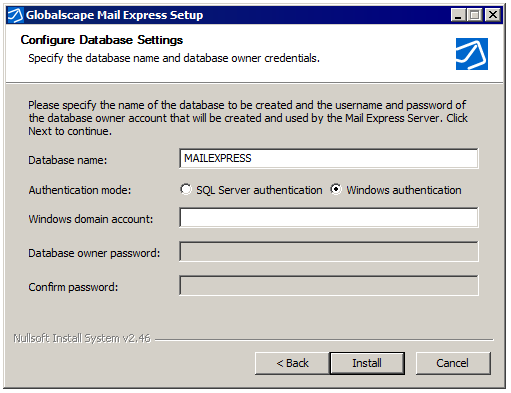
Provide the database name and owner credentials:
Database name: Name of the database; e.g., MAILEXPRESS
Authentication mode: When SQL Server authentication is selected, you must specify the username and password for the user account to use when connecting to the database. When Windows authentication is selected, the installer will use the account running the installer when connecting to the database.
Database owner username and Database owner password: The account credentials to be used by the Mail Express Server when connecting to the database. When Windows authentication is selected, these fields are disabled and you must enter the Windows domain\account name.
Click Install. Continue to the final step.
For a new Oracle database:
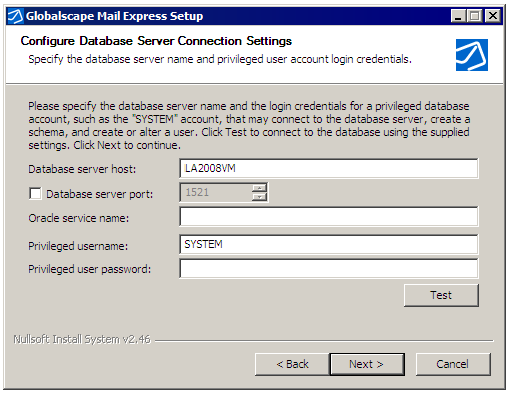
On the Configure Database Server Connection Settings page, provide the database instance connection information:
Database server host name (255 characters is the maximum length for a hostname)
Database server port: This option defaults to 1521 (the default Oracle listener port). When enabled, the port value is required and must be between 1 and 65535. If you are not running the Oracle listener service and not using the default port, then you need to specify the port.
Oracle service name: name for running instance of the database.
Privileged username and Privileged user password: The privileged database account, such as the "SYSTEM" account, has permission to connect to the database server, create users, and create or alter users. These fields are case sensitive.
(Optional) To verify that Mail Express will be able to connect to the database using these settings, click Test.
If the connection is successful, click OK to dismiss the success message.
If the connection fails, click OK to dismiss the error message and then verify that you have entered the configuration correctly.
Click Next. The Configure Database Server Connection Settings page appears.
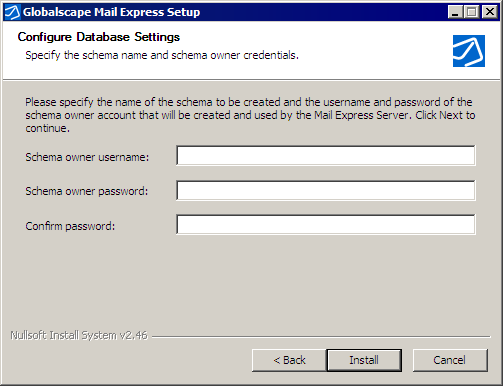
Provide the Schema owner username and Schema owner password ("schema" account credentials) that Mail Express will create and will be used by Mail Express.
Click Install.
Mail Express Server is installed, and then the Installation Complete page appears.
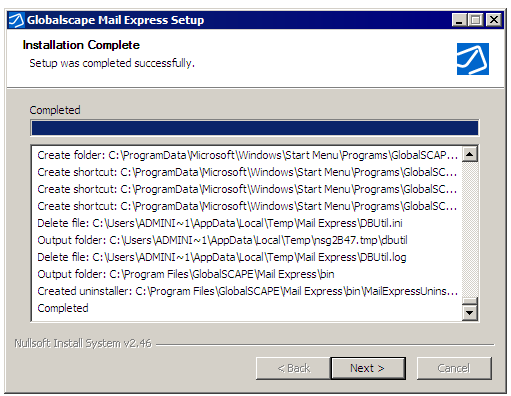
Click Next. The Finish page appears.
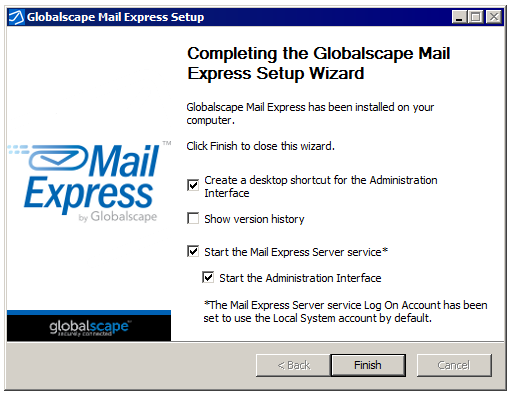
Before clicking Finish, select or clear the check boxes as needed:
Create a desktop shortcut for the Administration Interface—This check box is selected by default. The shortcut allows you to connect to the administration interface in your default browser.
Show version history—This check box is cleared by default. If you select the check box, when you click Finish, a text file of the version history appears in your default text reader (typically Notepad).
Start the Mail Express Server service—This check box is selected by default. If you do not want the service to start yet, clear the check box. You will not be able to open the administration interface if the service is stopped.
|
The Mail Express Server service Log On Account is set to use the Local System account by default. If you want to run the service under a true user account, rather than the Local System account, clear the Start the Mail Express Server service check box and change the Logon Account prior to starting the service. |
Start the Administration Interface—This check box is selected by default. If you have opted to start the Mail Express Server service, this option will launch your default web browser and open the Mail Express Administration Portal.
After you click Finish, if you chose to start the administration interface, the Welcome to Mail Express Administration page appears in your default web browser. Refer to Initial Configuration of Mail Express Server for instructions for initial setup. (Both the username and the password are case sensitive.)
The installer log (Installer.log), EULA (License.txt), and release notes (README.txt) are stored in the root of the Mail Express installation folder (by default C:\Program Files\Globalscape\Mail Express).