Staging a Product
Staging a product allows you to transfer the objects now and load them onto the IBM i at a later time. This is a particularly useful option if you want to move your product save files from one system to multiple systems on the IBM i. Note: If you choose to stage the objects, the files are stored in the HSLOADMGR library. You cannot specify a different library name.
- In the Navigation Pane, under Deployment Manager, click Products. If the menu is hidden, hover over the Navigation Pane to expand it.
- Click
 Show Actions for the product you want to work with.
 - Click Stage.
- On the Select Systems screen, choose the systems on which you want to stage the product.
- Click Add.
- If you want to change the details of the install, you have a couple options:
- Click Quick apply settings to all systems if you want to specify a specific port and user profile for the systems you've selected. This saves time if you're staging the product on multiple systems. Then, continue to step 7.
- Click Expand to view all systems or click
 Next to the specific system you want to view. Then, continue to step 7.
- Apply settings to your systems:
- Enter a port number if you want to change the FTP port number to something other than the default of 21.
- If you want to use FTPS (FTP over SSL) during the file transfer, select Yes from the drop-down. The default FTPS secure port is 990.
To change the SSL port number to the required secure port for your environment, click OK when asked if you want the default (990), then enter a new number in the Port field.
- If you want to use a user profile other than the assigned profile, select Enter user profile from the Type drop-down, then enter a new user name and password.
- (Only available for certain products) Enter the name of the destination ASP group, if it's different from the default of *SYSBAS.
- Click Stage.
- Review the confirmation panel, then click Stage again.
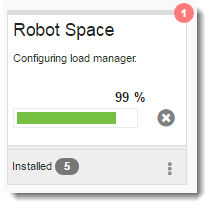
When the staging process starts, you're returned to the Products page. A progress bar appears on the product you're staging so you can follow the stage in real time.
Follow these steps to load it onto the system you identified above.
- Log on to the IBM i using the user profile and password you specified in step 7 above.
- Execute the following command:
HSLOADMGR/HSWRKLOAD
- On the Work with Loads panel, you have several options:
- Option 1, Load: Loads the product onto the IBM i. You can toggle F11 to see the status and save file name of the load.
- Option 2, Run pre-checker: Determines whether or not a product installation or conversion will complete successfully on your IBM i system.NOTE: The pre-checker is only available for certain products. Refer to the product’s specific installation, conversion, or upgrade instructions for more information.
- Option 4, Delete: Removes the save file from the HSLOADMGR library.
- Option 8, Submit: Submits the product for a silent install (batch job). When the Submit Job panel displays, review the information and press Enter.NOTE: We recommend you submit only one batch job at a time.
- Enter an option next to the product you want to load, then press Enter.