Intermapper Flows Settings
You can use the Flows Settings window to view and edit settings for Intermapper Flows.
To open the Flows Settings window:
Click the Settings icon in the top-right corner of the Flows window.
The following tabs are available in the Settings window:
- Exporters - To select which exporters you want to collect from.
- Appearance - To select a coloring theme for protocols and hosts.
- Preferences - To set parameters that control behavior of Intermapper Flows.
- Advanced - To set performance-related parameters, the path to your database, and a database size.
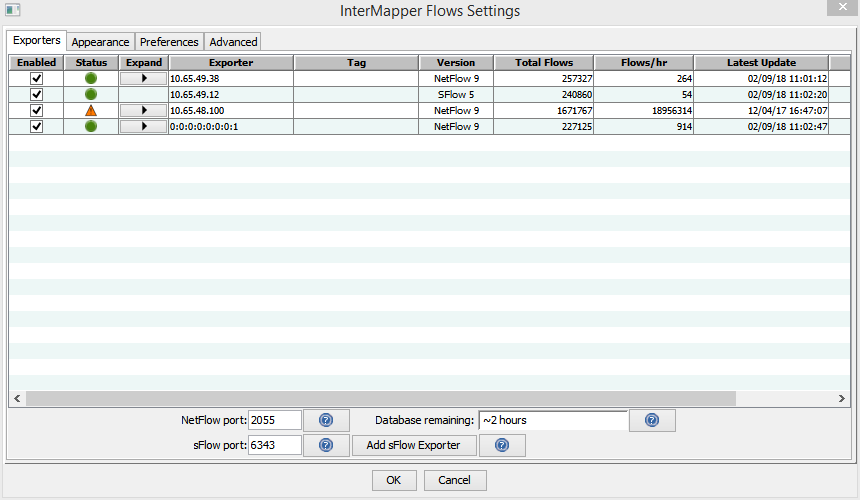
Exporters tab
You can use the Exporters tab to select the exporters from which you want to collect data.
Selecting and Adding Exporters
The Exporters tab lists all available exporters.
To select exporters:
- Select or clear the Enabled check box to enable or disable collection and analysis of data from an exporter.NOTE: NetFlow exporters are displayed in the list automatically if they are properly configured. The exporter must be configured to send data to Intermapper Flows.
- Click Add sFlow Exporter to add an sFlow exporter. The Enter sFlow Information window appears as shown below. Enter information about the exporter, then click OK. Intermapper Flows sends SNMP commands to the exporter to turn on sFlow.
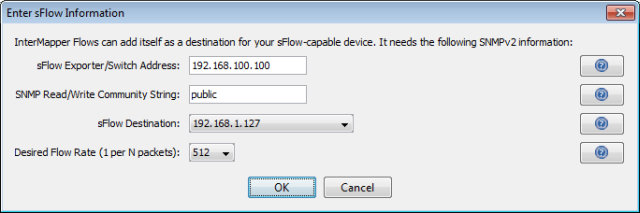
Do the following:
- sFlow Exporter/Switch Address - Enter the address of an SNMPv2-capable sFlow exporter.
- SNMP Read/Write Community String - Enter the community string for the exporter.
- sFlow Destination - The address of the Intermapper Flows collector. Your server might have multiple network devices, each with its own IP address. Intermapper Flows makes its best determination as to which IP address should be listed ad your sFlow collector, but it can guess incorrectly. If the exporter is not registered correctly, try a different IP address.
- Desired Flow Rate (1 per N packets) - Ask the exporter to send an sFlow update every N packets. The exporter might not be able to honor this request, so Intermapper Flows keeps track of the actual update rate as well.
Additional Columns
- Expand - Click the right arrow to expand an exporter to view information for all available interfaces. Click the down arrow to collapse the exporter's interface lines.
- Tag - Double-click to edit the tag for any exporter or interface. Tags are displayed in the Exporter/Interface menu in the Flows window. Intermapper Flows fills in these tags, if available, from every device.
- Version - The NetFlow or sFlow version used by the exporter.
- Total Flows - The total number of Flow records exported.
- Flows/hr - The average flows-per-hour from this exporter.
- Latest Update - The date and time of the last update from this exporter.
- First Report - The date and time of the first report from this exporter.
Additional Boxes
- NetFlow port - Intermapper Flows listens for NetFlow v1, v5, v7, and v9 on this port. 2055 is the default port, but ports 9555 and 9995 are sometimes used.
- Database remaining - Each exporter has an estimated flow rate, updated the last time it reported. The combined rate is used to calculate an estimated database capacity.
- sFlow port - Intermapper Flows listens for sFlow on this port. The default port is 6343. This must be different from the NetFlow port. Make sure that this port is not firewalled from any of your exporters.
- Add sFlow Exporter button - Click this button to add an sFlow exporter. The Enter sFlow Information window appears.
Appearance Tab
You can use the Appearance tab to select a coloring scheme for charts in the Flows window.
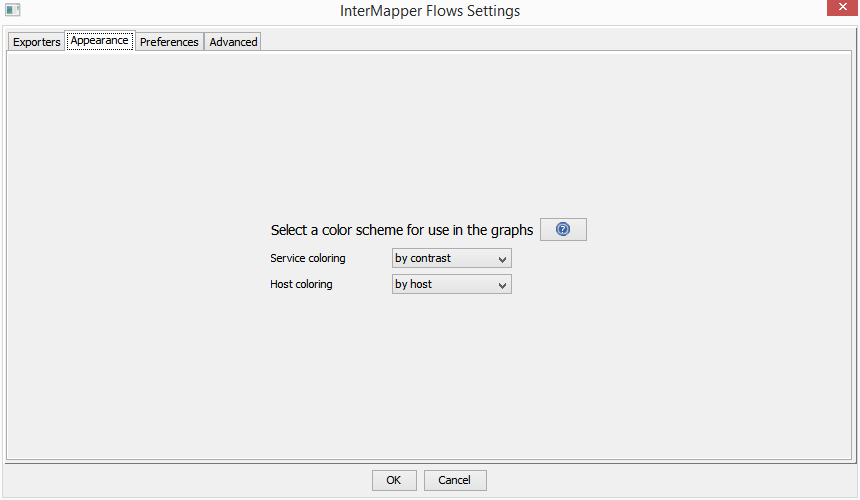
To select a color scheme:
- Service coloring - Select a scheme to use for Services.
- Host coloring - Select a scheme to use for Hosts.
The following color scheme strategies are used for charts and graphs:
- By port or host - Colors are fixed for each port or host. This means the color for a port or host is the same in every chart when that port or host is displayed. Because of the limited number of colors, it is possible for two adjacent hosts in a chart to have the same color.
- By contrast - Chart colors are assigned in the same order for each chart. This provides greater contrast, but a single host or port might be colored differently in each chart or in the same chart at different times.
Preferences Tab
You can use the Preferences Tab to set local preferences for Intermapper Flows.
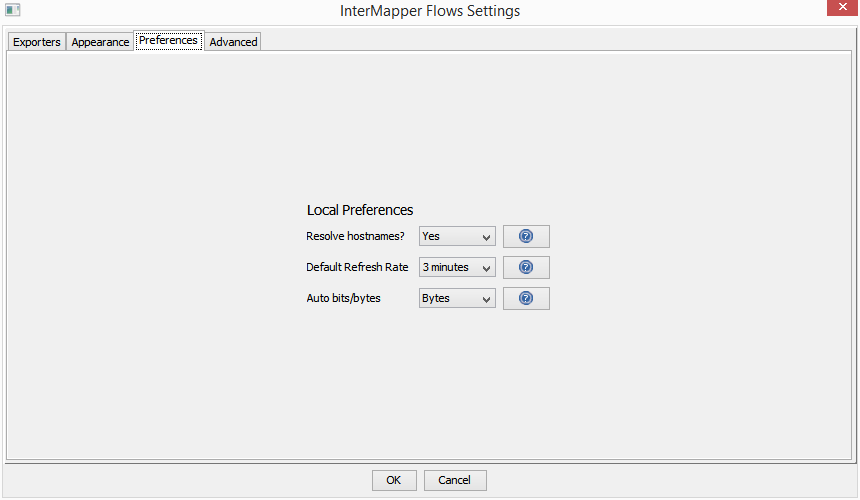
Local Preferences
- Resolve hostnames? - Click Yes to resolve IP addresses to show host names. Click No to display only IP addresses. This can improve performance and security.
- Default Refresh Rate - Select a default refresh rate for a new Flows window. To override this setting in any Flows window, select a different refresh rate from the Auto-update menu.
- Auto bits/bytes - Select a default display setting of Bits or Bytes for any new Flows window. To override this setting, select a different setting from the Graph Scale menu in the upper left of the Stack Chart.
Advanced tab
You can use the Advanced tab to set performance- and database-related parameters.
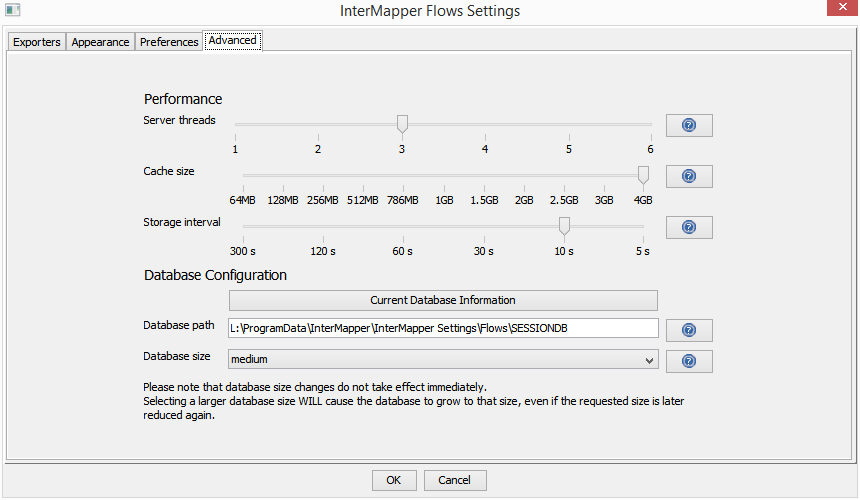
Performance Settings
- Server threads - The number of available query threads to start. In practice, this number can be small. It is the number of concurrent requests that Intermapper Flows handles without queuing requests. A good rule of thumb for this value is the number of processors in the server, plus 1. For example, a quad-core server might use 5 threads.
- Cache size - The size of the memory session cache. Session records are written to disk regularly, but to speed up queries (for graphs and tables), some are cached in memory. It is safe to set this close to the memory capacity of the server.NOTE: - Larger values for the session cache increases server startup and restart times as records are loaded from disk. A cache larger than 1.5Gb requires a 64-bit processor.
- Storage interval - The number of seconds between disk commits. Committing more often can decrease performance by using physical media more often. Committing less often requires more session cache to avoid losing data.
Database Configuration Settings
- Database path - The path to an existing directory. The server must have read and write access to this directory. NOTE: If you change the database path, the existing database is not copied to the new location, however, you can do this manually while the service is not running. The old database is not deleted.
-
Database size - Available sizes as shown below (calculated from the current flow rate):
Size # Session Records Size on disk tiny 3000 ~400 KB small ~8 million ~1000 MB medium 80 million ~10 GB large 800 million ~100 GB very large 2 billion ~256 GB
-
Current Database Information - Shows the maximum size of the database, the number of records in the database, and the number of days when those records are collected.
