Users and Groups
You can use the Users panel of the Server Settings window to add and edit users and groups, to assign users to groups, and to assign privileges and access to maps.
Users Panel
To maintain the list of users and groups allowed to access the various servers:
Do any of the following:
- Click New User to add a user.
- Click New Group to add a group.
- Select the user or group and click Remove to remove a user or group.
- Select the user or group and click Edit to edit a user or group's information.
- Select the Use IMAuth Server check box to use the Intermapper Authentication server.
- Click Configure to open the Intermapper DataCenter to set up the IMAuth Server.
- Click Use Remote Auth Server to use an Authentication Server on another computer.
- Select a Default group for externally authenticated users from the menu.
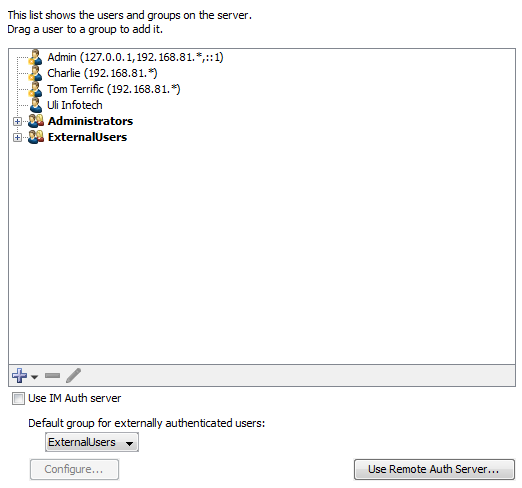
The following example shows a typical user and group configuration in the Users panel of the Server Settings window:
What Are Users and Groups?
-
User
An individual identified by a user name and password or identified automatically from a client IP address or range.
-
Group
A collection of users. Groups can be granted permissions to access certain servers or maps and can be granted different levels of access for a server or map.
Creating a New User
- Click the plus sign + and select Add User. The User Information dialog is displayed.
-
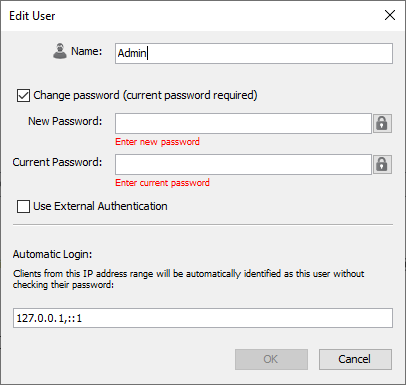
In the Name and Password text boxes, do one of the following:
- Type the name and password for the new user.
- In the Automatic Login text box, omit the password and enter an IP address range.
- Select the Use External Authentication check box and type the username used by the external authentication server. No password is necessary; authentication is performed by the external authentication server.
How Automatic Login Works
- If a connection arrives from an address that matches an Automatic Login address, the person is automatically logged in as the specified user.
- If you supply both the password and automatic login address, the person is logged in automatically from the specified address, but must supply a password when connecting from other addresses.
- Automatic login addresses should be unique between users. The resulting login name is not guaranteed if two automatic-login addresses are the same.
- For more information see Controlling Access To Your Server.
Users in Intermapper need to have passwords that meet the following requirements:
-
The passwords are at least 12 characters in length (after multiple spaces are combined).
-
The passwords can not be longer than 128 characters.
-
The passwords can be changed. If the user has a password already, the current password is required to change the password.
-
Spaces can not be at the beginning or end of the password.
-
By clicking the lock icon, the user can choose to either temporarily display the password as plain text or masked text.
Editing User Information
To edit the information about a user:
- From the user list, select the user you want to edit.
- Click Edit or double-click the user. The User Information dialog is displayed, containing information about the selected user.
Managing Users and Groups
A group is a collection of users, all of whom have the same set of permissions.
To create a new group:
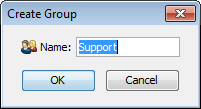
- Click the plus sign + and select Add Group. The Group Information dialog is displayed.
- In the Name text box, type the name of the new group.
- Click OK. The new group is displayed in the User list.
Adding and Removing Group Members
To view the users in a group:
Click the plus sign (+) to the left of the group to expand it.
To add a user to a group:
Click and drag the user's entry to the group entry. The user is displayed in the list of users for that group.
To remove a user from a group:
- Expand the group list to view the users in the group.
- Click the user you want to remove and click Remove. A confirmation dialog is displayed.
- Click OK. The user is removed from the group.
Removing Users and Groups
To delete a user or group completely:
- Select the user you want to remove.
- Click Remove. A confirmation dialog is displayed.
- Click OK to confirm. The user or group entry is removed from the list.
- The Administrators group is always present and cannot be removed.
- The FullWebAccess group is defined by you. If present, its members can view all web pages and can acknowledge devices through the web server.
- The FullLogAccess group is defined by you. If present, its members can view all log files.
- The FullTelnetAccess group is defined by you. If present, its members have full access to the Telnet server.
Configuring the Intermapper Authentication Server
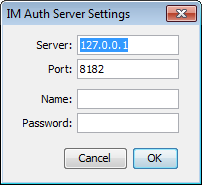
Click Use Remote Auth Server to connect to an Intermapper Authentication Server installed on a different machine from Intermapper. For more information, see Authentication Server.
Importing Users and Groups
Click Import to upload a file containing data for users and groups. For information on importing data, see Importing Data. For information on the user and droup data structure, see User Attributes.