Connections for Integrations
The JAMS Connection Store lets you save connection information for certain integrations. You can then specify the Connection in the Job.
Adding an Oracle Connection for Banner
This option is available only if the Oracle Integration has been installed. See Configuring the OracleStoredProc Execution Method for more information.
Ensure you have created a Credential within JAMS that contains the credentials for connecting to the Oracle database.
- Click Connection Store from the Shortcuts menu.
- Click +.
- In the Name field, enter the name, such as OraDatabase.
- In the Description field, enter a description.
- In the Type of Connection field, select Oracle.
- Click Ok.
NOTE: You can also change the Type of Connection on the Properties tab. If you change it, the Property values are maintained if they exist in the new Connection Type.
- Prepare your Oracle Connection String to the Oracle Database. Within the following string, replace the following:
HOST with the Banner\Oracle database host name.
SID with the Banner\Oracle database service name.
(DESCRIPTION = (ADDRESS = (PROTOCOL = TCP)(HOST = <HOST>)(PORT = 1521))(CONNECT_DATA = (SERVICE_NAME = <SID>)));
NOTE: After updating the HOST and SID, copy the Connection String because you need this to update the Connection String field. Use tnsnames.ora as the reference to look up the required values for the Connection String. - Click the Properties tab.
- Under Oracle, click the Connection String field. The Oracle Connection dialog is displayed.
- In the Data Source field, paste the Connection String.
NOTE: Do not include Data Source = in the Connection String as JAMS automatically inserts it.
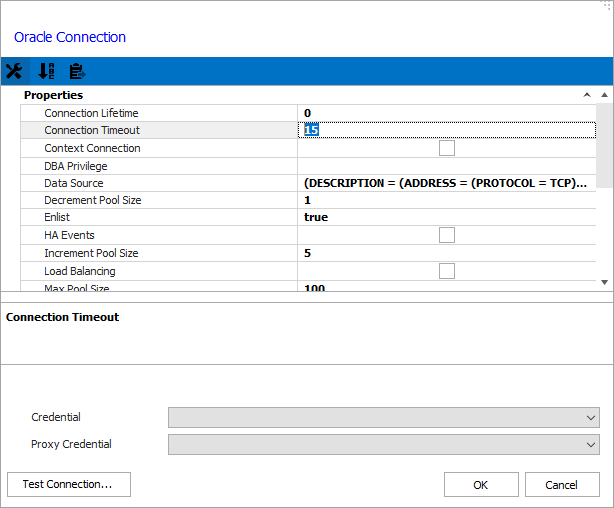
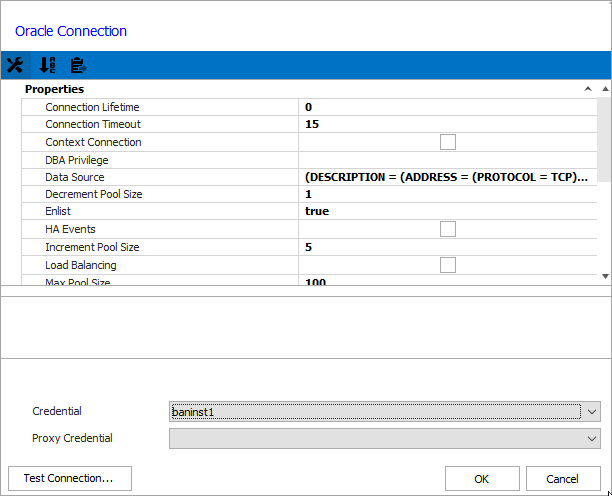
- In the Credential field, select a Credential in JAMS.
- Click Test Connection to verify the connection. If the connection is unsuccessful, a red X is displayed on the Test Connection button. You can hover your cursor over it to get details about the error.
- Click OK.
- Click the Security tab.
- Review the permissions for this Connection.
NOTE: Ensure the Submit permission is selected for user accounts that will use this Connection.
- Click Save and Close.
Banner Connection
You can define the Banner Connection in the Banner Connection field. See Banner in JAMS for more information.
Adding an SAP Connection
Creating a Connection for SAP lets you configure the details once and reuse the connection within multiple Jobs and Sequence Tasks. Two connection options are available for SAP.
SAP (Group/Server Selection)
Select the SAP (Group/Server Selection) option if your site has two or more servers and you are using load balancing.
Before adding an SAP Connection, ensure a credential has been configured within JAMS that contains the information SAP username and password for connecting to the SAP Server.
- Click Connection Store from the Shortcuts menu.
- Click +.
- In the Name field, enter a name for the connection.
- In the Description field, enter a description for the connection.
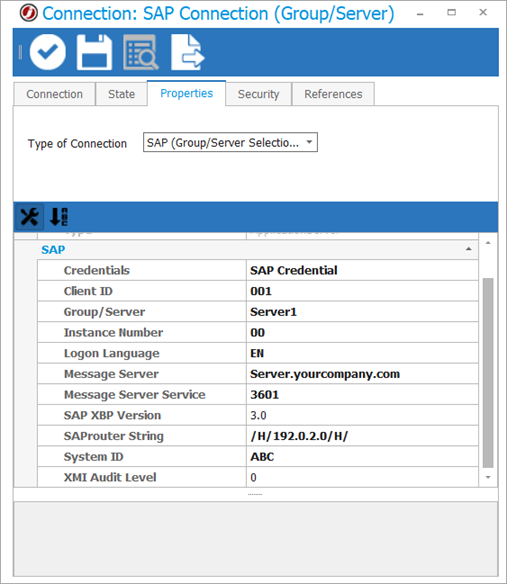
- In the Type of Connection field, select SAP (Group/Server Selection).
- Click OK.
- Click the Properties tab.
- On the Properties tab, do the following:
- In the Credentials field, enter the SAP credential that was created in JAMS.
- In the Client ID field, enter the three-character ID. The values can be between 000 and 999.
- In the Group/Server field, enter the appropriate server.
- In the Instance Number field, enter the two-character ID. The values can be between 00 and 99.
- In the Logon Language field, enter the two-letter language code to be used for connecting to SAP.
- In the Message Server field, enter the appropriate server.
- In the Message Server Service field, enter the appropriate server service.
- In the SAP XBP Version field, enter the version of XBP that SAP is using. By default, version 3.0 is used. Setting this field allows JAMS to connect to older versions of SAP that use version 2.0.
- In the SAProuter String field, enter the SAP router string.
- In the System ID field, enter the three-character SAP system ID that was defined during SAP installation.
- In the XMI Audit Level, field enter the number for the Audit Level. This determines the level of detail logged in SAP.
- Click the Security tab.
- Review the permissions for this Connection.
NOTE: Ensure the Submit permission is selected for user accounts that will use this Connection.
- Click Save and Close.
SAP (Custom Application Server)
Select the SAP (Custom Application Server) option if the connection to your SAP system will be done trhough the Gateway Server. Before adding an SAP Connection, ensure a credential has been configured within JAMS that contains the username and password for connecting to the SAP Server.
- Click Connection Store from the Shortcuts menu.
- Click +.
- In the Name field, enter a name for the connection.
- In the Description field, enter a description for the connection.
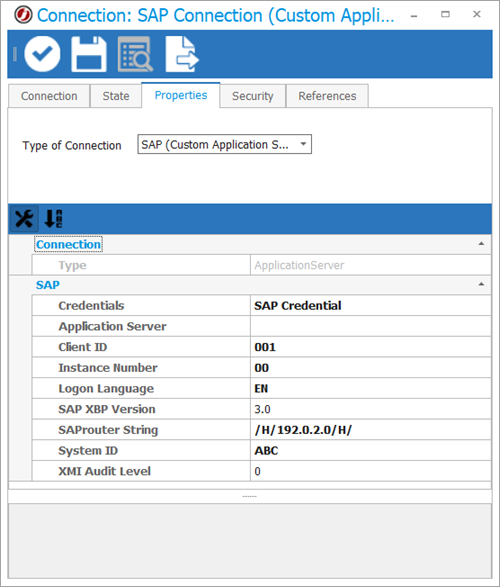
- In the Type of Connection field, select SAP (Custom Application Server).
- Click OK.
- Click the Properties tab.
- On the Properties tab, do the following:
- In the Credentials field, enter the SAP credential that was created in JAMS.
- In the Application Server field, enter the name of the SAP server that will be used for the connection.
- In the Client ID field, enter the three-character ID. The values can be between 000 and 999.
- In the Instance Number field, enter the two-character ID. The values can be between 00 and 99.
- In the Logon Language field, enter the two-letter language code to be used for connecting to SAP.
- In the SAP XBP Version field, enter the version of XBP that SAP is using. By default, version 3.0 is used. Setting this field allows JAMS to connect to older versions of SAP that use version 2.0.
- In the SAProuter String field, enter the SAP router string.
- In the System ID field, enter the three-character SAP system ID that was defined during SAP installation.
- In the XMI Audit Level, field enter the number for the Audit Level. This determines the level of detail logged in SAP.
- Click the Security tab.
- Review the permissions for this Connection.
NOTE: Ensure the Submit permission is selected for user accounts that will use this Connection.
- Click Save and Close.
SAP Connection
You can define the SAP Connection in the SAP Connection field. See Using SAP Execution Methods to Run JAMS Jobs for more information.