Paladin Setup and Configuration Guide
Paladin is a powerful event alerting application that integrates with your organization’s network.
Use this guide to get specific details on how to download, register and configure Paladin to define a customized and effective monitoring and alerting environment for your organization.
Installing and Configuring Paladin
To get Paladin up and running, users at minimum need to install Paladin, Authenticate and Complete their User definition, and Download and run the Paladin Certificate Installer on the JAMS Server.
Installing JAMS and Paladin
To get started, you will need to download and install JAMS. After confirming the Paladin license purchase with your account representative, download the production ready JAMS installer from the support site.
Next, Install JAMS and make sure that the JAMS Integration Pack for Paladin Event Handling has been installed. If not, re-run the installer and enable the checkbox for Paladin on the Integration Packs step. Note that unchecking any previously installed components will uninstall those items. For a detailed information on how to install JAMS, please refer to the JAMS Installation Guide.
Registering Paladin
As a part of the purchase, your company profile is created by the account representative, triggering an email invitation to register Paladin.
- Open the Email Invitation and click the Paladin link.
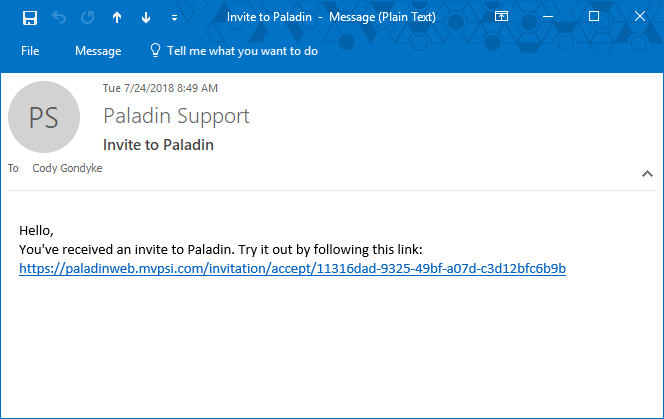
- A web page will open. Click Select Authorization to open the Auth0 popup and begin the authorization process for Paladin.
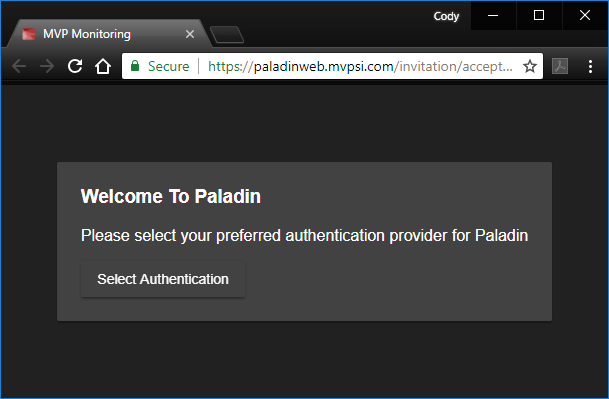
- In the Auth0 popup, click the Sign Up tab, then select from one of the authentication methods. Users have the option of social network credentials, or using a standard Email & Password with the Sign Up button.
In this example, Microsoft is used. Clicking the Microsoft button immediately takes the new user to the Microsoft Login page.
If the Email/Password option is used, a confirmation email will be sent to the listed email address. Users must follow the instructions in that email to verify their account.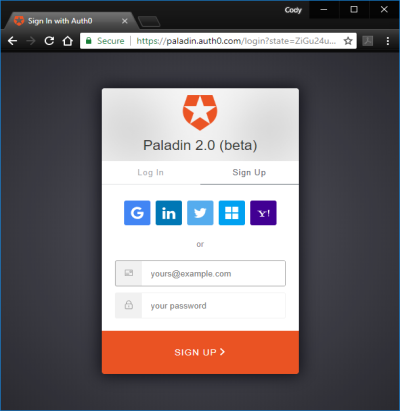
- Enter the credentials for the given authentication method, and resolve any additional dialog boxes that may appear.
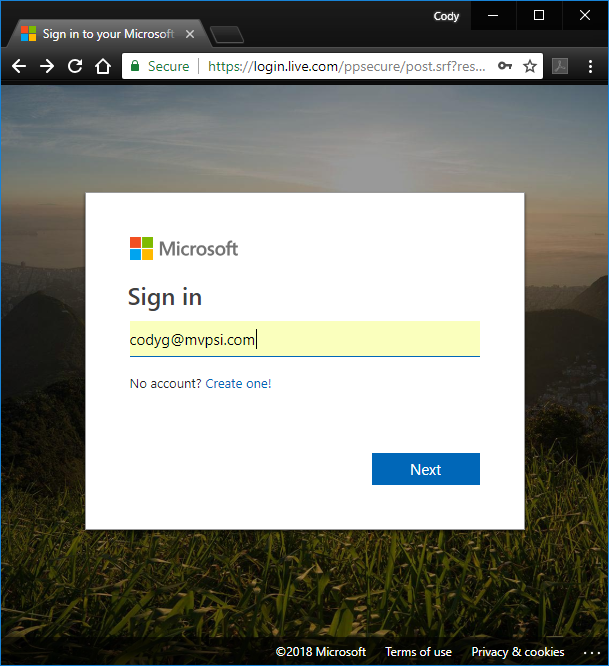
- With the verification process complete, users will be taken to the Paladin site, https://paladinweb.mvpsi.com/
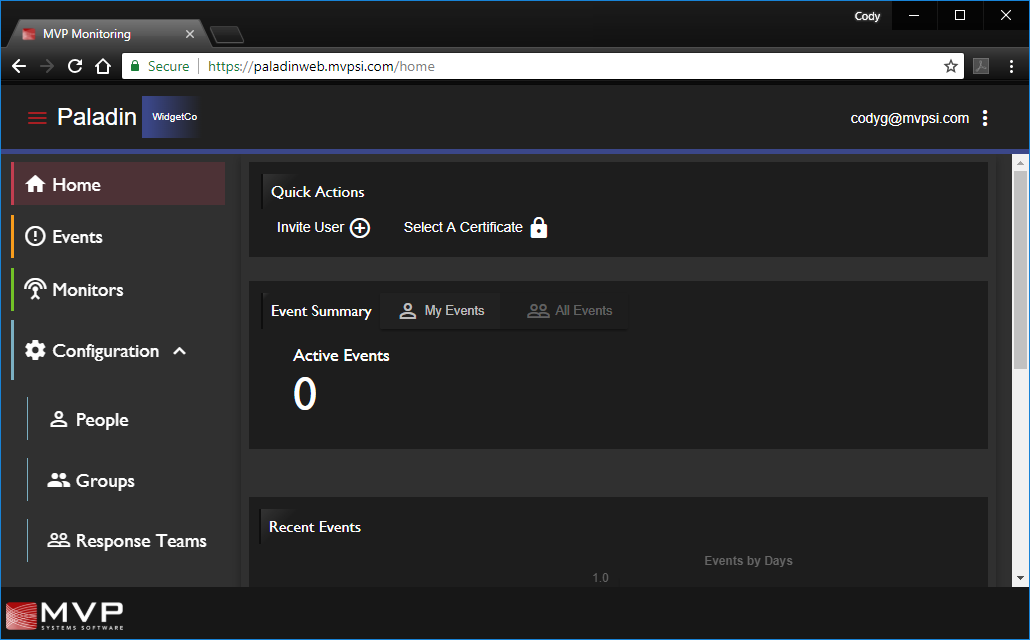
- On any first login, users should immediately complete their Paladin profile before navigating through or editing Paladin.
Completing the Paladin Profile
The first action any user should take in Paladin is to complete their Paladin Profile. Failure to complete the Paladin Profile may result in errors.
- From the Paladin Site, click the Vertical Ellipses in the upper right-hand corner. A drop-down will appear.
- Select the Edit Profile option from the drop-down list.
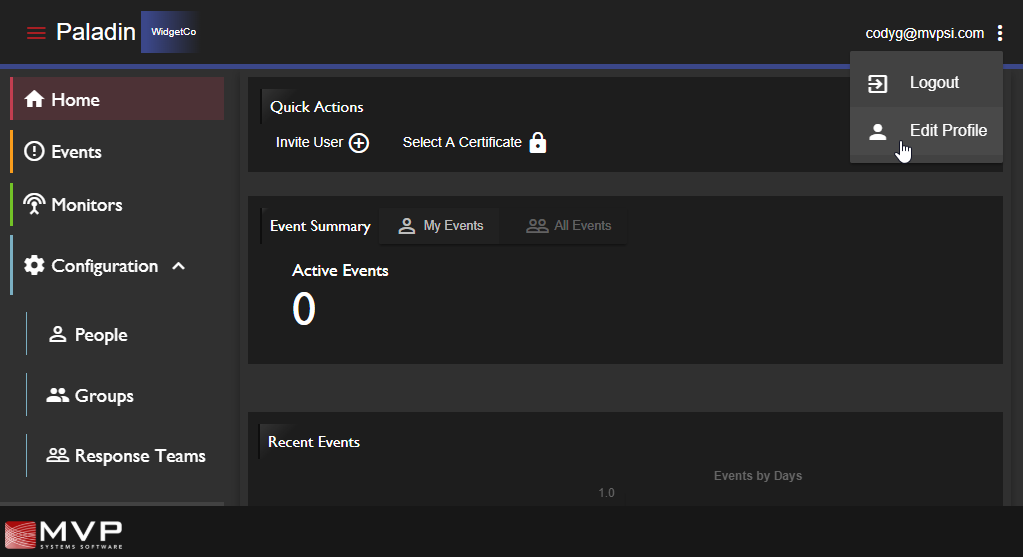
- A Profile Panel will appear. Click the Pencil icon to begin editing.
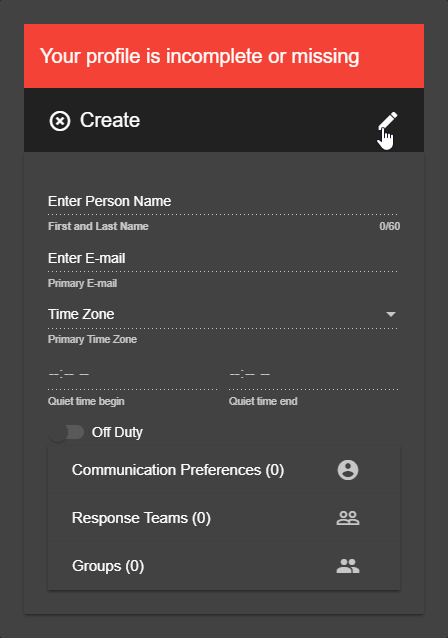
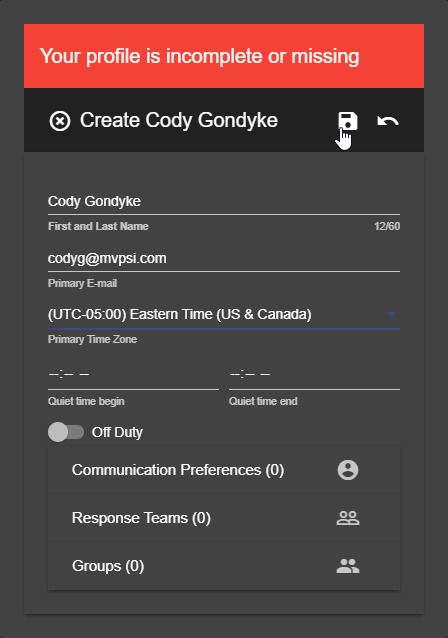
- Set Profile options as desired. At minimum, Name, E-Mail, and Time Zone are required for initial Paladin Profile configuration.
See the Managing Profiles and Inviting Users section for more information on Profile Properties. - With options set as desired, use the Save button to commit the changes.
Installing the Paladin Certificate
Paladin must be able to send and receive messages on port 443 to function properly. Ensure port 443 is open, then follow the instructions below to download and install the Paladin certificate.
- Navigate to the Paladin Home page, then click on Select a Certificate in the Quick Actions section.
- Select the certificate from the pop-up list, then use the Download button to download the Certificate Installer.
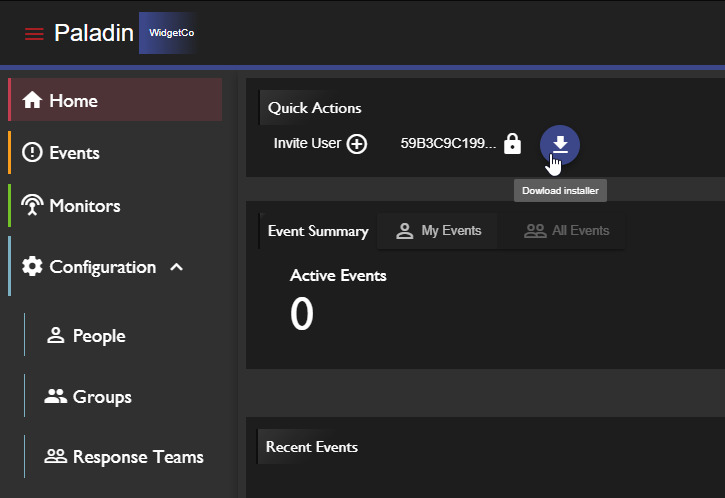
- Open the PaladinApiCertificateInstaller from the download location.NOTE: Users MUST run the installer on the JAMS Server.
- Read and accept the License Agreement, then click Install.
The Installer will add the Paladin certificate to the Local Computer's Personal Certificates.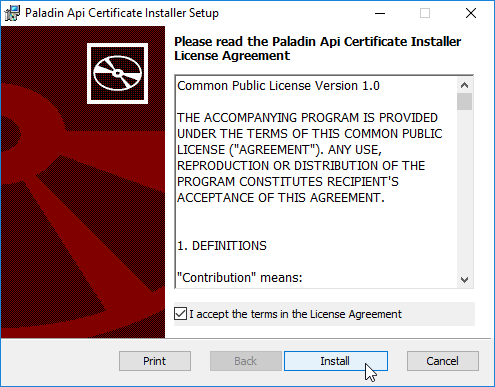
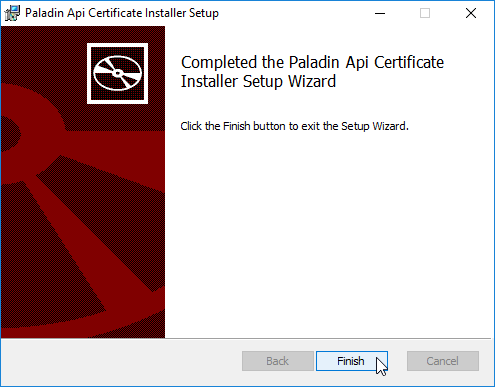
- Once the installer has completed, click Finish.
- Open the JAMS Client as an administrator on the JAMS Server.NOTE: If the JAMS Client was open when the certificate was installed, restart the JAMS Client.
- Open the Configuration shortcut, then select the Integrations tab to view the Paladin Integration Properties.
- Set the Certificate property to the Friendly Name of the Paladin Certificate, "ApiPFXCertificate_wixCert_0". Users that attempt to rename the Paladin Certificate must use their custom Friendly Name as the Certificate value.
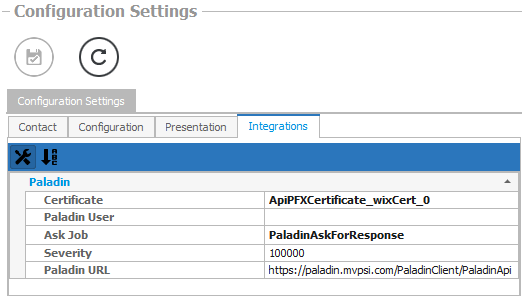
- Save the Certificate value change. Do Not edit any other Paladin Properties.
- JAMS is now ready to send Paladin alerts through the use of Paladin Event Elements.
Paladin Navigation
The Navigation Panel, located on the left side of the Paladin UI, contains a set of shortcuts for each Paladin module. Module shortcuts are displayed based on the Role assigned to the logged in user.
- Home is the splash screen for Paladin, and includes preconfigured items:
- Quick Actions - If users have proper permissions, they can invite new users directly from the Quick Actions Bar with the Invite User button.
- Event Summary - A list of currently active events. Users with proper permissions may resolve events directly from the Event Summary section.
- Recent Events - A graphical display of events that recently occurred, sorted by day and by week.
- Current Events - A graphical display of active events in the environment.
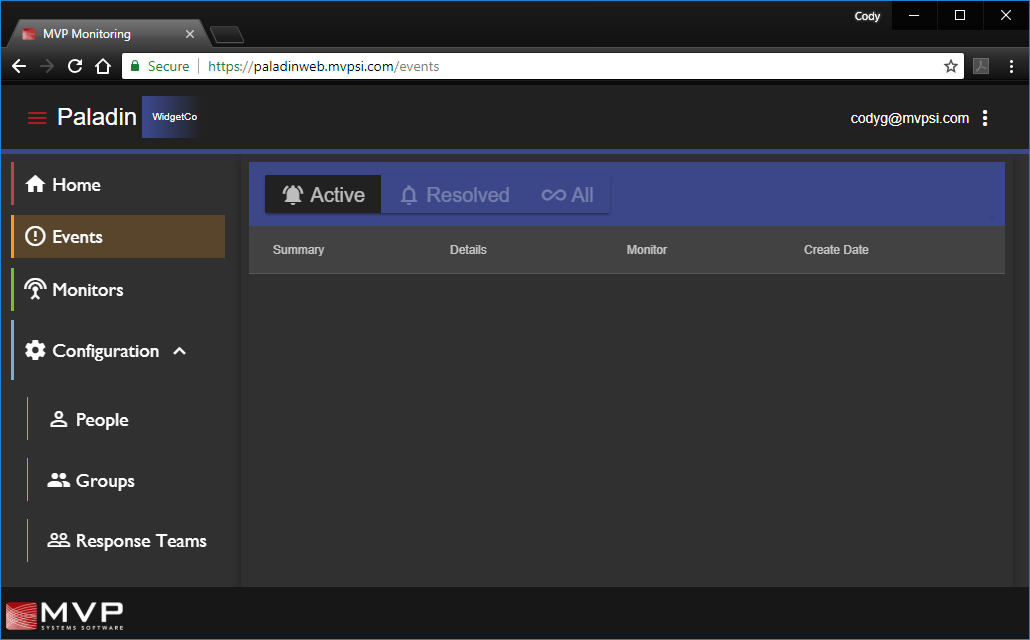
- Events is a list of any events in the environment. It can be filtered to show All, Active, or Resolved Events. Users with sufficient permissions can resolve Active Events from here.
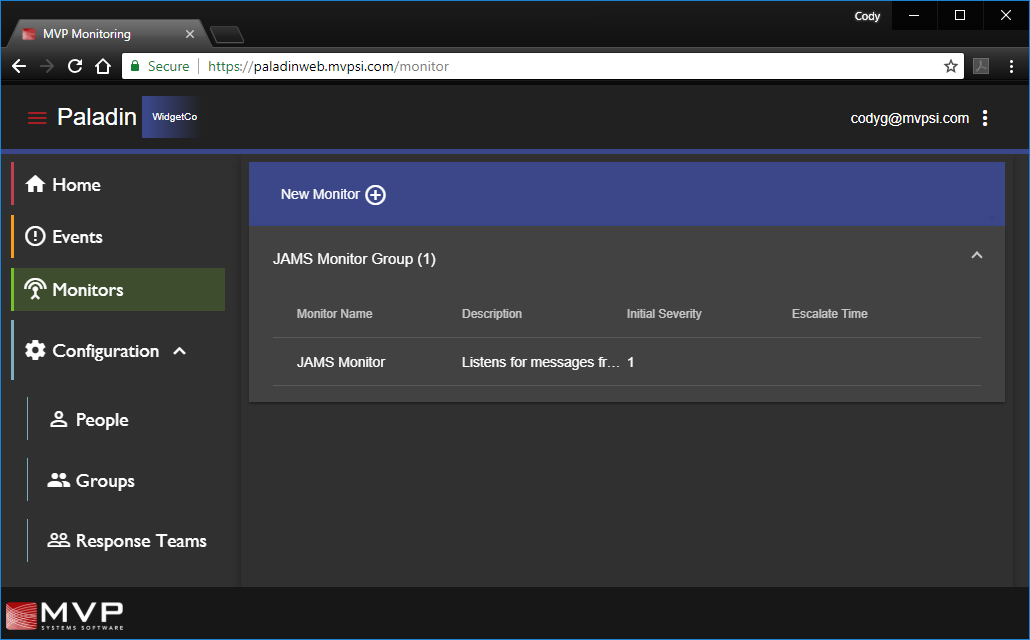
- Monitors contains a list of preconfigured monitors, sorted by group. Individual Monitors can be edited from this shortcut.
- Configuration is only available for Administrators. It contains sections to view, add, or edit company specific configuration, including:
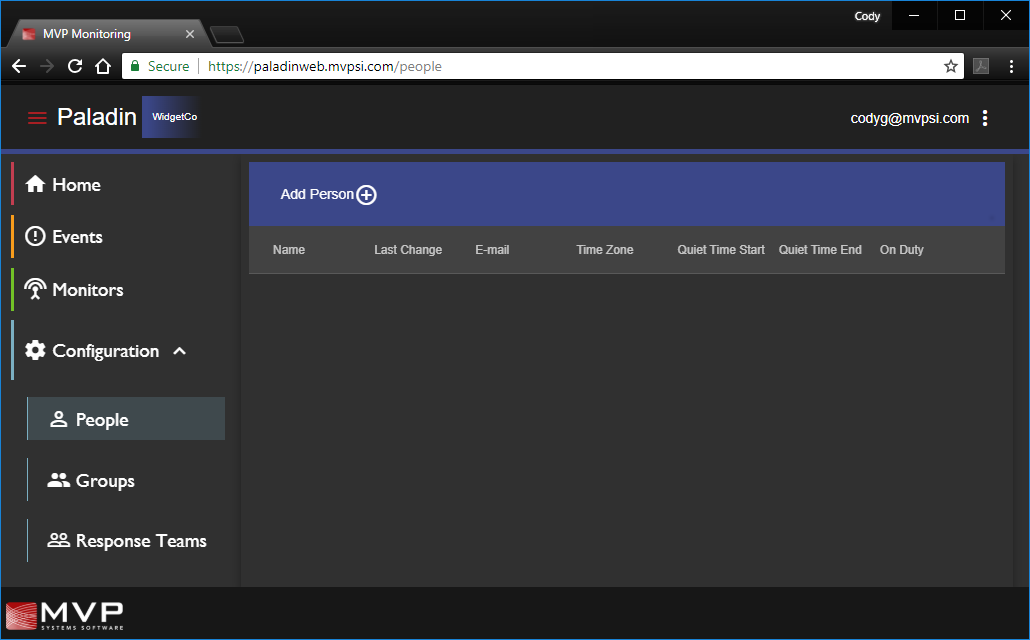
- People - People are the individuals in a company. The People shortcut allows Admins to view, add, or edit any people within their company.
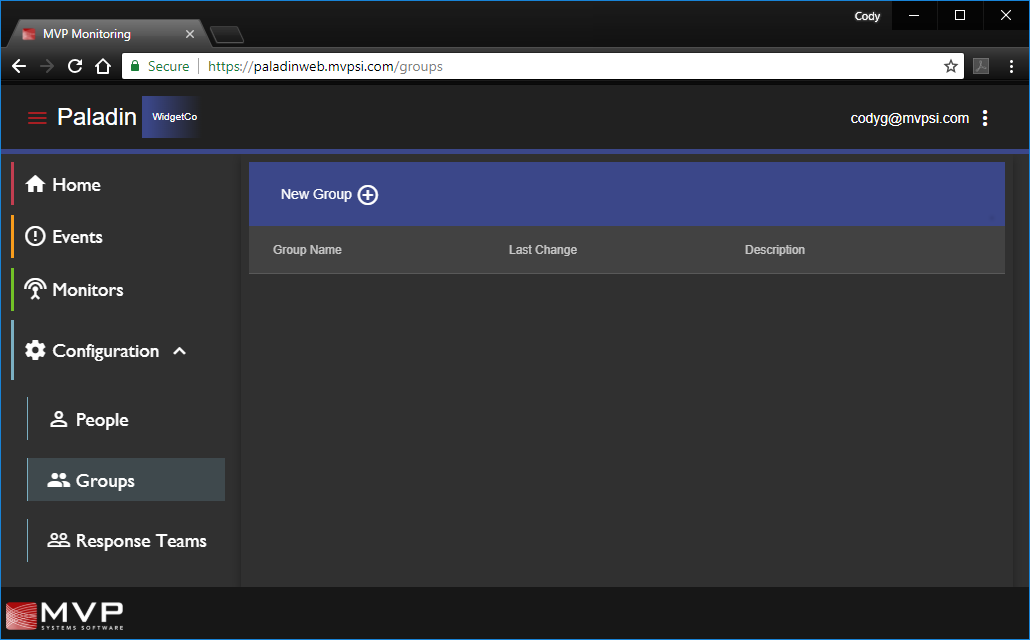
- Groups - Groups are used to logically organize other objects, including People. The Groups shortcut allows Admins to view, add, or edit any Groups within their company.
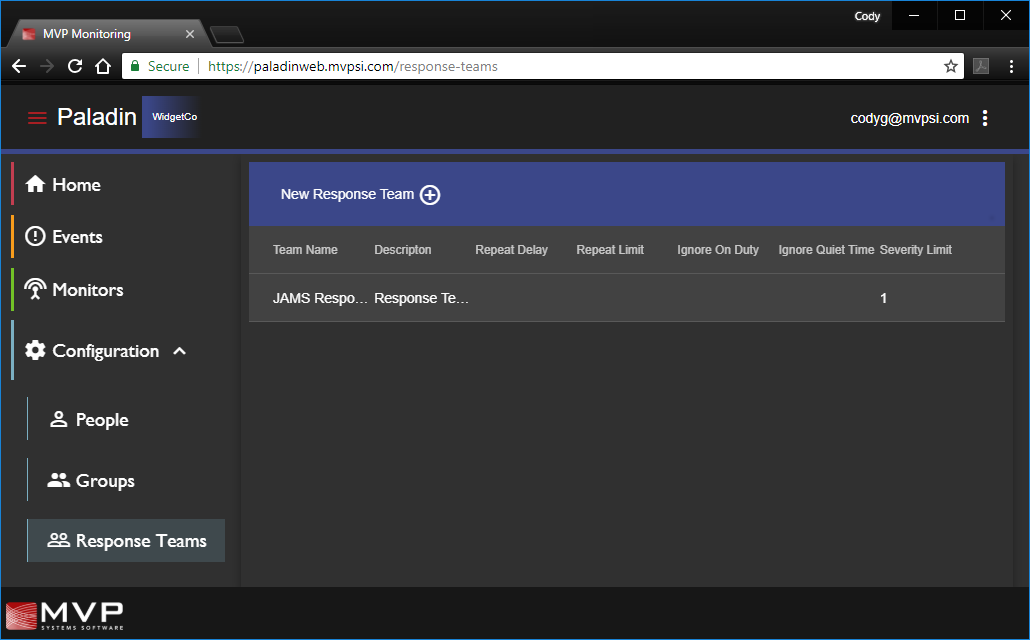
- Response Teams - Response teams are logical assortments of People or Groups used to determine who will be notified when an event occurs. The Response Teams shortcut allows Admins to view, add, or edit any Response Teams within their company.
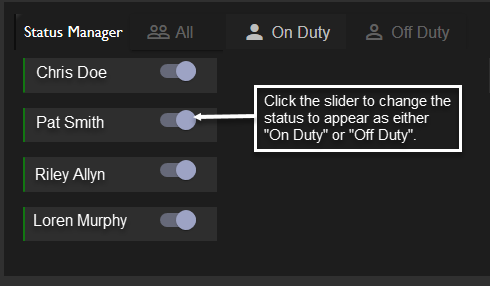
- Status Manager - View and update the status of Response Team members to determine availability to receive notifications.
- People - People are the individuals in a company. The People shortcut allows Admins to view, add, or edit any people within their company.
Viewing and Editing Objects
General Viewing and Editing
Most objects in Paladin are edited the same way. The instructions below outline general editing practices for all objects in Paladin. Note that a user’s ability to edit a given object depends on their role.
- Navigate to the module containing the data that will be viewed or edited.
- The Module will contain a list of items, with high-level information about each item. If the user has the required permissions, there will also be a button to Add a new item.
- Click on a specific item in the list to view the details of that item. If the user has the required permissions, there will also be an Edit button (pencil icon).
- When editing, an Undo button (curved arrow) and Save button (floppy disk) will appear. The Save button will preserve any changes made so far. The Undo button will revert unsaved changes.
- When satisfied with the changes, click Save, then close the item.
Security
Security in Paladin is comprised of Roles and Permissions. Role options currently include User and Admin. An overview of Role Permissions is available in the table below.
| Permission | User | Admin |
|---|---|---|
| Receive Notifications | Yes | Yes |
| Resolve Ongoing Events | Yes | Yes |
| Read and access all of the company's settings and objects | Yes | Yes |
| Update their own user profile | Yes | Yes |
| Edit all the company's settings and objects | No | Yes |
| Create new objects | No | Yes |
| Invite new users to the company | No | Yes |
Managing Profiles and Inviting Users
In Paladin, Users have a set of properties that should be defined to properly configure them.
- First and Last Name are the first and last name defined for the given user. A maximum of 60 characters may be used.
- Primary E-mail is the defined user's primary contact email.
- Primary Time Zone defines the local time zone for the given user.
- Quite Time Begin and Quiet Time End are used to create a window during any given day where Paladin alerts should not be sent to the user.
- Off Duty / On Duty Toggle is used to define whether the given user is considered "on Duty" and available to receive Paladin notifications.NOTE: Users must be On Duty to receive Paladin Alerts.
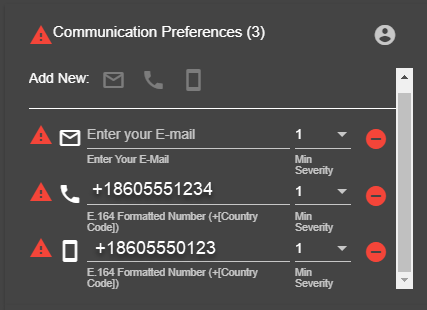
- Communication Preferences are the defined Email Address, Phone Number, and Cell Phone Number associated with a given user.
- Email Address is defined as a valid email address. The email type must also be defined as either Text or HTML. Users may also define a Severity associated with the Email Address.
- Phone Number is the defined landline or office phone of the given user and entered using the E.164 format as shown below. Users may also defina a Severity associated with the telephone number.
- Cell Phone Number is the defined Cell Phone associated with the given user. The defined Cell Phone Number should be able to receive text messages. User may set an associated Severity Level with the Cell Phone number. The Cell Phone number must use the E.164 format as shown below.
- Formatting Phone and Cell Phone Numbers must use E.164 Formatting.
- E.164 Formatting utilizes the international telephone and cell phone numbering plan to ensure each device has a unique number.
- There is a maximum of fifteen (15) characters.
- A formatting example can be seen below:
- Response Teams are the response teams that the defined user should belong to. Users may belong to any number of Response Teams. To define a Response Team, use the Response Team Search function and select the desired Response Team from the drop-down results list.
- Groups are logical collections of users. A user may belong to any number of Groups. To add a Group, use the Group Search function and select the desired Group from the drop-down results list.
Inviting a user to a Company
- While Logged in as an Administrator, Navigate to the Home Module.
- Click the Invite User button in the Quick Actions Bar. A panel will appear.
- Enter the Email Address of the user to invite.
- Select the Role that will be assigned to the new user - User or Admin.
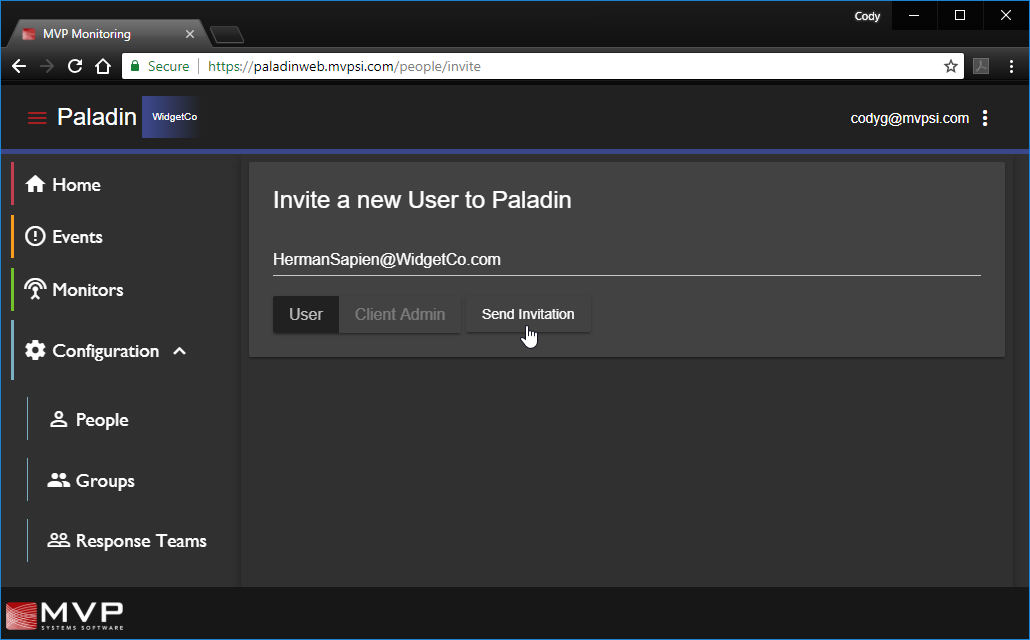
- Click the Send Invitation button.
- When the invitation has been successfully sent, a confirmation panel will appear.
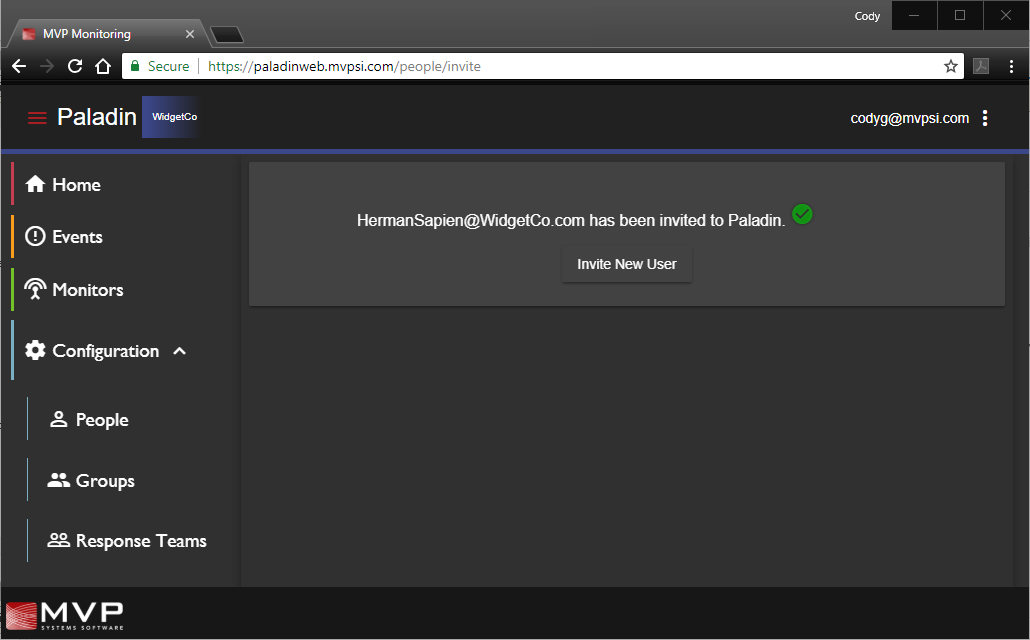
- The newly invited user will need to complete the authentication and profile configuration steps seen in the Registering Paladin and Configuring the Paladin Profile instructions.
Monitors
Monitor Properties
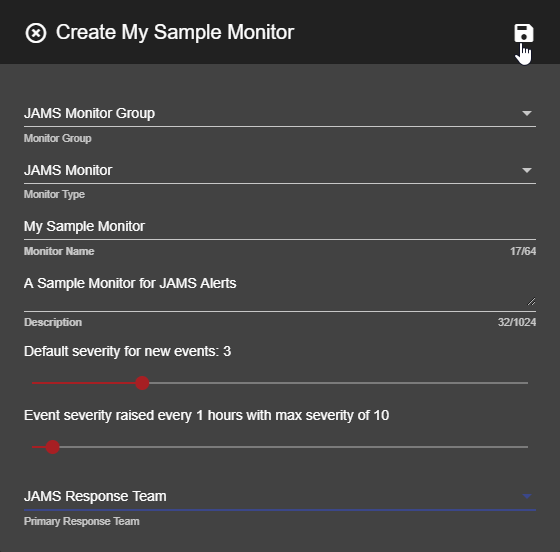
Monitors in Paladin have a standard set of defined Properties:
Monitor Group defines which group the new monitor belongs to. In nearly all environments, monitors will reside in the JAMS Monitor Group.
Monitor Type defines the type of monitor that is being created. For nearly all environments, all monitors will be the JAMS Monitor Type.
Monitor Name is the friendly name used to reference the monitor.
Description is the long-text reference of the monitor.
Default Severity for new events is the severity that will be assigned to events coming into the monitor when no severity was set on the Paladin Element. Severity levels range from 1 to 10.
Event Escalation is a slider that defines how often Event severity should be raised for the given monitor.
Primary Response Team is the response team that should be responsible for responding to events on the given monitor.
Creating Monitors
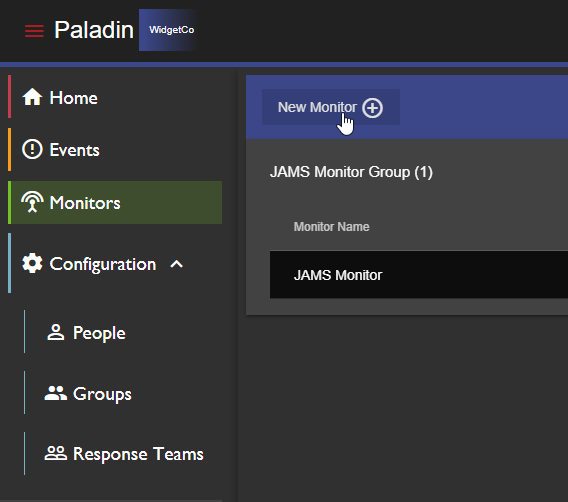
- Navigate to the Monitors section, then use the New Monitor button to open the create panel.
- On the Create panel, enter the properties as necessary, using the JAMS Monitor Group and JAMS Monitor Type.
- When the properties have been set as desired, Save and Close the create panel.
Groups
Groups are collections of objects and may include any number of defined People, Groups, or Response Teams.
Group Properties
Group Name is the friendly name used to reference the group.
Description is the long-text reference of the group.
Creating Groups
- Navigate to the Groups section, then use the New Group button to open the create panel.
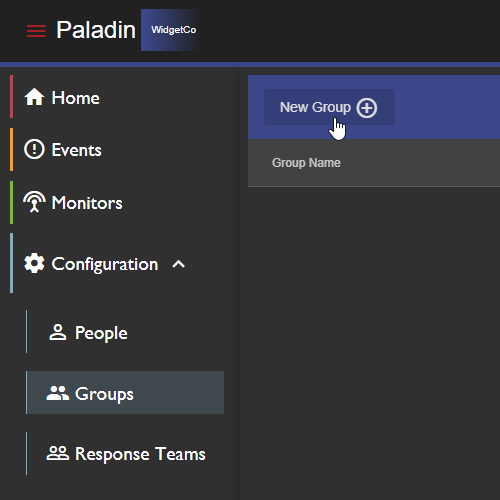
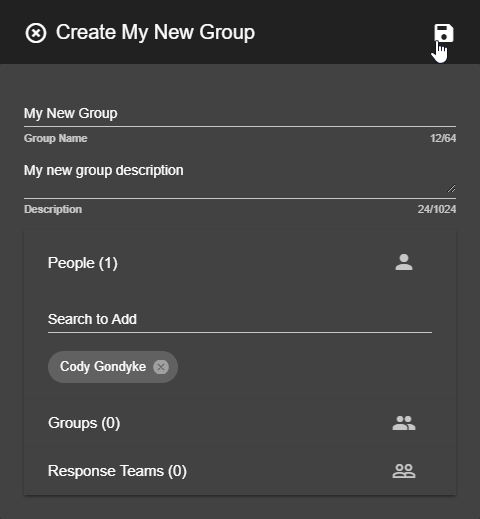
- On the Create panel, enter the properties and add People, Groups, or Response Teams as necessary.
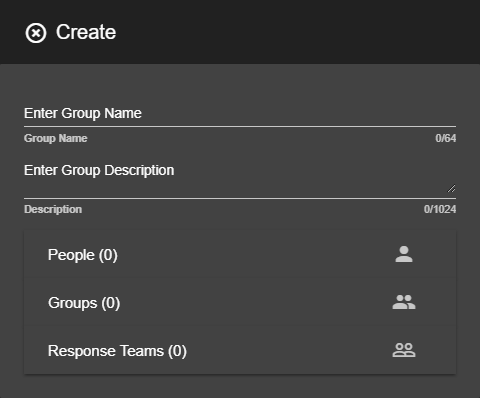
- When the properties have been set as desired, save and close the create panel.
Response Teams
Response Team Properties
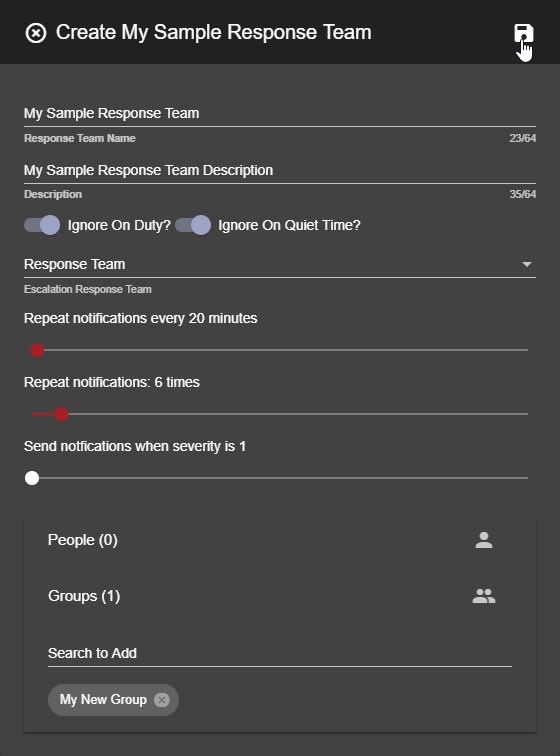
Response Team Name is the friendly name used to reference the Response Team.
Description is the long-text reference of the monitor.
Ignore on Duty? is a toggle used to determine whether the Response Team should ignore the "On Duty" status set at the user level.
Ignore Quiet Time? is a toggle used to determine whether the Response Team should ignore the "Quiet Time" set at the user level.
Escalation Response Team is a secondary response team that will be notified if the given response team does not resolve an event.
Notification Interval defines how often notifications should be repeated.
Notification Repeat Count defines how many times notifications should repeat on the defined Notification Interval.
Minimum Notification Severity is the minimum Event Severity that will trigger notifications to the response team.
Creating Response Teams
- Navigate to the Response Teams section, then use the New Response Team button to open the create panel.
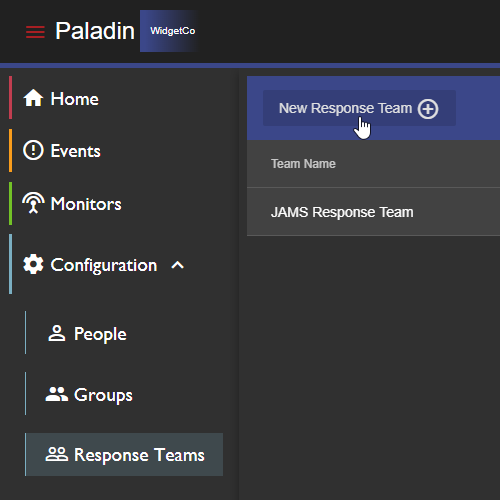
- On the Create panel, enter the properties as necessary.
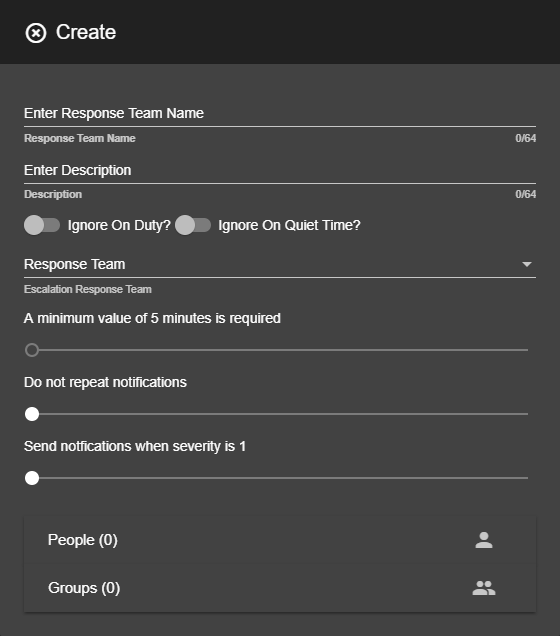
- When the properties have been set as desired, save and close the create panel.
Resolving Events
Paladin's new UI allows users to resolve events directly from the Paladin Web App. To Resolve Events:
From the Home Module
- Navigate to the Event Summary in the Home Module.
- Find the event in the Event Summary list and click the Resolve button.
- The Event will be resolved with the default messages of "Manually resolved by <<user>>." The current date and time are recorded on the resolution.
From the Events Module
- Navigate to the Events Module.
- Find the event that should be resolved and click it. A panel will appear.
- Toggle the message to either default or custom as desired.
- Click the Resolve button.
- If the event was resolved with the custom message option set, a panel will appear for entering the custom message.
Setting up the Paladin Alert in JAMS
Users must set up the Paladin Alerts in JAMS. To set up these Alerts, a Paladin Event Element is added to a Job or Folder.
Configuring a Paladin Alert
- Open the Properties dialog for the Job or Folder where the Paladin alert will be added.
- Click on the Elements tab, the use the Add... button to open the Add Element dialog.
- Select Paladin Event from the EventHandler section, then click Next >.
- Set the Element Properties as desired, then click Finish.
- Save & Close the Job or Folder.
Paladin Properties
| Property | Description |
|---|---|
| Paladin | |
| Monitor ID | The Monitor(s) that should receive the event. Use a comma separated list to define multiple Monitors. |
| Severity | The defined severity of this event. If left as 0, the severity will be set to the Monitor's default severity. |
| Summary | A summary of the event. |
| Detail | A detailed description of the event. |
| Ask for a response | Should JAMS ask for a response from Paladin and take action based on the response? |
| Upload the Log file | Should the Job's log file be uploaded to Paladin? |
| Events | |
| Entry Success | Defines whether the event should be triggered when the entry completes with a successful completion severity. |
| Entry Informational | Defines whether the event should be triggered when the entry completes with an informational completion severity. |
| Entry Warning | Defines whether the event should be triggered when the entry completes with a warning completion severity. |
| Entry Error | Defines whether the event should be triggered when the entry completes with an error completion severity. |
| Entry Fatal | Defines whether the event should be triggered when the entry completes with a fatal completion severity. |
| Entry Started | Defines whether the event should be triggered when the Job has started executing. |
| Normal Event | Defines whether the event should be triggered when a normal event occurs. |
| Low Event | Defines whether the event should be triggered when a low event occurs. |
| Moderate Event | Defines whether the event should be triggered when a moderate event occurs. |
| High Event | Defines whether the event should be triggered when a high event occurs. |
| Urgent Event | Defines whether the event should be triggered when an urgent event occurs. |
| Critical Event | Defines whether the event should be triggered when a critical event occurs. |
| Status | |
| Enabled | A toggle used to enable or disable the Event Handler. |