In this section you will learn how to add user rules that tell Powertech Exit Point Manager for IBM i to reject access to a server for a specific user, or for all users. You will also learn how to manage service profiles that require access, but do not need to be audited.
Blocking Unused Servers
When you are confident that a server is not being used, you can create a rule to block any possible access. For the following example, we will assume the *FTPREXEC server is not being used and should be blocked.
Blocking a server for all users or for a specific user
- From the Main Menu, select option 1, Security Configuration Menu. Then select option 2, Security by User.
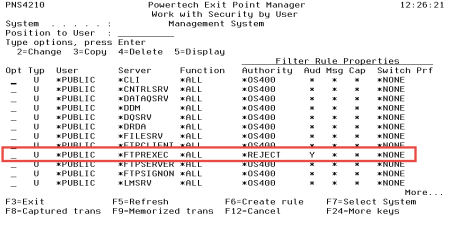
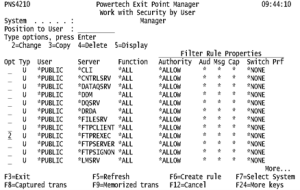
- Next to the *FTPREXEC server *PUBLIC (default) user rule, enter 2.
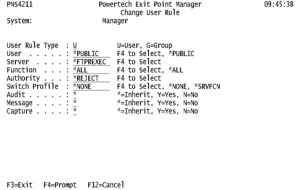
- Change the Authority column from *ALLOW to *REJECT. (Alternatively, to block a server for a particular user, you would create a new rule, indicating *ALL for Function, the User ID for User, and *REJECT for Authority.)
NOTE: Consider using a message management tool to help alert you of any reject messages.
- Ensure Audit is set to Y.
NOTE: Whenever a reject rule is put in place it is highly recommended the Audit flag remains set to Y. In the future, it may be useful to run an audit report showing any rejected access attempts against servers you have blocked. (If you are creating a new rule, set Message to “Y” in order to immediately submit a message upon any access attempts that are rejected. Set Switch Profile to *NONE).
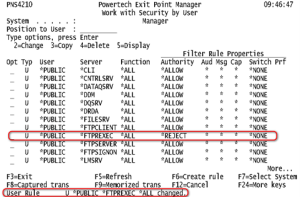
- Press Enter. The *FTPREXEC server has been blocked for all users.

- When the server cache is cleared this rule will take effect. For the rule to be effective immediately, clear the server cache manually. To do so, turn rule enforcement off an on again as follows:
- In Work with Security by Server, enter 7 for the server (in this case, *FTPREXEC).
- Change Powertech Exit Point Manager for IBM i Rules Enforced to N and press Enter.
- Turn the rule enforcement back on - change Exit Point Manager Rules Enforced to Y and press Enter.
Managing Service Profile Activity
In the Discovery, Data Collection, and Analysis section, you learned that the Compliance Monitor user profile, PLCM2ADM, is an automated service profile that requires access to the system, but does not need to be audited. Its transaction history produces unnecessary data that can be inconvenient to sift through while analyzing reports. Therefore, you can add a rule that grants it access to the server it requires (*DATAQSRV), with auditing turned off.
Creating a service profile user rule
- From the Main Menu, choose 1, the 1, Security by Server.
- Type 3 next to the server used by the service profile (in this case *DATAQSRV).
- Press Enter to copy the *PUBLIC rule.
- Enter the following values:
- User Rule Type=U for an individual user (you would choose G for a User Group).
- User=PLCM2ADM (the service profile account ID)
- Server=*DATAQSRV (the chosen server)
- Function=*ALL (this rule applies to all server functions - alternatively, you could enter a specific function)
- Authority=*ALLOW (uses the authorities granted by the system)
- Switch Profile=*NONE (do not switch user profiles)
- Audit=N (do not audit)
- Message=* (inherit global system value (default=N))
- Capture=* (inherit global system value (default=N))
- Press Enter to create the rule.
If the *PUBLIC rule for this server is set to *REJECT, all access attempts will be rejected. But, since this new rule is more specific, it is evaluated first, allowing PLCM2ADM access while restricting all other users. With this configuration, all access requests will be rejected, except for those originating from the user PLCM2ADM.


