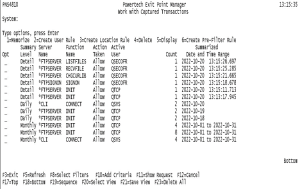
Once you've captured transactions, you can memorize, delete, display, filter, and sort them. For more options, see Work with Captured Transactions.
- From the Powertech Exit Point Manager for IBM i Main Menu, select option 3, then 2 to display the Work with Captured Transactions panel. The Work with Captured Transactions panel provides three views of the transaction data. Each view displays additional parameters and information.
- Press F11 to switch to the next view, if needed. The F11 label displays the current panel view (for example, View2, View3).
Filtering Captured Transactions
Filters are sets of criteria that can be used to display specific transactions. For example, you could create a filter that includes only transactions by *SECADM users, then apply the filter to show only those transactions on the Work with Captured Transactions panel. You can further isolate the needed transactions by applying additional filters.
To apply a one-time use filter
-
On the Work with Captured Transactions panel, press F10, Add Criteria. The Add Selection Criteria window appears.
-
Specify the Field to filter by, whether the filter should include (I) or exclude (E) the specified value, and then enter the required Value (From Value). To specify the filter should return a range of values, use both the From Value and To Value fields to define the range.
-
Press Enter to apply the criteria.
To apply a saved filter
-
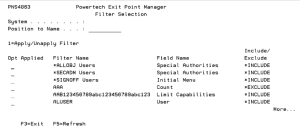
On the Work with Captured Transactions panel, press F8 to open the Filter Selection window.
-
Review the list of filters you created from the Work with Filters panel.
-
Enter 1 next to the filter(s) you would like to apply to the list of transactions.
-
Press Enter to apply the filter.


