Workflow Designer Quick Reference Guide

At its core, the term "workflow" can be defined as a collection of operations and processes which collectively serve to accomplish the business objectives of an organization. Traditionally, workflows are performed manually. Employees have to physically hand deliver documents, sort through files, and notify people of tasks they need to complete by way of email, notes and meetings. With Automate Enterprise, such procedures can be performed automatically, from start to finish, through a sequence of tasks, processes and a defined set of rules which, at runtime, provide the basis of automation flow required to accomplish a specific goal. This concept is known as workflow automation.

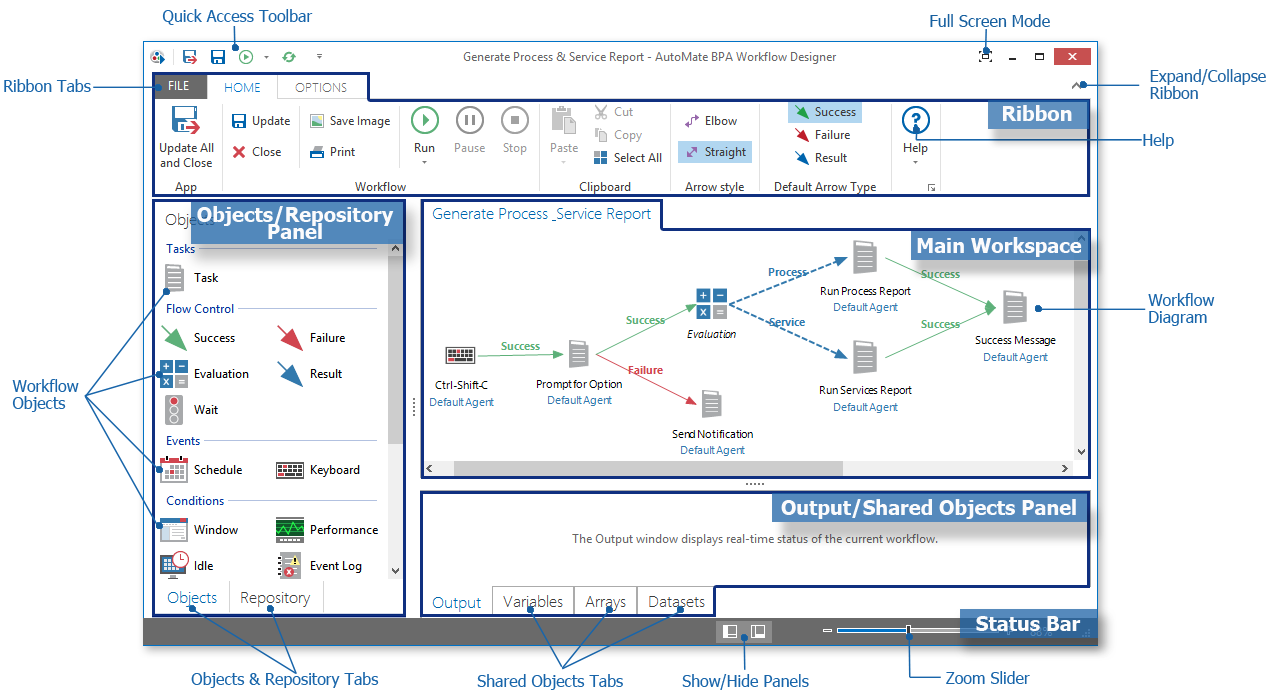
Workflow Designer (WFD) is the primary user interface for creating, configuring and managing automated workflows. It houses all of the automation elements required for workflow construction, including tasks, conditions, and flow control arrows and provides an intuitive design that enables such objects to be easily incorporated into a workflow using drag and drop. New or pre-existing objects can be added by simply dragging the desired object from the Objects/Repository panel onto the main workspace. Once added, an object's properties can be edited and the proper agent or agent group assigned. Objects can be linked to other objects using the appropriate flow control arrows (for example, Success, Failure, and Result).

ClosedOpening Workflow Designer

  1. From Server Management Console, select Workflows on the Navigation bar.
  2. Do one of the following:
    • Select a workflow and click the Edit button on the top panel.
    • Right-click a workflow and select Edit from the context menu.

ClosedAdding a New Workflow Object

  1. From Workflow Designer’s Objects/Repository panel, select the Objects tab.
  2. Drag the desired object onto the workspace or simply double-click the object.

  1. Enter a unique name for the new object.
  2. Assign an agent for the object (if applicable).
  3. Double-click the object to view or edit its properties.

Closed
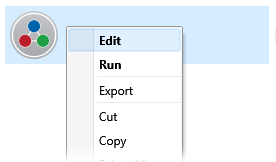
Adding/Editing an Existing Workflow Object

  1. From the Objects/Repository panel, select the Repository tab. The panel becomes populated with existing workflow objects categorized by folders/sub-folders.

  1. Drag a repository object onto the workspace or simply double-click the object.
  2. Once added to the workspace, if necessary, you can double-click the object to view/edit its properties (if applicable).

ClosedConnecting Workflow Objects Together

  1. From the workspace, click the supplied arrow on the object in which to stem from.
  2. Drag the tip of the arrow and release it onto another object. A dot appears next to the object being connected indicating a successful link.

  1. To modify the type of flow control arrow, right-click the connected arrow and select the desired type (that is, Success, Failure, Result) from the context menu.

ClosedSetting a Breakpoint
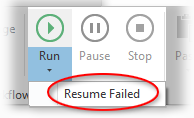
From the workspace, select the workflow object in which to set a breakpoint and do one of the following:

  • Click the Breakpoints button on the ribbon.

  • Press F9 on your keyboard.

  • Right-click the workflow object and select Breakpoint.

ClosedRunning Options

The various run options dictate how workflow execution should commence after a breakpoint is encountered. Details about each option are as follows:

  • Run from here - Runs the workflow from the currently selected object.
  • Resume - Resumes execution from where the breakpoint was initially encountered.
  • Step - Steps through each ensuing workflow item. When you click the Step button or press F10, WFD runs the next object then pauses. When you’re ready to proceed, click Step or F10 again to run the next object, and so on.
  • Stop - Halts execution at the current object and logs status as success.

Point of Error Execution

After correcting an error, you may want to re-run the workflow to check for additional issues. However, you may want to start execution from the point of the previous error instead of running the workflow in its entirety. This can be performed by clicking the down arrow below the Run button on the ribbon and selecting Resume Failed.