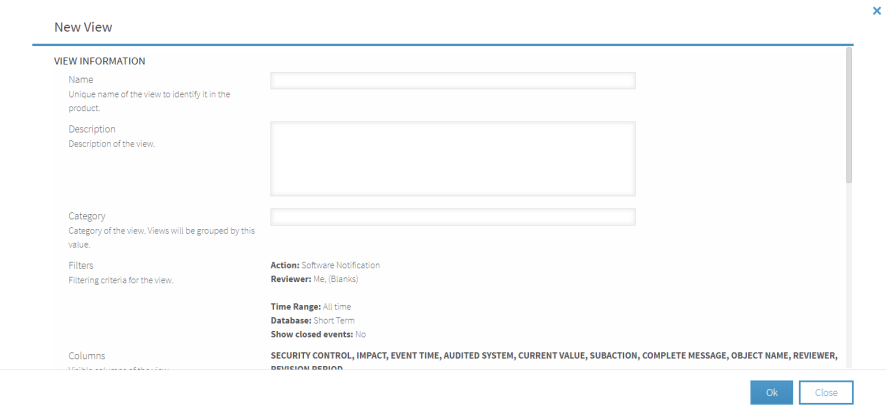
Creating a User View
When creating a user view, it is important to remember that you can only define a view against the currently selected filters.
You must therefore, define the filters that you want to see in the view, in Event Manager or Forensic Analysis, prior to using the View option to create a new user view.
Example of how to create a user view
The following example creates a view that shows all the events performed by special users within a Windows environment during the last three days. Note that this example assumes that you have the same assets and users defined on your system.
Creating the Filter
- Open Event Manager in Forensic Analysis view.
- Click Reset Filters to refresh the display.
- Click Assets and in the drop-down panel type Family:Windows in the search bar and click the Magnifying Glass. All Windows assets are displayed in the Assets panel. Click OK.
- Click the User Category column. From the options displayed, click Special Users. Click OK.
- Click Select Columns and in the Affected Users section select just the User Name, User Category and User Domain columns. Click OK.
- Click Time Range and in the drop-down menu select Last 3 days.
The Forensic Analysis display now shows all special user activity within Windows assets for the past three days. This is the basis of the information on which we will build the custom User View.
Creating the User View
We are now ready to create the new user view from the filtered information.

- Click the
 View icon to display the current defined Standard and User Views.
 - Click Add new from current filters...
- In the Name field, type Windows Events From Special Users.
- In the Description field enter text that provides a meaningful description of the view, such as its purpose and what it is actually monitoring.
- In the Category field type Windows Events.
- Click the Default View toggle control to on if you want this view to be the one that is shown by default every time that Forensic Analysis is displayed.
- In the Regulations Information section, scroll down and select Internal Regulation.
- In the User Variables Mapping section, define the titles of any custom columns that you want to appear on this view. Up to 99 variables can be defined as well as two Additional Information selections. See User Variables Mapping for more information.
- Click OK to create the new view.
This View is now created and is available from your User Views panel. It is currently not available for use by anyone else. For information on how to share views with other groups or individual users see Sharing Views.