Access MSP Admin Topics
From the navigation menu, select Support > MSP Admin Topics.
Create New Client Account
Before you can create a client account, ensure you have all required information components:
-
An active Fortra VM account for the MSP’s organization and account creator
-
The name and email address of the employee on your team in charge of the account, if not yourself
-
The signed agreement with listed services from the client
-
The client’s primary contact name and email address
-
The client’s physical address
-
While not required for initial account creation, a completed PAQ document from the client
- From the navigation menu, select Client Ops > Accounts.
-
Select + New Account. A new window opens.
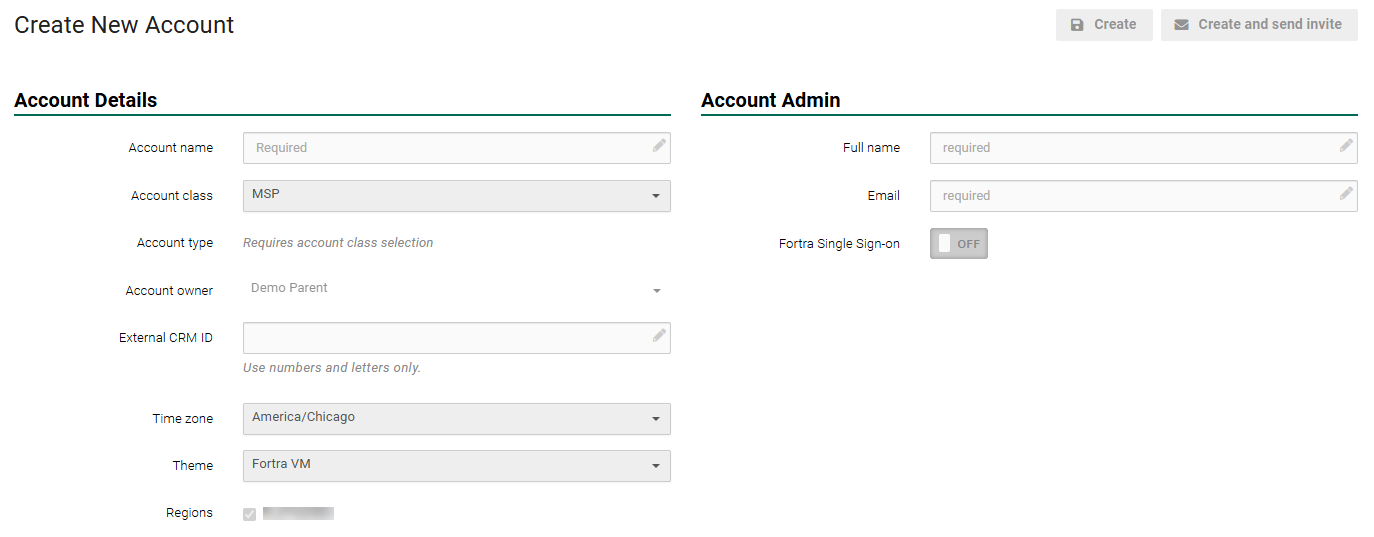
- In the Account name box, enter the name of the client as it appears on the signed agreement.
- Leave the Account type as General.
- In the Account Owner box, enter your organization’s name (the MSP).
- In the Time Zone box, enter the client’s time zone.
- In the Theme box, enter your organization’s name.
- Under Account Admin, enter the primary contact information of the client account in the Full Name and Email boxes.
-
Select Create.
-
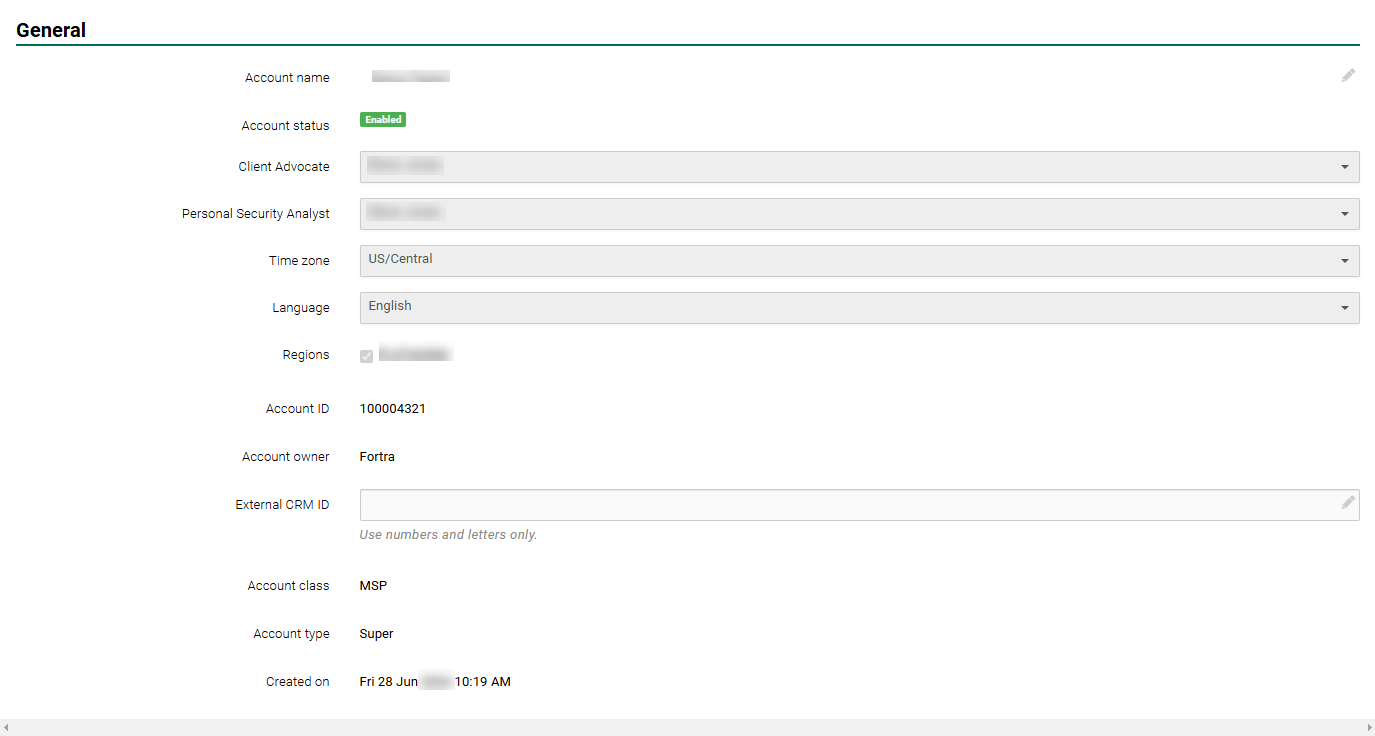
Once the account has been created, Fortra VM automatically opens Account > Account Profile on the menu. Select Client Advocate, and then enter the name of the person within your organization responsible for overseeing this account.
See Super Account Settings for more information. -
Under Reports & Branding, enter the client's address into the Address box.
-
Select Save. A message will appear at the top of your screen informing you that the account info is being saved.
NOTE: To complete this section, refer to the signed agreement for the list of services to which the client has subscribed. -
From the navigation menu, select Account > Service Subscriptions.
-
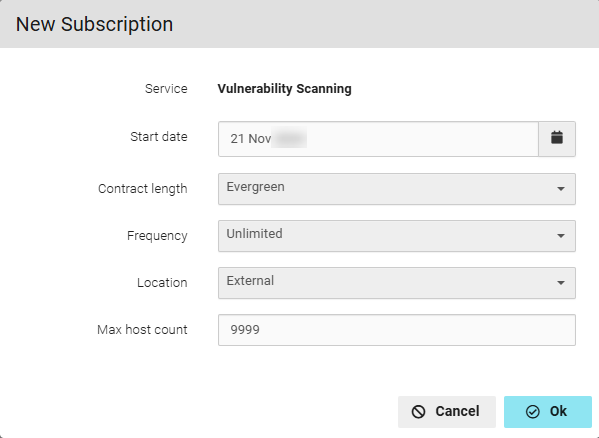
Choose Vulnerability Scanning, and then select + Add Service.
-
The New Subscription dialog appears. Populate each field according the client's contract.
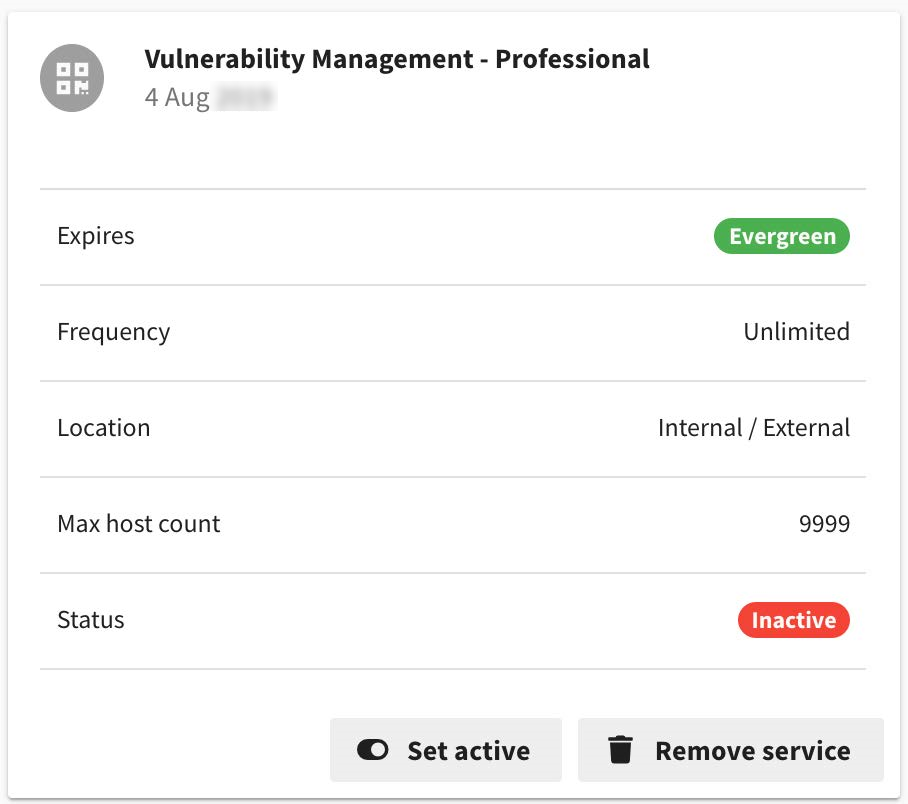 NOTE: You can toggle the state of subscriptions to be Active or Inactive. Only one subscription per service offering (or edition in some instances) may be active at a time. These are used in conjunction with scan workflows to both show subscription usage breakdowns and limit usage when applicable.TIP: If you don't want client accounts to expire automatically at the end of their contract, select Evergreen for length of contract. This will require the MSP to manually to terminate or extend their account.
 -
Select OK.
Continue to add Service Subscriptions as dictated by the client contract.
- From the navigation menu, select Account > Users.
- Select + New user.
- Complete the Full Name and Email boxes.
- Leave the Role as User unless otherwise instructed by the client’s primary contact.
- Select Create. This will also send out an invitation to the User.
For more information on how to create, assign, change or delete a role, go to Users and Roles.
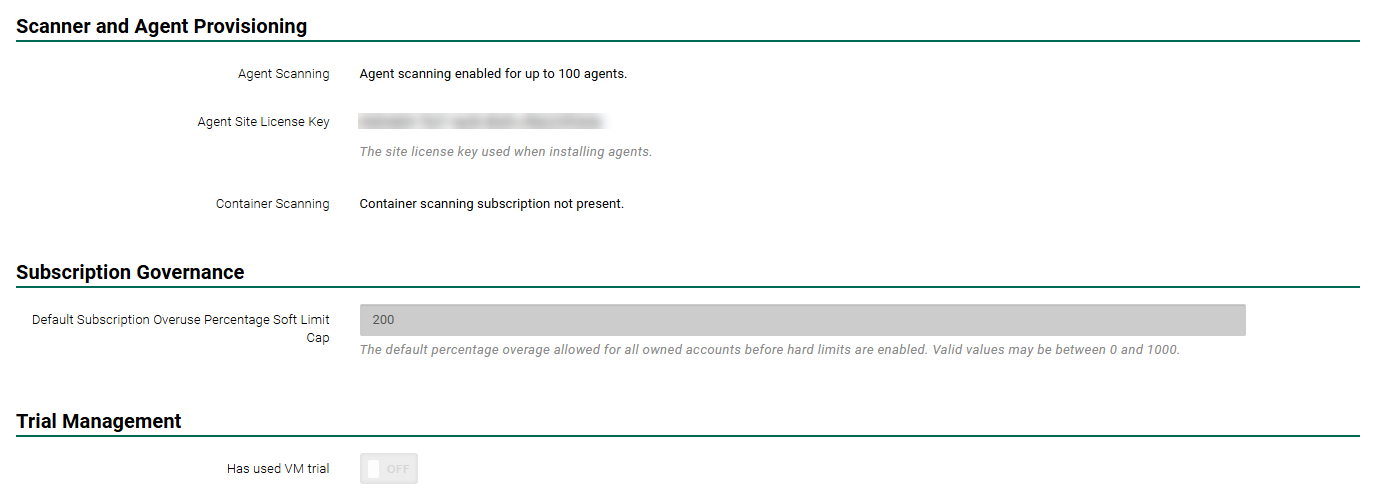
Before setting up the RNA Scanners, you will need to allocate tokens.
- From the navigation menu, select Account > Settings and scroll down to the Scanner and Agent Provisioning section. Enter the number of tokens needed as specified in the client contract.
The next step is to set up the internal and external scanning.
External Scanner Set-up
-
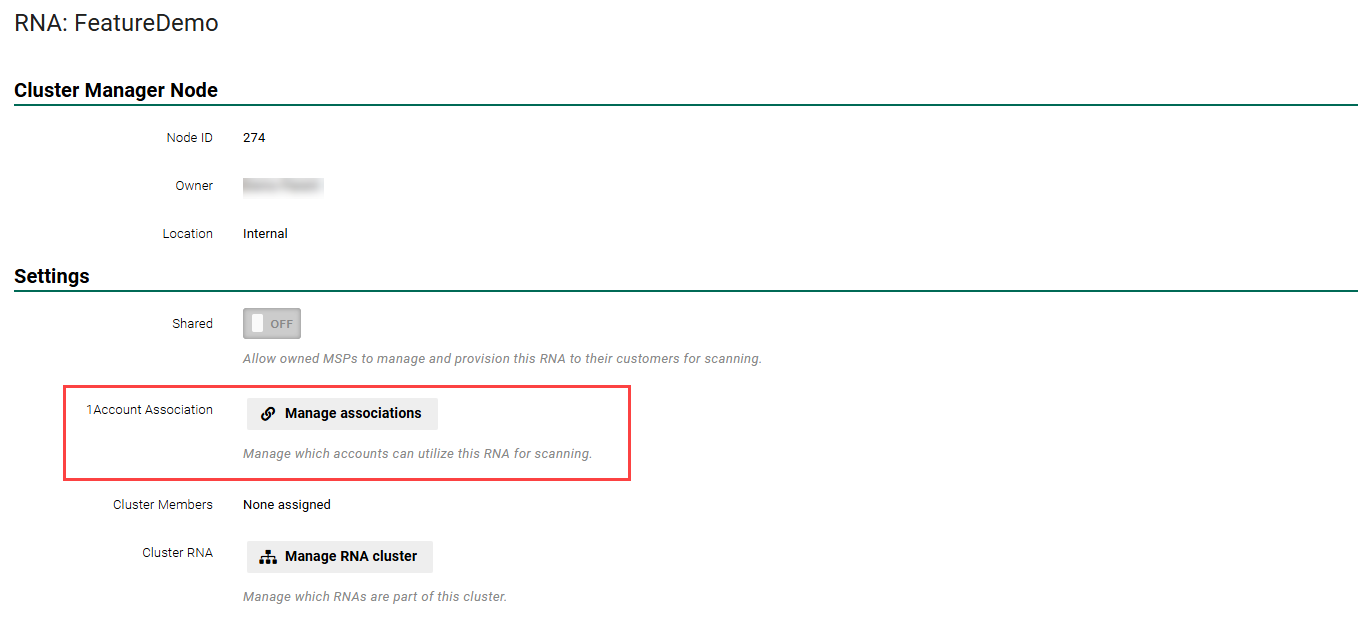
From the navigation menu, select Client Ops > RNA Management.
- In the search bar, enter external or find the scanner from the list, and then select the scanner. A new window opens.
-
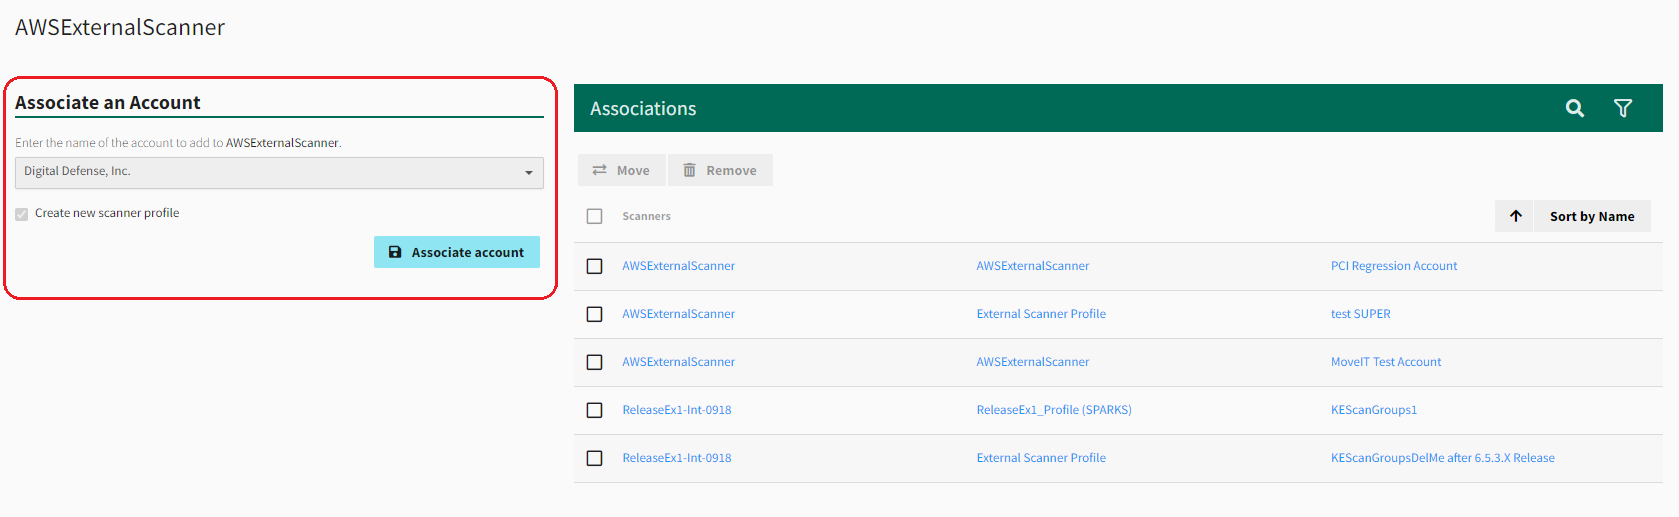
Scroll until you find Account Associations, and then select Manage Associations.
-
Under Associate an Account, select the appropriate account, and then select Associate Account.
-
Ensure the Create new scanner profile checkbox is selected.
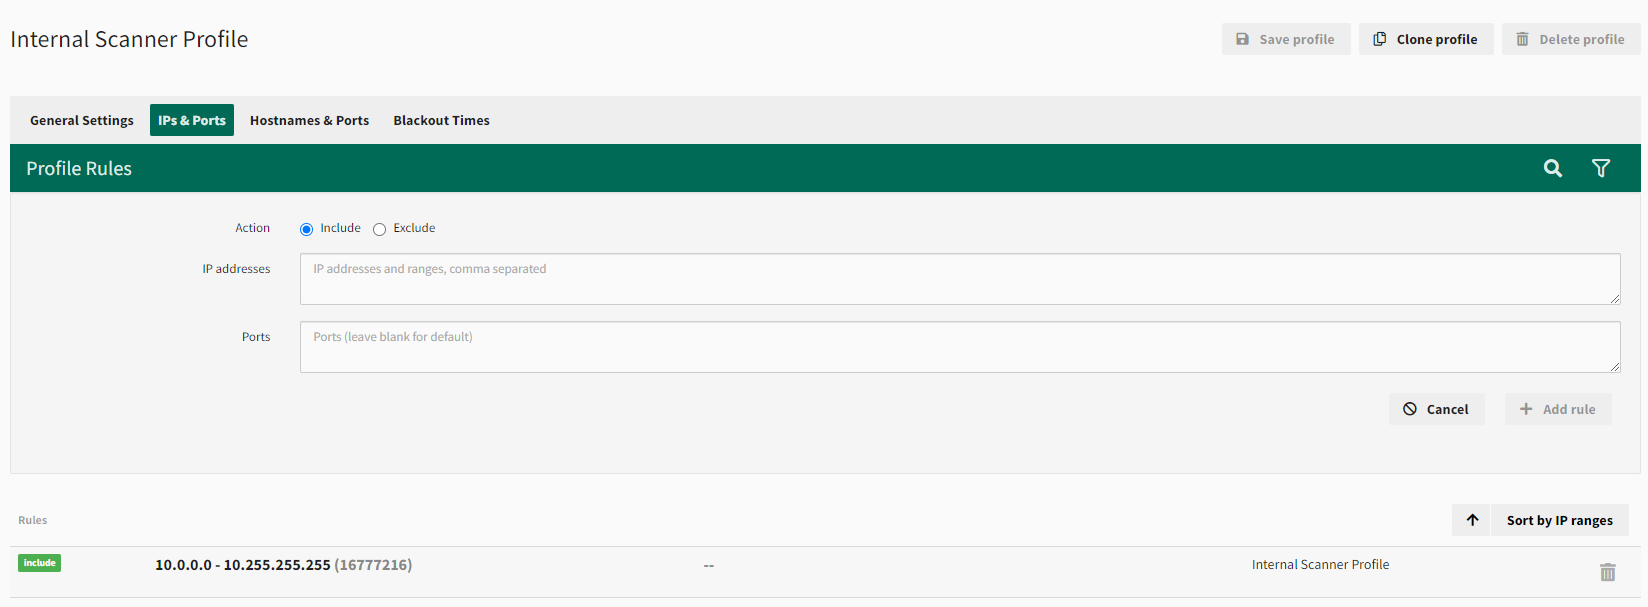
- From the navigation menu, select Client Ops > Accounts.
- Select the client account.
- Select Scan Settings > Scanner Profiles.
- Select the intended scanner. Go to each tab and enter the relevant information for IPs & Ports and Blackout Times.
See Install RNA Virtual Scanner Appliance for a systematic guide of the RNA installation and configuration process, including system and platform requirements. It is important that you familiarize yourself with this process.
If you have questions about anything listed in these steps, contact your Fortra Support.
You cannot complete the client set up until the RNA is set up, configured, and actively connected from the client’s network to Fortra’s network. If the client has any issues you cannot answer, contact your Fortra Support.
Internal Scanner Set-up
Once the RNA is connected from the client's network to Fortra's network, follow the steps below to add scan targets.
-
From the navigation menu, select Client Ops > Accounts.
-
Select the client account.
-
Select Scan Settings > Scanner Profiles.
-
Select the intended scanner. Go to each tab and enter the relevant information for IPs & Ports and Blackout Times.
 TIP: You can add IP addresses to the scanner profile while creating scans or asset groups by using the "auto-add IPs" checkbox.
RNA Confirmation
The amount of RNAs visible will depend on the client agreement. For clients that have both internal and external scanning, you should be able to view at minimum two RNAs. One will have the external name and the other should have a name that relates to, but is not exactly the client name within Fortra VM. If additional activations were allowed per the client agreement, those RNAs should be visible as well.
Once the client has appropriately installed and configured the RNA, confirmation is required.
- From the navigation menu, select Scan Settings > Scanners.
- You should be able to view at minimum (depending on number of activations allowed by the client agreement) two RNAs. One will have the external name and the other should have a name that relates to, but is not exactly the client name within Fortra VM.
-
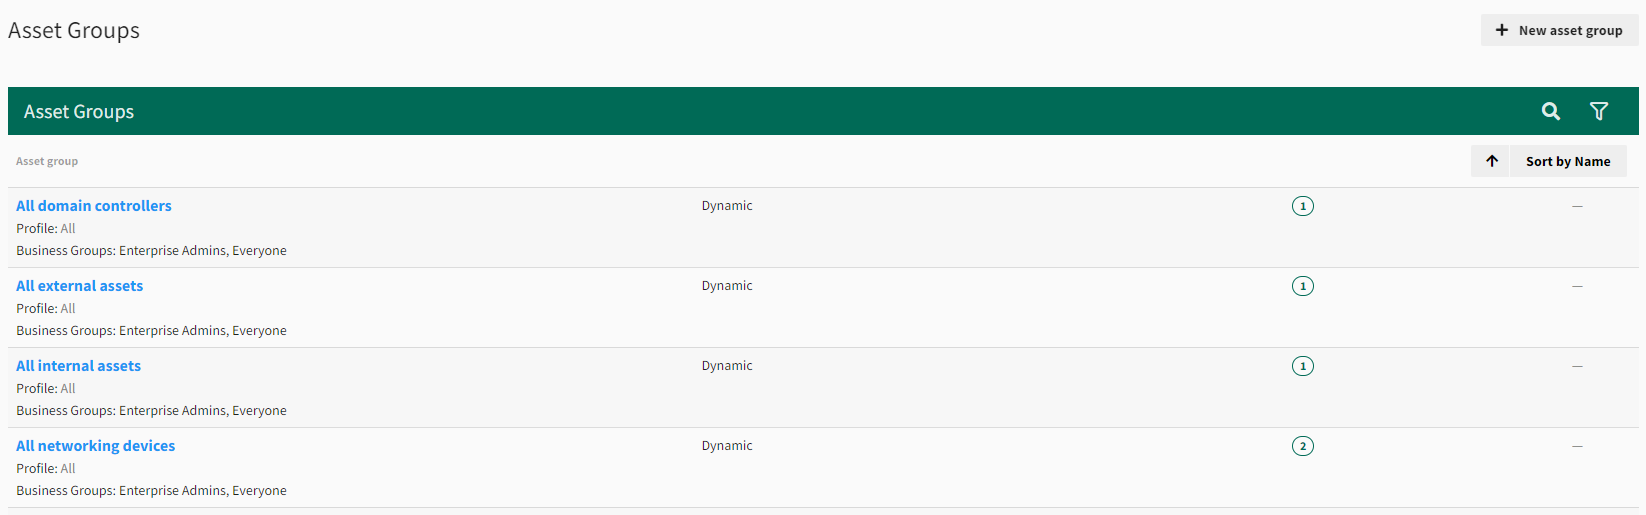
From the navigation menu, select Scan Settings > Asset Groups.
-
Select + New asset group.
-
In the Asset group name box, enter Full Internal Network.
-
Select Save.
-
Select IPs & Ports, and then select Scanner Profiles. The client can enter their own IPs & Ports, or you can.
-
Select +Add Rule.
NOTE: If you cannot select +Add Rule after entering the IP addresses or ranges, the IP addresses or ranges may be written in a way that the system does not recognize. Re-enter the addresses in a different format.
-
From the navigation menu, select Scan Settings > Asset Groups.
-
Select + New asset group.
-
In the Asset group name box, enter Full External Network.
-
Select Save.
-
Select IPs & Ports, and then select Scanner Profiles. The client can enter their own IPs & Ports, or you can.
IMPORTANT: If your client is using an AWS RNA to scan external targets, a request must be submitted to AWS to not block port 25 to prevent the scanner from missing those assets. -
Select +Add Rule.
NOTE: If you cannot select +Add Rule after entering the IP addresses or ranges, the IP addresses or ranges may be written in a way that the system does not recognize. Re-enter the addresses in a different format.
Continue to Schedule Scans to complete client account set up.