Creating a Route
This topic shows you how to set up a new document route.
To set up a document route:
-
In the Webdocs Route Designer, click Add Route.
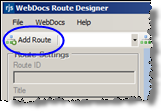
Add New Route displays.

-
(Optional) In Description, type a description of this route.
-
In Manager, choose the route manager.
A route manager is the Webdocs user who is notified when a document is approved or rejected or when a route is completed. A route manager can be any Webdocs user who has an email address in Webdocs. You must also select one of the manager-notification options to choose when the route manager is notified.
-
In Manager Notification Options, choose one or more options for when the manager receives an automatic email:
-
When a user accepts a document.
-
When a user rejects a document.
-
When a document completes a route.
-
-
In Return Options, choose what happens when a Webdocs user returns a document:
-
Allow user to return a document– send the document back to the previous step for correction.
-
Clear from route after return– remove the document from the route.
-
-
Click Add Route
 .
.The route is set up and displays.

-
Continue to Adding Steps to a Route.