Assigning Permissions
Permissions are how you give users access to the folders and documents they need to do their work, while also keeping Webdocs secure.
Some users need more permissions because they need to do more complex work with documents and need access to many folders. Other users might only do simple tasks with a few documents in one folder. For users doing simple tasks, you might allow just one permission.
To maintain the maximum level of security, Fortra recommends that you allow the minimum number of permissions that users need to do their work. If a user does not need a permission, do not give them that permission.
There are seven permissions you can assign in Webdocs.
| With this permission... | Users can... |
|---|---|
|
|
|
|
|
|
|
|
|
|
|
|
NOTE:
Note: Users must also have the check-in permission to save checked-out documents back to Webdocs.
Also, while the document is checked out, other users can view it, but other users cannot edit the document or change its information. When the user checks in the edited document, the edited document becomes the current version in Webdocs. That current, edited version is the one that all other users will work with. |
|
|
Each of these seven permissions has three settings:
For more advanced information on how permissions work together, see Managing Permissions.
Assigning Permissions to a Folder for a Group
Assigning permissions to a folder for a group means that everyone in the group has the permissions allowed to that group. This is the simplest and most common type of permission. For more advanced ways to assign permissions, see Managing Permissions.
To assign permissions to a folder for a group:
-
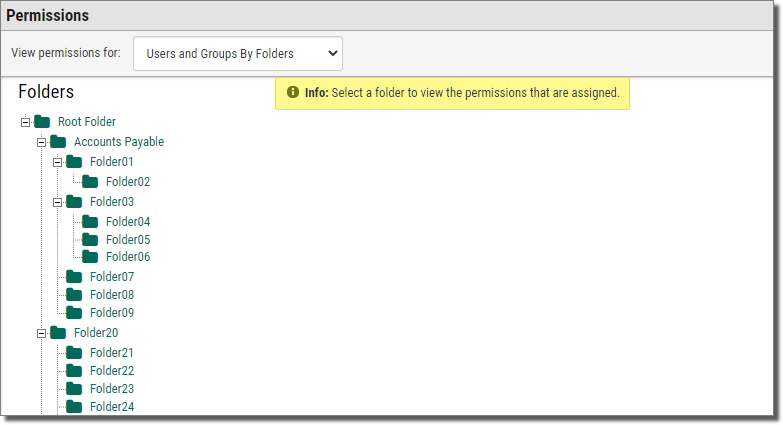
On the side menu of the Settings tab, click Permissions
 .
.Permissions displays.
-
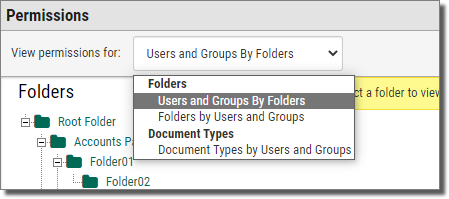
In the View Permissions For: drop-down, select Users and Groups by Folder.
-
Click the folder you want to assign permissions to.
NOTE:Allowing permissions to a folder does not automatically allow permissions to a sub-folder. To allow permissions to a sub-folder, repeat these instructions for the sub-folder.
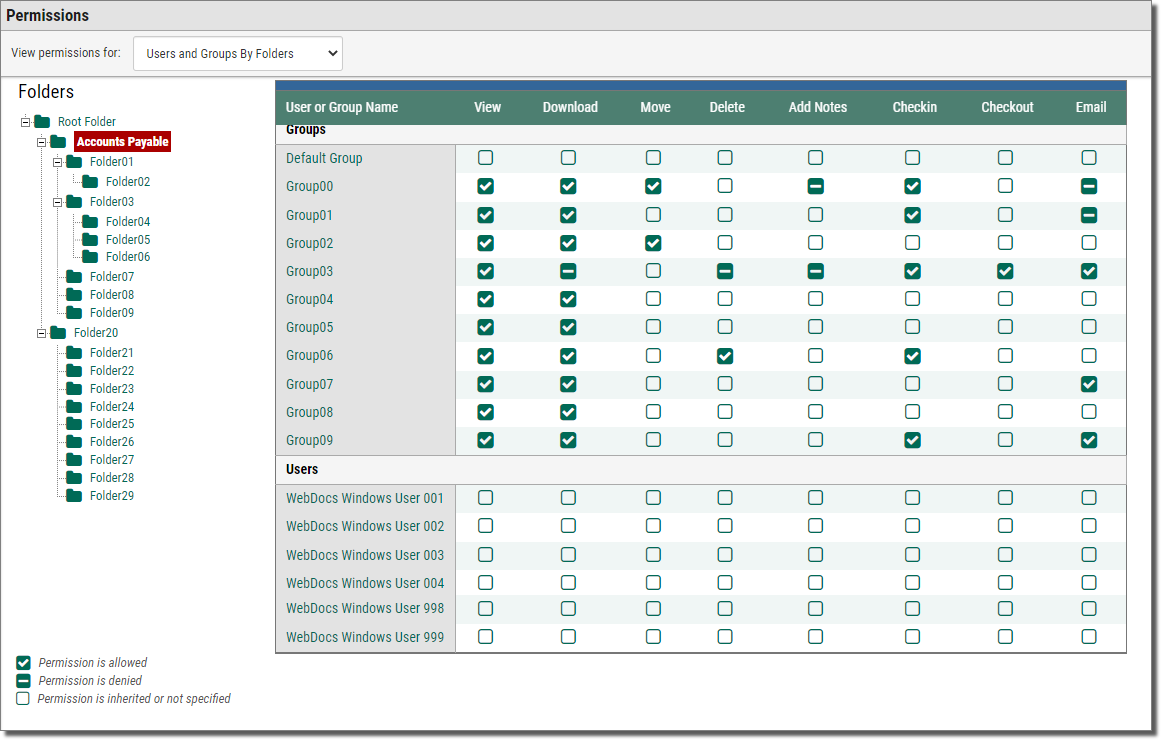
The folder is highlighted red, and the list of groups, users, and permissions displays to the right of the highlighted folder.
This is what a folder looks like before you assign permissions to it:
 NOTE:
NOTE:The first time you assign permissions, all groups and users have unspecified or inherited permissions. When all permissions are unspecified or inherited, no one can access this folder.
-
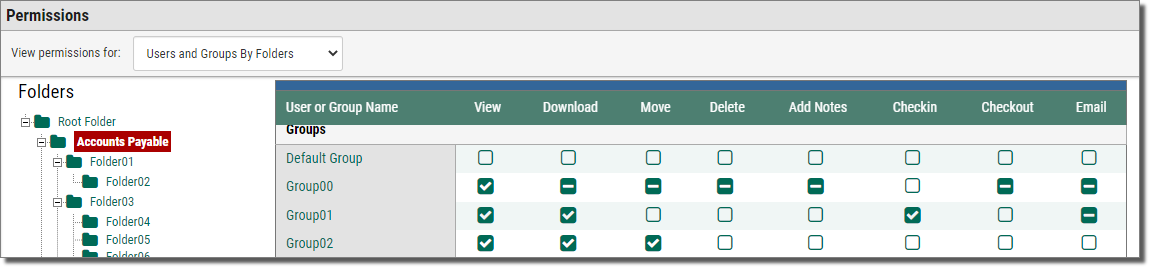
Assign a permission by clicking the icon in the column of the permission. Clicking an icon switches between allow
 ,
deny
,
deny  ,
and unspecified
,
and unspecified  .
.For example: Below, users in the Group 00 group can only view documents in the Accounts Payable folder.
-
Continue setting the permissions.
TIP:Set permissions for all the groups when you create a new folder. Users' permissions can be left unspecified - in this case, their permissions will be inherited from the groups they belong to.