![]()
For information about the account management page, /manageaccount, which is configured at the Site level, see Enabling the Account-Management Page.
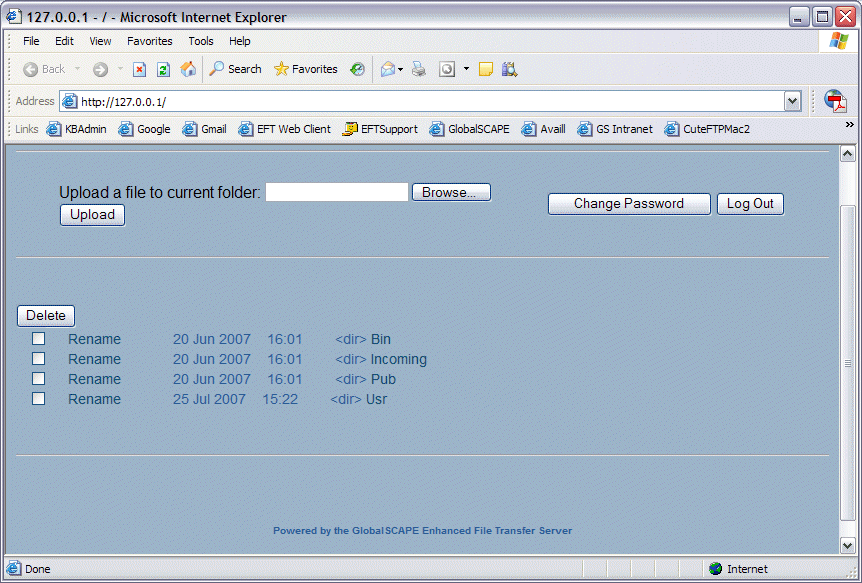
EFT Server comes with a built-in upload form, which uses the POST method. When HTTP transfers are enabled and a user has permissions to upload using HTTP, users can upload files to their home directory via a Web browser using the HTML Listing and Upload form. Users can type a direct path (UNC is supported if the operating system also supports it) or they can click Browse to locate the file. The Upload form automatically displays when a user connects to EFT Server via a Web browser, and displays the directory (folder) to which they have upload permission.
|
|
For information about the account management page, /manageaccount, which is configured at the Site level, see Enabling the Account-Management Page. |
To upload a file, users click Browse to find the file on their computer, then click Upload. The file is placed in the folder they are currently browsing.
If enabled in EFT Server, users can change their password from the Upload form.
Limitations of the Upload form include:
Inability to mass transfer files
Inability to rename or delete files
Inability to create folders
Minimum customization
The size of file uploads is limited by the setting in the User Setting Level or user account and the fact that you are using HTTP to upload files. Browser-based uploads are limited to a 2GB or less file size.
The look and feel of the HTML Listing and Upload form can be customized by creating a cascading style sheet (CSS) used to format the Web page. You can change options such as the background color (and/or image), fonts used (including specifying font sizes and styles, etc), link colors and decoration, and more.
|
|
To remove or edit the error message that appears in the HTML Listing and Upload form when no Web Transfer Client licenses are available, refer to Web Transfer Client Licensing. |
The files are located in the \EFT\EFTClient directory:
efthtmllisting.css - User defined; used to customize the HTML Upload form
efthtmladvanced.css - Controls advanced features of the HTML Upload form
To customize the HTML Listing and Upload form
On the EFT Server computer, create a CSS file using your favorite text editor and name it efthtmllisting.css.
|
|
You can copy and paste the example script below into a text editor, then edit the formatting as needed. The BODY tag defines the background color, H1 defines the size and color of the heading text, and so on. |
Save the file in the EFTClient folder. By default, the path is:
\Program Files\GlobalSCAPE\EFT\EFTClient
The example style sheet script below changes the default appearance of the Upload form to that shown after the script.
BODY
{ background-color:#9bb2c9;
background-image:url(logo.gif);
background-repeat:no-repeat;
background-position: 14px 10px;}
H1
{ font:18px arial;
font-weight:bold;
line-height:20px;
color:#295d97;
text-align: center;}
PRE
{ font: 14px arial;
font-weight:normal;
line-height:20px;
color: #295d97;}
FORM
{ font:12px arial;
font-weight:normal;
line-height:20px;
color:#295d97;
text-align: center;}
EM
{ font:10px arial;
font-weight:bold;
line-height:20px;
color:#295d97;
text-align: center;}
A {color: #0a4966; text-decoration: none; }
A:HOVER {color : #ffffff; text-decoration: none;}
A:ACTIVE {color : #0066cc;}
