Enable Workspaces to Send Files
Workspaces for Outlook is an enterprise ad hoc file transfer solution that allows employees to quickly and securely send large files right from within Microsoft Outlook. Workspaces for Outlook allows organizations to address broad scale, risky file sharing practices while providing an easy-to-use interface for end users that requires little to no training from IT staff. Users can quickly and easily send large files via email from within Microsoft Outlook via the dedicated add-in, and benefit from an enhanced email experience with advance sending features, such as the ability to receive file pick up receipts. Recipients pickup their files in their web browser via a secure link. Administrators have the ability to manage user transactions behind the scenes, including the ability to set secure link expiration overrides and set policies for the automatic handling of exceedingly large file attachments.
-
Before using this feature, the EFT administrator must enable Workspaces and install and enable the EFT Outlook Add-In, as described below.
-
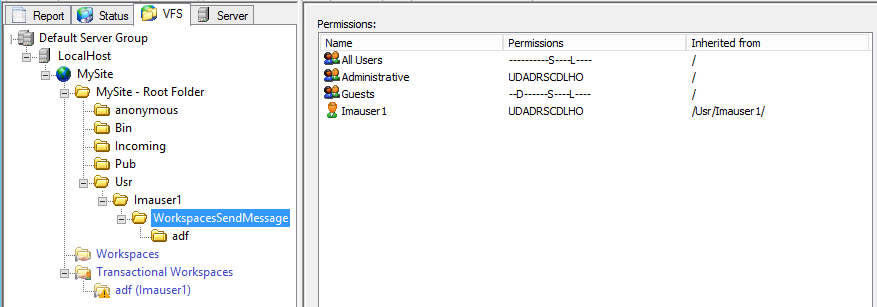
(In v7.4.7 and later) When you send a file using the WTC, a WorkspacesSendMessage folder is created under the sending user's home folder in the Virtual File System (VFS). Subfolders in the WorkspacesSendMessage folder are named for the Subject line of the message.
-
To enable Workspaces for Outlook
-
In the administration interface, connect to EFT and click the Server tab.
-
On the Server tab, click the Site you want to configure.
-
In the right pane, click the Workspaces tab.
-
Select the Enable Workspaces check box, then click Apply.
-
To configure Workspaces, on the Server > Workspaces - Send tab, Select the Enable secure file sending check box.

-
Under Authorizedusers can send files to, select one of the following options:
-
Existing EFT users only (most restrictive) - Allows EFT users to send files via Workspaces for Outlook only to other users with an EFT account
-
Existing EFT user and registered guest accounts - Allows EFT users to send files via Workspaces for Outlook to other EFT user accounts and registered guest accounts
-
Existing EFT users, registered guest accounts, and anonymous users - Allows EFT users to send files via Workspaces for Outlook to other EFT user accounts, registered guest accounts, and non-EFT user accounts. Non-EFT user accounts do not require credentials, making it easy for the recipient to pick up files, but makes the system less secure. To reduce this risk, the sender can make the pickup link "single use."
-
-
Transactional Workspaces folders in the VFS that are shared with unregistered users will have an exclamation point on the anonymous-access folder
-
-
-
In the Send portal reserved path box, specify the path for the Send portal. The default is /send.
-
In the Hostname:port box, specify the URL for file pick up.
-
To require the use of Outlook for large files, select the Auto-attach files in Outlook when they exceed check box, and then specify a size.
-
Specify the maximum expiration period for pickup links. The default is 1 month.
-
Do one of the following to deploy the EFT Outlook add-in on end-users' computers:
-
Use the EFT Outlook add-in installer:
-
-
Click Browse to open the EFT installation folder, get the EFT Outlook add-in installer, and install the EFT Outlook Add-In as described in Installing the EFT Outlook Add-In.
-OR-
-
-
Use the Outlook add-in deployment script:
-
-
Click View to open the Outlook Add-in Deployment Script box.
-
Copy and paste the script into the tool you are using to deploy the Outlook Add-In across your organization.
-
Click OK or press ENTER to close the Outlook Add-in Deployment Script box.
-
Edit the script to match your environment (i.e., the EFTHOST IP address and port, username, password).
EFT supports Manual authentication, which is really Basic authentication, so you have to explicitly provide the user's EFT username and password (that is, the username and password that this Add-In user uses to log in to EFT--not the admin credentials). EFT also supports Integrated Windows Authentication (IWA) where you don’t have to explicitly provide a username and password if you are logged into Windows with your domain account.
-
-
Edit the Add-In installer command-line arguments depending on the authentication type you want:
-
-
-
-
For manual authentication, do the following (EFTUSERNAME and EFTPASSWORD values have to be substituted with the actual Add-in user’s EFT username and password):
msiexec /lv installation.log /qn /i EFTOutlookAddinInstaller.msi EFTHOST=https://WIN-KST875BEBNP EFTPORT=443 EFTAUTHTYPE=MANUAL EFTUSERNAME=username EFTPASSWORD=test123! INSTALLLOCATION="%userprofile%\AppData\Roaming\GlobalSCAPE\EFT Outlook Add-in" FILESTORELOCATION="%userprofile%\AppData\Local\GlobalSCAPE\EFT Outlook Add-in"
-
For Integrated Windows authentication, do the following (EFTUSERNAME and EFTPASSWORD don’t need to be supplied):
msiexec /lv installation.log /qn /i EFTOutlookAddinInstaller.msi EFTHOST=https://WIN-KST875BEBNP EFTPORT=443 EFTAUTHTYPE=IWA INSTALLLOCATION="%userprofile%\AppData\Roaming\GlobalSCAPE\EFT Outlook Add-in" FILESTORELOCATION="%userprofile%\AppData\Local\GlobalSCAPE\EFT Outlook Add-in"
-
-
-
Related Topics