Configuring AS2 Outbound Partners Using the Wizard
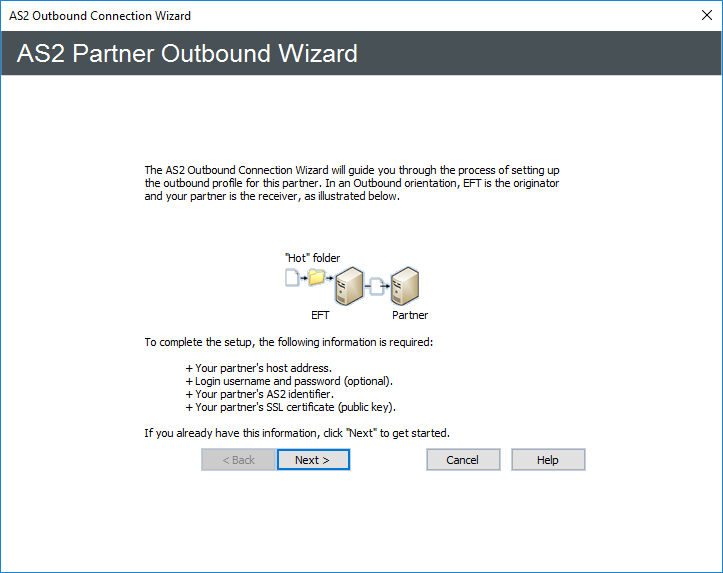
(Requires AS2 and HTTP/S module) EFT provides an AS2 Partner Outbound Wizard to assist you in configuring AS2 outbound connections. This wizard is accessible from the AS2 Outbound Settings dialog box the user account's Connections tab, and in the AS2 Send File dialog box in the Event Rule Action. The procedure below describes how to use the wizard to configure outbound AS2 partners.
To complete the AS2 Partner Outbound settings, the following information is required:
-
Partner's host address used for AS2 transactions
-
Partner's AS2 identifier
-
Path (inbox, outbox, or mailbox) to the remote server, if required by partner
-
Remote proxy settings, if required by partner
If you plan to execute a command upon success or failure of AS2 transactions, define the command before configuring your partner access; or you can go back later and edit the AS2 partner manually after you have defined the command.
If you plan to send a notification email upon success or failure of AS2 transactions, you can Create an email Notification Template to use in the email Action.
The MDN timeout for an AS2 reply is hardcoded to two hours; 5-day timeout for asynchronous transactions. See also the Retry and Timeout options below.
To configure outbound AS2 partners using the wizard
-
In the administration interface, connect to EFT and click the Server tab.
-
Do one of the following:
-
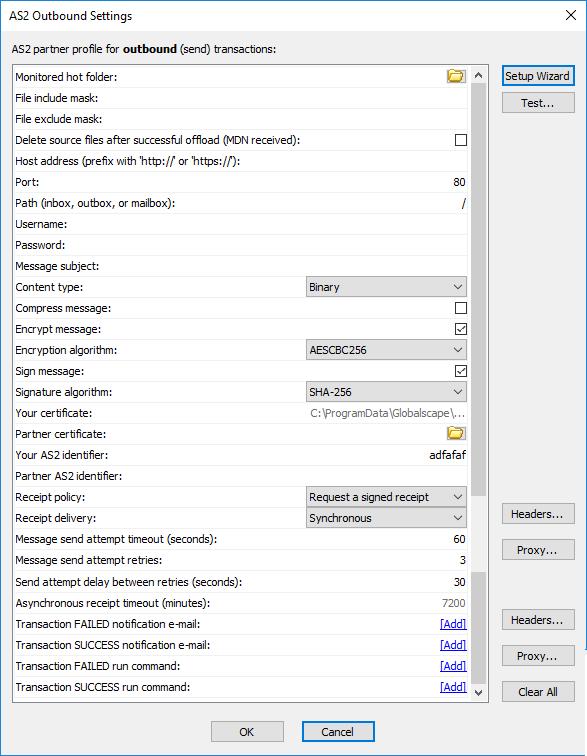
On the Server tab, click the user account that you want to configure, then in the right pane, on the account's Connections tab, select the AS2 outbound check box, and then click AS2 Outbound. The AS2 Outbound Settings dialog box appears.
-
In an Event Rule, after adding the AS2 send file to host action to a Rule, in the Rule Builder, click select. The AS2 Send File dialog box appears.
-
In either the AS2 Outbound Settings dialog box or AS2 Send File dialog box, click Setup Wizard. The AS2 Partner Outbound Wizard appears.
-
Click Next. The AS2 partner connection information page appears.
-
In the Partner host address or domain area specify the protocol to use (http:// or https://), IP address/domain name, and Port number used to connect to the AS2 partner.
-
In the Path area, provide the path to the inbox, outbox, or mailbox at the AS2 partner location.
-
In the Username and Password boxes, provide the logon credentials.
-
If you need to configure a proxy server, click Proxy and then refer to Configuring an AS2 Outbound Proxy for the procedure, if necessary.
-
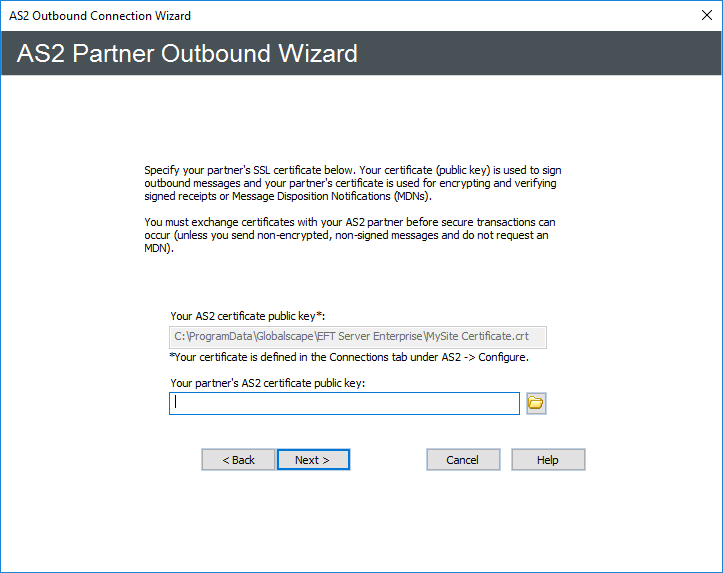
Click Next. The AS2 certificates page appears.
-
In the Your AS2 certificate public key box, the certificate that you specified when you created the Site appears.
-
In the Your partner's AS2 certificate public key box, type the path or click the folder icon to select your partner's public key file.
-
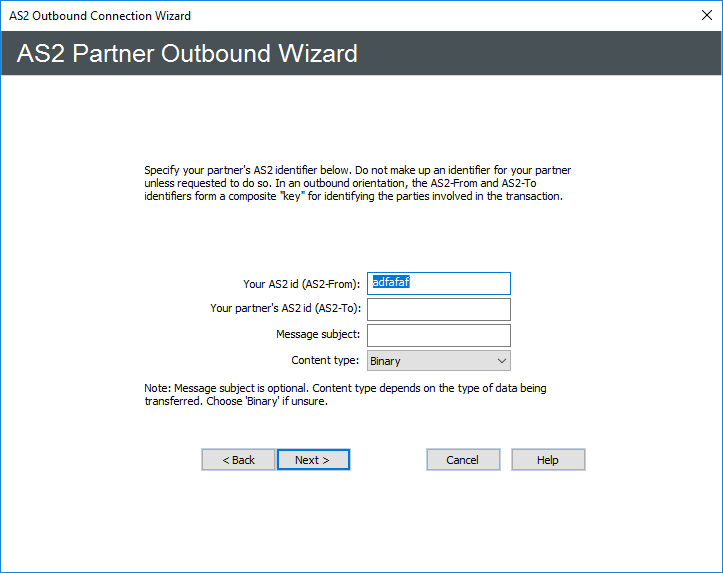
Click Next. The AS2 identifier page appears.
-
In the Your AS2 ID (AS2-From) box, your globally defined ID appears. You can use the same ID you defined for EFT when you enabled the AS2 inbound listener or you can define a different ID for each partner.
-
In the Your partner’s AS2 ID (AS2-To) box, specify this partner's ID (provided to you by the partner that you are defining). AS2-From and AS2-To form a pair for identifying the sending and receiving partnership. That is, they form a composite key for identifying the parties involved in the data exchange.
-
(Optional) In the Message subject box, specify the text that is to appear in the subject line of AS2 messages to/from this partner.
-
In the Content type box, click the list to specify the type of messages to be sent to/from this partner.
-
X12 - Format used by many healthcare, insurance, government, transportation, and finance organizations.
-
EDIFACT - Format adopted by the International Organization for Standardization (ISO) as the ISO standard ISO 9735.
-
XML - File format used for structured documents.
-
EDI Consent - Provides a standard mechanism for "wrapping" the EDI objects but does not specify any details about those objects.
-
Binary (default) - e.g., executables, word processing files, database, spreadsheet, and multimedia files
-
Plaintext - e.g., text and HTML files
-
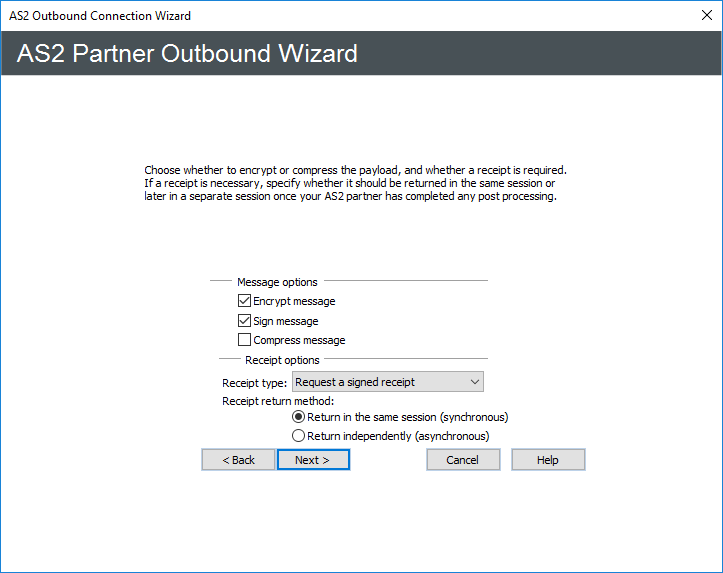
Click Next. The message and receipt options page appears. The MDN serves as a receipt, guaranteeing the transaction was successful.
-
In the Message options area, select or clear the check boxes depending on whether the AS2 message should be encrypted, signed, and/or compressed.
-
In the Receipt options area, click the list to specify whether to send a Request a signed receipt, Request an unsigned receipt, or Don't request a receipt.
-
If you clicked Request a signed receipt or Request an unsigned receipt (not Don't request a receipt), specify whether to send the receipt in the same session (synchronous) or independently of the session (asynchronous). Asynchronous receipts will be returned to the domain name specified on the Site's Connection tab using the port specified on that same page.
-
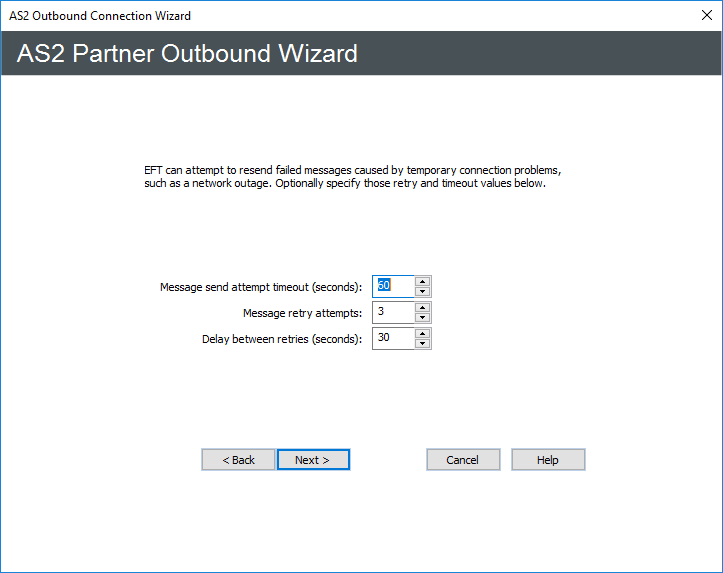
Click Next. The message retry and timeout options page appears.
-
(Optional) EFT can attempt to resubmit failed messages in case of network outage or other temporary (transitive) errors. EFT will resend the same message, payload, and AS2 Message ID. Specify the following retry and timeout values as needed:
-
Message send attempt timeout (seconds). This is the message connection/send timeout. The range is 0-600; 0 = no timeout; the default value = 60 seconds.
-
Message retry attempts. The range is 0-9999; (0 = no retry); the default value = 3 retries.
-
Delay between retries (seconds). The range is 0-9999; (0 = no wait); the default value = 30 seconds.
-
Asynchronous receipt timeout (minutes). The range is 0-999,999; (0 = no timeout); the default value = 7200 minutes (5 days). (This option does not appear if you specified to return the receipt independently/synchronous on the previous page.)
-
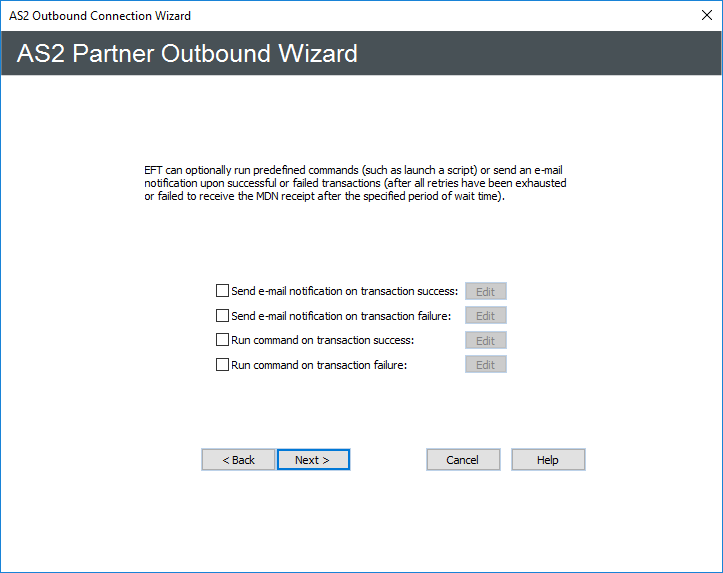
Click Next. If you define the connection from the user account's Connection tab, the transaction success or failure options appear. (This page does not appear in the Event Rule Action configuration.)
-
(Optional) Specify whether to send an email notification upon transaction success and/or failure and whether to run a command upon transaction success and/or failure. Select the applicable check box, and then click Edit to configure the email or Command.
-
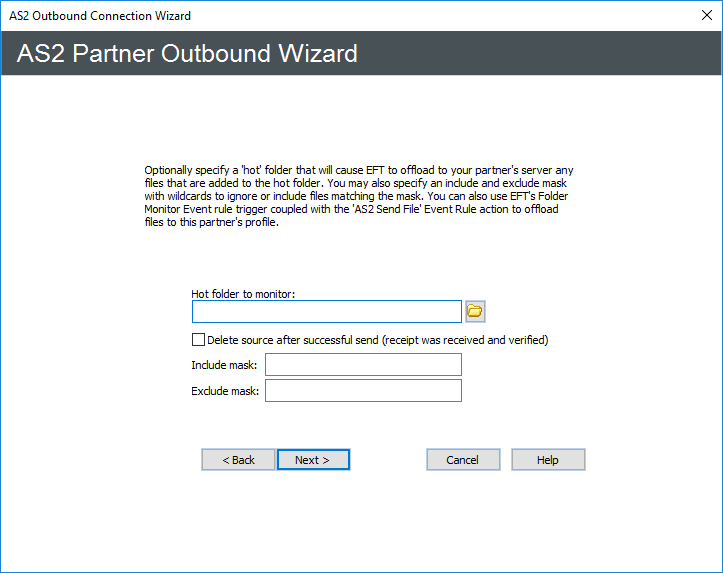
Click Next. The hot folder page appears. If you define the connection from the user account's Connection tab, the "hot folder" options appear. (This page does not appear in the Event Rule Action configuration.)
-
Specifying a folder to monitor is optional. If you specify a folder to monitor, EFT will automatically offload to your partner's AS2 server any files that are added to the specified folder. You can offload all files in the folder or only specific files or types of files. Wildcard masks can be used in the Include mask and Exclude mask boxes.
-
Click the folder icon to specify a folder or type a path in the Hot folder to monitor box.
-
If you want to delete the source file(s) after they are successfully sent, select the Delete check box.
-
If you want to specify only certain files are sent, specify the files to include or exclude in the Include mask and Exclude mask boxes. For example, to exclude all .wav files, type *.wav in the Exclude box. By default, all files are sent (Include mask = *.*).
-
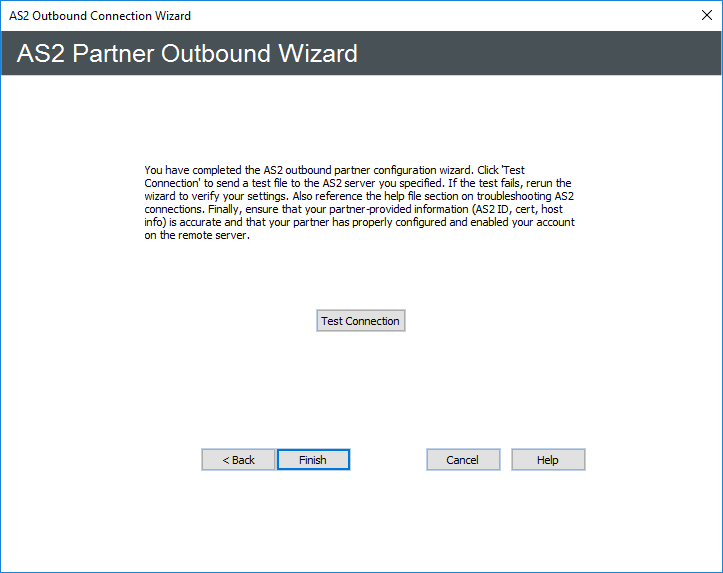
Click Next. The Test Connection page appears.
-
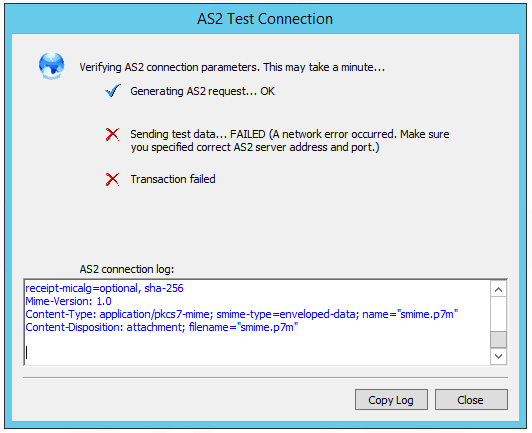
Click Test Connection. The AS2 Test Connection dialog box appears.
-
EFT attempts to connect to the AS2 partner and send test data.
-
If the test fails, data appears in the AS2 connection log area that you can copy to the clipboard to be pasted in a text file or email for troubleshooting. Click Close, then in the wizard click Back to adjust settings, if necessary.
-
If the test is successful, click Close.
-
Click Finish. The information provided in the wizard is updated in the account's AS2 Outbound tab. To make further adjustments to the partner's configuration, you can edit the AS2 Outbound tab directly.

For information about the various content types, refer to RFC 2046 at http://www.ietf.org/rfc/rfc2046.txt.