Creating EFT Administrators
The main EFT administrator account is created when you install EFT. That account can log in and create other administrators with varying permissions. You can give other users and group access to the administrative functions of EFT by creating an administration account for them in the EFT administration interface. For security and for compliance with the PCI DSS, you should not create more than one administrator with full control over EFT. (You cannot edit the settings for your own account.) Refer to Delegated Administration for details of creating "sub" administrators with a very specific subset of permissions for managing EFT, COM, Site(s), Settings Templates, user accounts, user passwords, and reports.
While you can have two administrators working on Event Rules at the same time, if they are working on the same Rule at the same time, when they save their Rule, the second administrator to save will get a notice that the changes could not be saved because changes have been made by someone else. They then need to refresh to see the other changes, and then make their changes to the event rule again.
The administrator accounts are only used for EFT administration. If administrator users also need to log in to the Web Transfer Client to exchange files, they will need a separate user account.
To create an administrator account
-
In the administration interface, connect to EFT and click the Server tab.
-
On the Server tab, click the Server node to which you want to add an administrator account.
-
In the right pane, click the Administration tab.
-
In the Administrator Access and Permissions area, click Add. The Create Administrator Account dialog box appears.
-
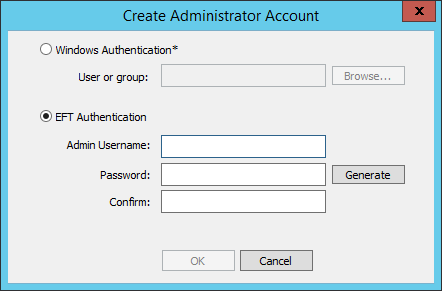
Specify either Windows Authentication or EFT Authentication.
-
If you choose EFT Authentication, specify the account details:
-
Define a user name for the account.
-
Define and confirm a password for the account or click Generate to generate a strong password.
-
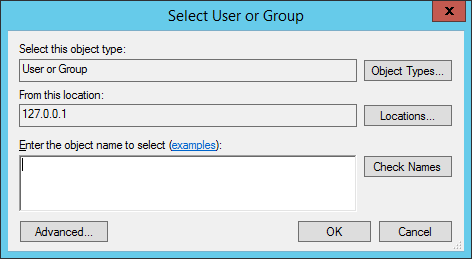
If you choose Windows Authentication, click Browse to specify the User or group. The Select User or Group dialog box appears.
-
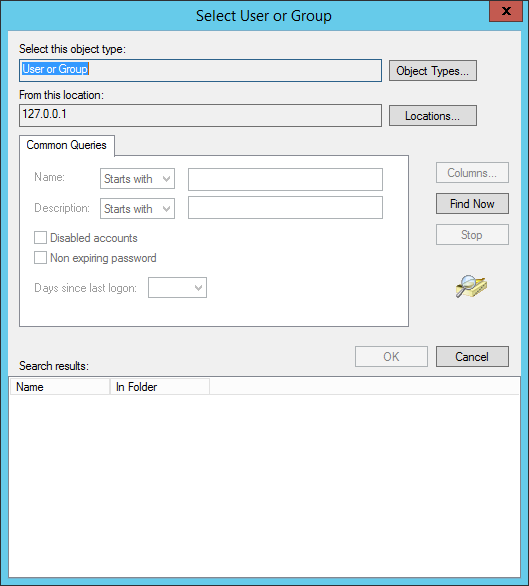
To expand the dialog box, click Advanced.
-
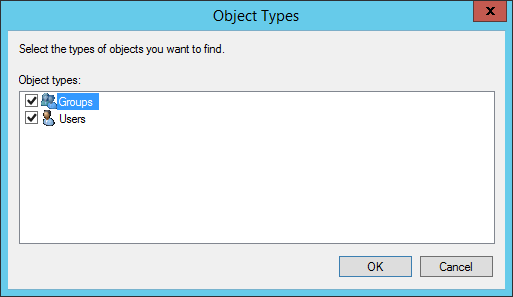
To specify the type of object to search for (User or Group), click Object Types. The Object Types dialog box appears.
-
By default, both groups and users are searched. To search only groups, clear the Users check box; to search only users, clear the Group check box, and then click OK.
-
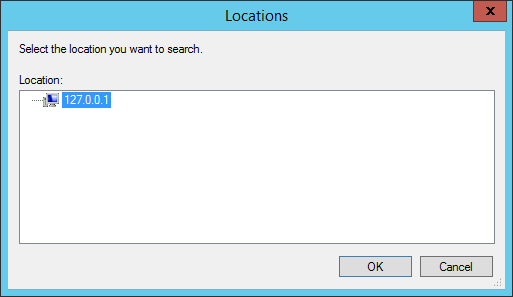
Click Locations to specify a network address to search. The Locations dialog box appears with available locations displayed.
-
Click a location, and then click OK.
-
In the Select User or Group dialog box, use the Common Queries area to search for a specific user or group.
-
After you have specified your search criteria, click Find Now. The search results appear.
-
Click the user or group that you want to use for this account, and then click OK. The user or group appears in the Create administrator Account dialog box.
-
Click OK.
-
On the Administration tab, click the Selected account permissions policy box, then specify the functions this account can control. (Refer to Delegated administration for details of each type.) The Selected account permissions policy (Site administrator, User administrator, etc.) applies only to the account selected.
-
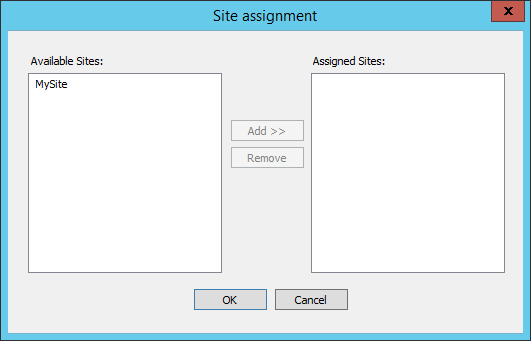
If you specified that the account is a Site administrator, Template Settings administrator, Change Password administrator, or User administrator, the assignment dialog box appears.
-
Specify one or more items in the Available box, then double-click the selection or click Add, then click OK. The assignment appears in the Assigned list.
-
Complex Passwords, Password History, Password Reset, and Account Policy options apply to all EFT-managed administrator accounts defined on this Server.
-
Optional permissions - By default, the account has Manage personal data, Run & Edit Reports, and COM permissions. Clear the check box for items that you don't want to apply to the selected account.
-
COM - Allow or deny the administrator account to use the COM API
-
Run & Edit Reports - Allow or deny ability for user to run reports.
-
Manage personal data - Allow or deny the administrator account to manage users' personal data. Upgrading from 7.4.x enables this option on all existing administrator accounts.
-
Click Apply to save the changes on the Server.
Passwords are case-sensitive; the username and password fields each cannot exceed 1024 characters. If the Password and Confirm boxes do not match, the OK button is disabled. Retype the passwords.
AD accounts that are part of the local computer’s administrator’s group will not appear when browsing the “local computer” because these accounts are AD accounts, not local. AD accounts will appear when browsing the "AD" scope. You can select AD accounts when performing remote administration as long as the administration interface and EFT are in the same domain or working across trusted domains.
The new user appears in the Administrator account names box.
Related Topics