Configuring Switch Pairs
Examine the list of users with special authorities on your systems. Identify profiles that do not need the special authorities, or profiles that only need the special authorities on an emergency basis, or at specific times. Your goal should be to reduce the number of users with each of the special authorities to a very small number on each system.
For the following example, we will assume the previous scenario with Joan, Ted, and Alice.
- Create the privileged profile with the higher level of authority needed, (for this example, "APMOD").
- Set the password to *NONE so that it cannot be used for interactive sign-ons.
- Set the Password Expiration Interval to *NOMAX to ensure it remains available.
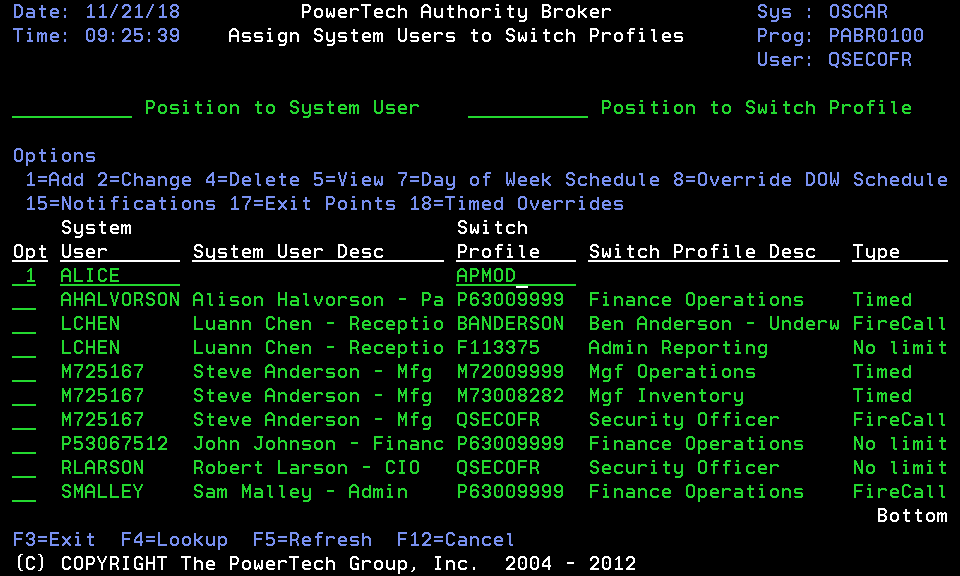
- Use the command LWRKAUTBKR to Launch Authority Broker.
- From the Main Menu, choose 1. The Assign System Users to Switch Profiles screen appears.
- Under Opt, enter 1, then specify the user (ALICE) and switch profile (APMOD).
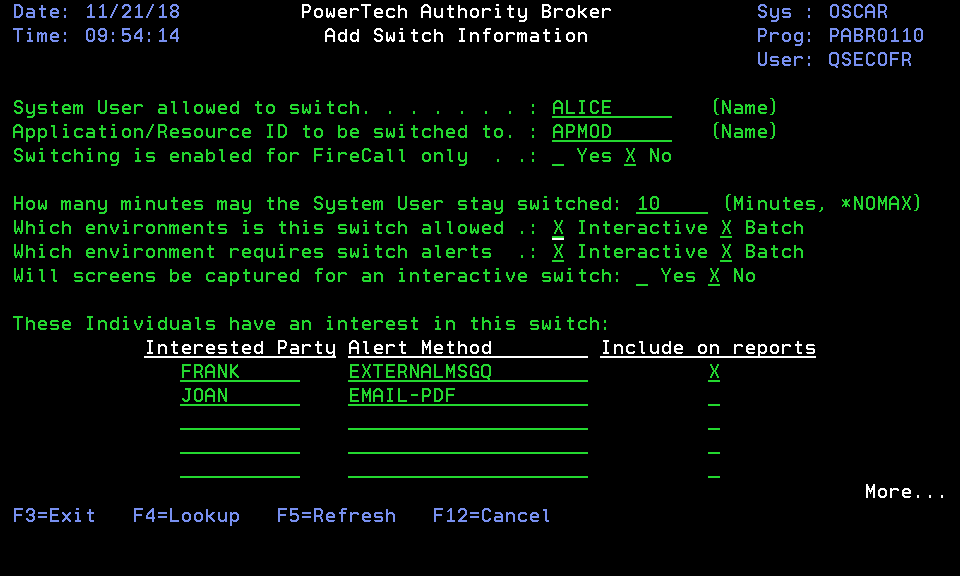
- Press ENTER. The Add Switch Information screen appears.
- Enter the desired switch information. Alice will be allowed a 10 minute session to complete her task. In this case, since Joan and Frank have an interest in reviewing Alice's switches, they are added as Interested Parties who will receive a report each time Alice switches to APMOD.
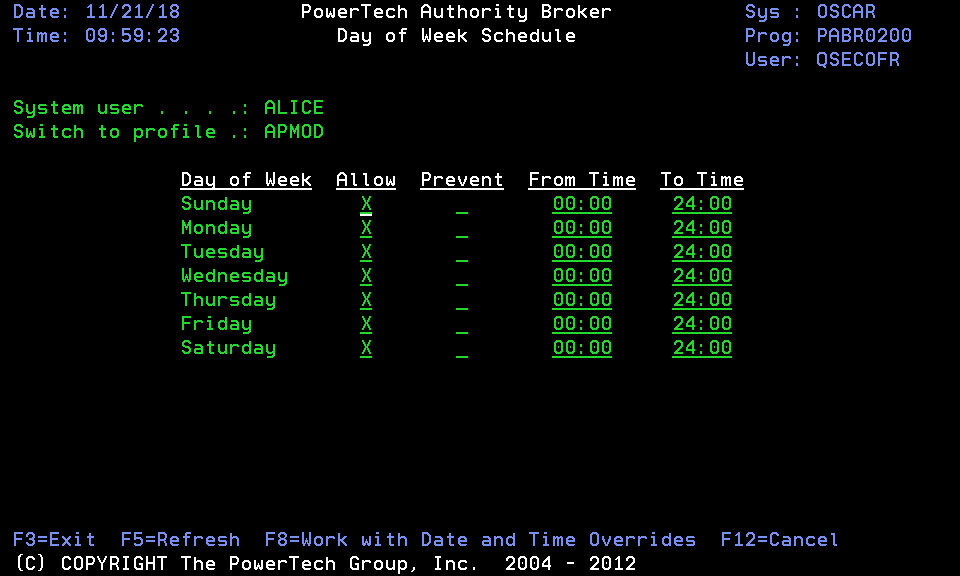
- Press ENTER. The Day of Week Schedule screen appears.
- Here, specify the days and times the User (Alice) will be able to switch to the APMOD profile.
- Press ENTER. The Switch is added to the list. The message "Entry added to database" appears at the bottom of the screen.
- Enter Option 5 (View) to display the Display Switch Assignment screen where you can view the Switch information.
- Enter option 15 (Notification Information) to display the Switch Pair Notifications screen, which can be used to list, add, and remove Interested Parties associated with a Switch Pair.
- To delete a Switch Notifications entry or an Interested Party entry, simply use the space bar to blank out the entry.
- Enter option 17 (product exit points) to display the Work with Switch Pair Exit Points screen, which is used to maintain product exit points for a system user/switch profile combination. This is not valid when adding an assignment.
- Enter option 18 (Timed Overrides) to display the Work with Timed Overrides screen, which is used to maintain timed options for a system user/switch profile combination.
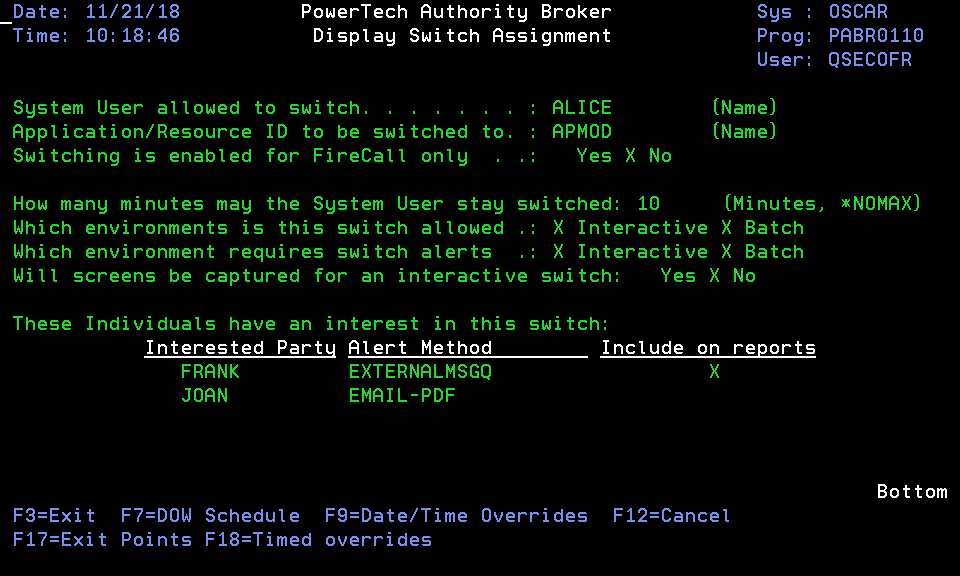
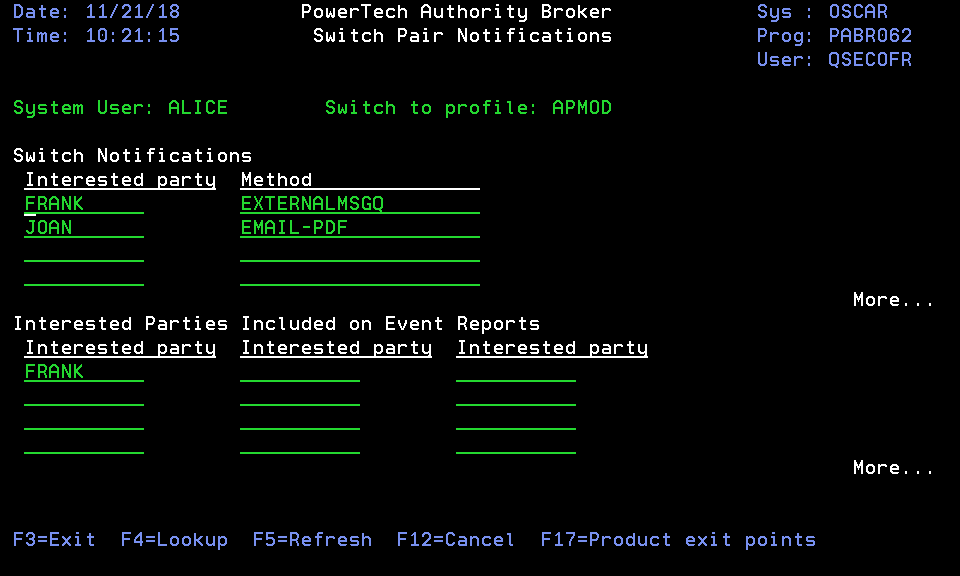
Interested Parties placed in the Switch Notifications section will be informed, via the given method, each time the System User switches to the Switch to Profile. Interested Parties placed in the Interested Parties (included on the Event reports) section will be incorporated into the Event reports.
Next, inform system users how to access their 'Switch To' profile using the steps in the next section, Switching Profiles.
 Previous - Implementing Authority Broker Previous - Implementing Authority Broker
|
Next - Switching Profiles
|