The HelpSystems Insite browser interface provides an efficient, interactive method of managing Exit Point Manager across all managed systems on your network. All the core functions of Exit Point Manager are available from Insite, including access to Rules, IP Address Groups, Pre-Filters, Product Defaults, Captured Transactions, Memorized Transactions, Object Rules, and Reports. Similar procedures are used for searching, filtering, adding, editing, deleting, and otherwise managing all of these items from your browser. The following instructions explain these common procedures.
***IMPORTANT: To users planning to use the HelpSystems Insite web browser interface with Exit Point Manager***
If *PUBLIC is locked down in your current Exit Point Manager configuration, you need to create rules that allow some of Exit Point Manager's profiles to access to the following server functions.
| Server | Function(s) |
|---|---|
| *SIGNON | RETRIEVE |
| *RMTSRV | RMTCMD, DSTPGMCALL |
| *SQL | INIT |
| *SQLSRV | OPENFETCH, PRPDESCRB |
| *QNPSERVR | INIT |
See Creating a Service Profile User Rule - green screen for information on how to allow these profiles to access these functions.
Using Insite with Exit Point Manager
The following instructions provide an overview for how to manage Exit Point Manager using your web browser.
Dashboard
The Dashboard allows you to see a snapshot of all network activity that has passed through (or been blocked by) Exit Point Manager.
Use the Dashboard to see an overview of your Network Activity.
To start the Dashboard Data Collector, which records the transactions shown in the Dashboard charts, in the green screen, run the command PNSSTRDASH. Or press F22 to activate the Dashboard Data Collector using the Operational Status screen.
See Dashboards Overview for more details.
Navigation Pane and Select Products Pane
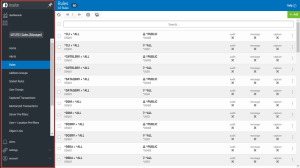
The Navigation Pane includes the general directory of management tools for Exit Point Manager, and, when open, is located on the left side of your browser window.
Click  to allow the Navigation Pane to minimize. Click
  to pin the Navigation Pane open, so its contents remain visible.
Click  to open or close the Select Product Pane.
The Navigation Pane includes a directory of Exit Point Manager's main management tools.
Sort, Search, and Filter settings
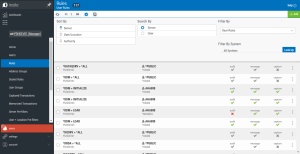
Each of the main pages include settings that allow you to choose how to sort the existing list items, what type of data will be searched when you do a search, and how to filter the list.
- Click the Settings button
 to open the sort, search, and filter settings.
 - Select how you want the status list sorted (Sort By). Click your selection again to change the sort order to ascending
 or descending
  .
NOTE: Sorting information, including the column the list is currently sorted by and the sorting direction, is available in your browser's address bar. For example, a URL that includes "sort/server/dir/1" indicates the list is sorted by server, low to high. A URL that includes "sort/server/dir/0" indicates the list is sorted by server, high to low.
 - Select the list category that will be used for searching (Search By). For example, for Rules, you can choose to search by Server, User, or Location.
- Select the filtering you want used (Filter By). You can choose to see all the list items, or you can select a specific type.
- Click Close
 to close the settings.
Searching
Type into Insite's Search box to find all items that include the specified text. Be sure the text you are searching for is in the same category selected for "Search By" in the Sort, Search, and Filter settings (see above). A text search queries all items in the category selected for all servers shown.
A search box appears near the top of your browser window.
Action Menu
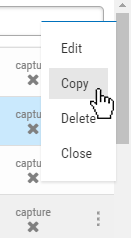
Roll your cursor over the right side of the list of Rules, Object Lists, and Pre-filters to display three dots  . Click these dots to display a context menu you can use to Edit, Copy, or Delete the item.


 Previous