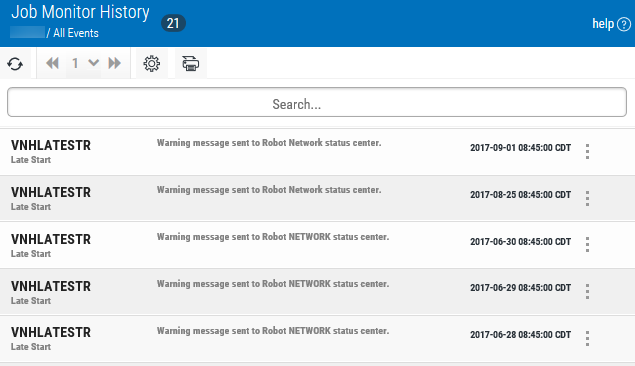
Job Monitor History
Job monitors allow you to monitor your job schedule for specific events, such as jobs that run too long, complete too quickly, or start later than their scheduled run time. You specify the criteria when you set the job up (this is done in the Explorer or IBM i versions of Robot Schedule). You also specify what Robot Schedule should do if it identifies a job monitor event. Robot Schedule can end a job or notify you by sending a message to the job’s message queue; sending a text, email, or pager message via Robot Alert; or sending a status to the Robot Network Status Center.
When a monitored job reaches one or more of the criteria defined on the Job Monitors tab, Robot Schedule takes the specified action and a history record is created. You can view these history records.
Viewing the Job Monitor History Page
In the Navigation Pane, clicktap Job Monitor History under the Robot Schedule menu. If the menu is hidden, hover over the Navigation Pane to expand it.
Things to know and do:
-
The number of records in the list, the server they're on, and the filter being used is displayed at the top of the page.
-
ClickTap
 Refresh to refresh the information in the display.
 -
ClickTap the page number and select the page you want to view. Or, clicktap the previous and next arrows.
-
ClickTap
 Print Event History to view the Event History list in HTML format. You can then select all the records (Ctrl+A) and copy it (Ctrl+C) to paste it into a spreadsheet. Note: You may have to disable the pop-up blockers in your browser to view the list.
 -
Start typing in the Search field to find a specific record. It will find everything that contains what you're typing. See Sorting and filtering below to learn how to filter your search.

Actions you can take:
ClickTap  Show Actions for any record to display the following options:
- Select Job Completion History to see the completion history for the job.
- Select Properties to display the job's properties.
Sorting and Filtering the Display
There are settings for the Job Monitor History page that allow you to choose how to sort and filter the list.
Follow these steps:
-
ClickTap
 Settings.
-
Select how you want the lists sorted (Sort By). ClickTap your selection again to change the sort order to
 ascending or
  descending.
 -
Select one or more options under Search By to narrow the list of items displayed.
-
Select an option under Filter By to further narrow the list of items displayed.
-
ClickTap
 Settings to close the settings.