Adding Unmanaged Hubs and Switches to a Map
Intermapper cannot automatically discover or monitor unmanaged switches and hubs (called dumb devices) since they have no IP address. However, there is a workaround that allows you to represent them on an Intermapper map.
To perform the workaround, you can create a placeholder icon and then manually drag the links from the appropriate devices to this new icon. Although Intermapper cannot test or monitor this fake equipment, it appears on the map and displays the interconnections of your network as a tool to diagnose problems.
The following is a step-by-step description of the process. Note that this description works equally well for either switches or hubs.
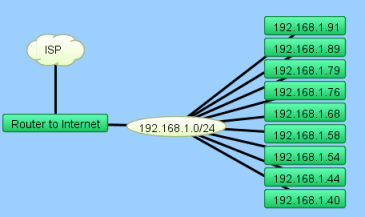
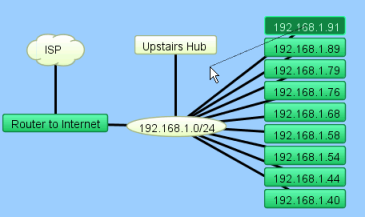
In the starting map, notice that Intermapper automatically connected a number of devices to the network oval labeled 192.168.1.0/24. The top three devices (IP addresses 192.168.1.91, .89, and .79) are connected to a dumb (unmanaged) hub on the floor. This page shows how to create a placeholder icon to represent the hub and connect those three devices to it.
|
ProblemThe top three devices (IP addresses 192.168.1.91, .89, and .79) are connected to a dumb (unmanaged) hub. We want to create a placeholder icon that represents the hub and then move the connections for those devices to the placeholder. |
|
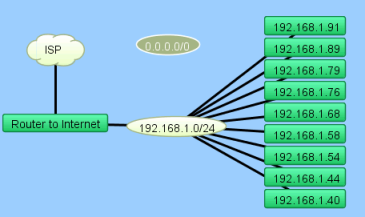
Step 1: Creating a Placeholder to Represent Your HubTo create the new empty network:
|
|
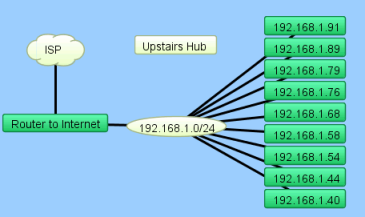
Step 2: Tidying Item AppearancesTo tidy up the appearance of the item: |
|
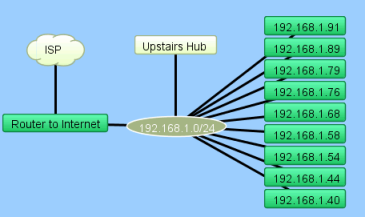
Step 3: Connecting the Hub to the NetworkTo connect the hub to the network:
A line is displayed, connecting the two items together. This line persists as you move the items around your map. |
|
Step 4: Connecting Devices to the HubTo connect the devices to the hub:
The line stays with the new rectangle. Do this for all three links. |

|
ResultYour map should look similar to this after dragging the three links from the oval to the fake hub. |