Editing Labels
Use the Label command, available from the Format menu (Cmd/Ctrl-L) to edit the labels for selected map objects. You can edit the label for a single device or network from the Device or Network Info window.
Every item on a map has its own descriptive label. Intermapper creates a default label showing the device's full DNS name or IP address(es).
To edit a map object's label:
- Make sure the map is in Edit mode.
- Select one or more map objects.
-
From the Format menu, select Label (Cmd/Ctrl-L).
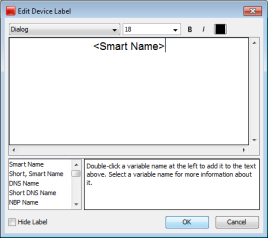
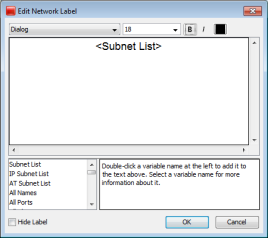
Depending on the selected object, the Edit Device Label dialog or the Edit Network Label dialog is displayed.
-
Enter label data as follows:
- Type text in the Label dialog's text box.
- Double-click any variable name in the list at the lower-left to insert that value into the item's label.
- Select Hide Label.
For example, the device in the Edit Device Label window uses the short, smart name (the leftmost part of the full domain name). The network shown in the Edit Network Label window has a static (unchanging) label of Our ISP with a list of all the subnets in the network shown on the next line.
|
|
|
Hiding a Device or Network Label
In some cases, you might not want to display a device or network label.
You can hide the label for any device or network unless the icon is set to one of the following:
- Rectangle
- Oval
- Cloud
- Text
To hide the label for a device or network:
- From the Format menu, select Icon. The Select an Icon window is displayed.
- Select an icon other than one mentioned above and click OK. The icon is displayed for the selected device or network.
- From the Monitor menu, select Label. The Edit Device Label or Edit Network Label window is displayed.
- Select the Hide Label check box and click OK. The label for the selected device or network is removed.