Insert Menu
You can use the Insert menu to insert devices, networks, links, and blocks of text to your map. You can also use this menu to initiate the Auto-discovery and network-scanning processes.
The Insert menu is available only in the Map window and is active only when the Map Editor is on.
| Menu Command | Description | |
|---|---|---|
| Device | Adds one or more devices to a map. | |
| Network | Adds a network (oval) to the map. | |
| Link | Connects two devices with a link. | |
| Auto-Discover | Scans a network to find network devices such as routers, hosts, switches, hubs, servers, workstations, and place them on the map. Specify a starting address and the kinds of devices Intermapper finds and limit the breadth of the search. | |
| Scan Networks |
Scans a network to find network devices such as routers, hosts, switches, hubs, servers, workstations, and place them on the map. Limit the types of devices Intermapper looks for. This command is available only when a network is selected, but the Filter dialog is also available from the Automatic Device Discovery dialog. |
|
| Empty Probe Group | Inserts one or more empty probe groups in the map. | |
| Text | Adds an object to the map containing the specified text. | |
| Icon | Inserts an icon into a map. | |
| Map Benchmark | Inserts a benchmark to define the latitude and longitude of a point on the map. | |
| Groups two or more selected devices into a probe group. Devices must have the same IP address. | ||
| Un-Group | Removes all probes from the selected probe group, and create a single device for each probe. |
Device
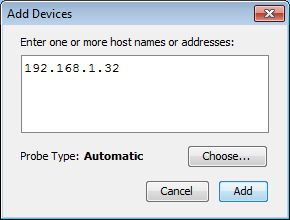
Adds a new device to a map. Intermapper links the newly-added devices to networks already in the map. This example shows the Add Devices window.
To add a device:
-
Enter the one or more device names or addresses into the window.
Enter the names manually or paste from some other source. The names must be separated with commas or whitespace (spaces, tabs, or returns). The list of host names or IP addresses can be copied from a text file, from a traceroute program, or from other source of names and/or addresses. To resolve a domain name to an IPv6 address, enclose it in [square brackets] as shown in the example.
-
Select a probe type. Automatic uses SNMP or ICMP Echo for IP devices.
You can also select from a list of probes for web servers, mail servers, or any of the other probes shown in the menu. For a complete list of the built-in probes, see Probe Reference.
- Enter a port number (if applicable to the probe).
- Enter an SNMP Community string (if applicable).
- Click OK.
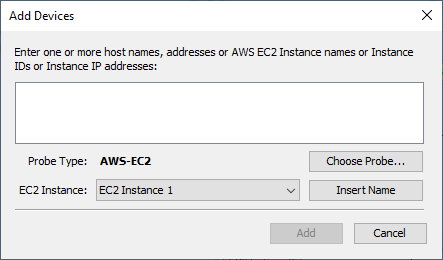
To add an AWS device:
If you have AWS EC2 instances entered in Sever Settings, you may add AWS devices to any map. To add an AWS device:
-
Click Add Device.
- Click Choose Probe... The following dialog box appears:
-
Click Insert Name to insert AWS EC2 instance names into the edit box. (You can also manually type the AWS EC2 instance names into the edit box.)
-
Click Add. After a moment, you will see the devices with the AWS EC2 instances.
Network
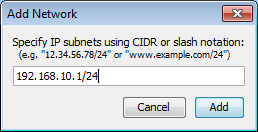
Adds a network (oval) to the map. This is useful when Intermapper does not automatically detect the network because no SNMP-speaking devices are present.
The Add Network window is displayed. Enter the IP address. For more information on how IP network information is represented, along with a discussion of the /24 notation, see Subnet Mask FAQ. )
After you click OK, a new network oval is displayed on the map representing that subnet. You can connect devices to this network by dragging their links as described in Adding and Removing Links.
Link
You can use the Link command to manually add a link where none exists. This can be useful when a link is not added during the auto-discovery process or when you want to use links to specify that certain devices are dependent upon other devices. For more information on dependencies, see Using Notification Dependencies.
To add a link manually:
- Select two devices or networks. (The menu command is available only when two items are selected.) You can use Shift-click, Ctrl-click, or you can click and drag to draw a box around the items you want to select.
- From the Insert menu, select Link. A link is displayed between the selected items. The link is permanently attached and remains connected when you move the items.
To remove a manually-added link:
Right-click the link and select Remove.
Auto-Discovery
You can use the Auto-Discover command to open the Automatic Device Discovery window. Using this command, you can automatically find network devices such as routers, hosts, switches, hubs, servers, and workstations and place them on the map. Specify the kinds of devices Intermapper finds and the breadth of its search.
Intermapper uses a starting address and scans for additional devices. By default, Intermapper starts with its router's address or its own IP address.
You can, however, enter a different address or DNS name or WINS name (preceded by back slashes \\) as a starting point. If Intermapper finds SNMP-speaking routers with connections on other networks, it searches those networks, finding more devices (and possibly more routers) until the specified hop limit is reached.
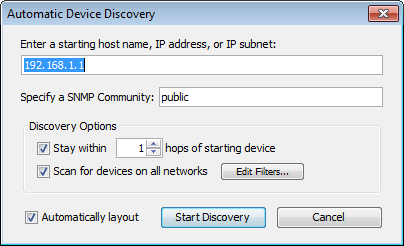
The Autodiscovery window allows you to specify the starting address as well as specifying other options for the auto-discovery process.
Enter a starting host name, IP address, or IP subnet - Enter the name or address of a device that Intermapper should use to begin the auto-discoveryprocess.
Specify a SNMP Community - Enter an additional SNMP read-only community string to be used to interrogate all devices. (Intermapper always attempts to read SNMP information using the default public community string. For more information, see SNMP Frequently-asked Questions.)
Stay within __ hops of starting device - Stops auto-discovery after Intermapper searches the specified number of hops from the starting device.
Scan for devices on all networks - See Scan Network.
Edit Filters - Click this button to open the Network Scanning window. See Scan Network below.
Automatically Layout - Select this check box to have the map laid out automatically (using the Organic layout).
Scan Networks
The auto-discovery process allows you to select which kinds of devices are added to the map. Intermapper applies a set of filters to the discovered devices. Only those that match the specified filters are added to the map.
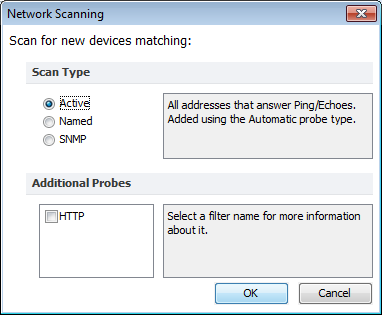
Click Edit Filter from the Automatic Device Discovery window or select Scan Networks from the Insert menu to open the Network Scanning window.
The following options are available:
- Active - forces a complete IP address scan for each network. Intermapper sends an ICMP Ping request to each IP address in the subnet range.
- Named - each IP address in the subnet is looked up in the DNS. If a corresponding name is present, the device is added to the map.
- SNMP - Intermapper sends an SNMP GetRequest to each address in the range. Devices that respond are added to the map.
- Additional Probes - if the HTTP check box is selected, an HTTP probe is added if an HTTP response is received and the device becomes a probe group.
Empty Probe Group
![]()
Enter one or more addresses or domain names in the Add Probe Groups text box and click Add. An empty probe group is added for each name or address.
Text
You can use the Text command to place a block of text on a map at a specified location.
To add a text object to a map:
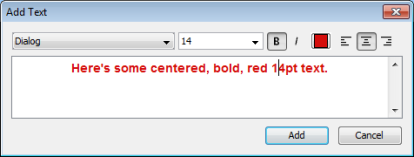
- From the Insert menu, select Text. The Add Text window is displayed.
- Enter the text you want to add to your map.
- Use the formatting controls to format the text.
- Click OK. A text object is displayed on the map.
- Drag the text object to move it to the desired location.
Icon
You can use the Icon command to add an icon to a map. An icon inserted using this method is not associated with any device or network; it is simply a graphic element added to the map.
To add an icon to a map:
- With the map editable, select Icon from the Insert menu. The Select an Icon window is displayed.
- Select an icon and click OK. The icon is displayed in the map.
Map Benchmark
You can use the Map Benchmark command to define the latitude and longitude of a point on a map. This is useful if you are placing devices on the map using geographic coordinates. Each device is located on the map in relation to the map's benchmarks.
Group
You can use the Group command to create a probe group, a single device containing multiple probes. In order for the command to work, all selected devices must use the same IP address.
To create a probe group:
- Select the devices you want to group. All selected devices must have the same IP address.
- From the Insert menu, select Group. The selected devices are collapsed into a single device, containing a probe for each selected device.
Un-Group
You can use the Un-Group command to explode a probe group into individual devices.
To un-group a probe group:
- Select the group you want to un-group.
- From the Insert menu, select Un-Group. The probe group is replaced by individual devices, each configured with one of the probes from the original group.