Customizing Reports
After you have run an assessment, you can tailor the report output to display data in a special order, organize the report columns, and filter the data to isolate the important information. You can also create custom filters to isolate data.
Sorting and Filtering Report Results
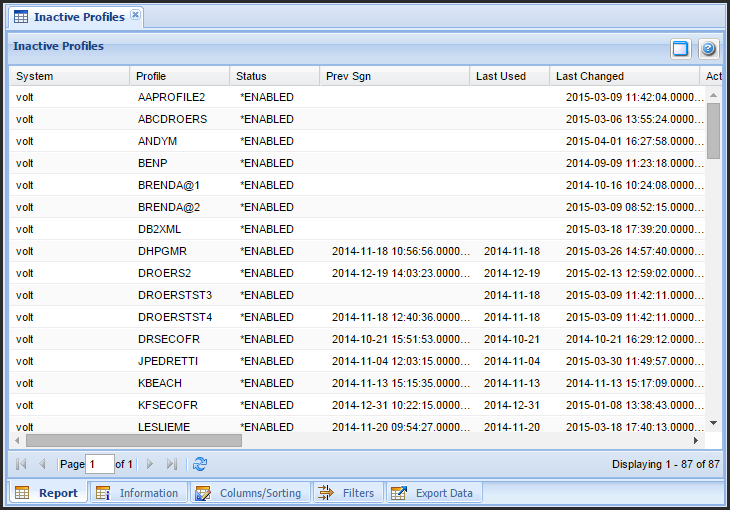
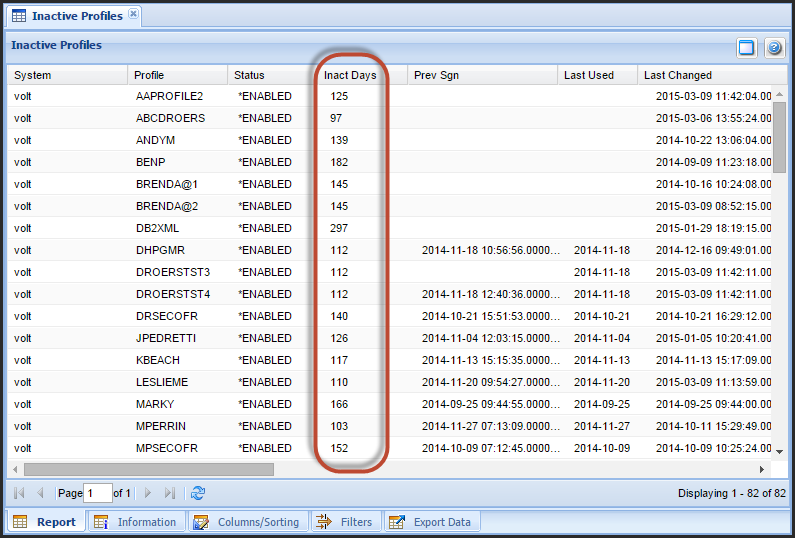
In the following example, we will run an Inactive Profiles report, then add a new column (Inactive Days), use a filter to remove the system profiles, and order the profiles according to the number of days they have been inactive.
To customize the appearance of report output
- Select the report you would like to customize. For this example, we have run the Inactive Profiles report. These are profiles that have not signed on recently.
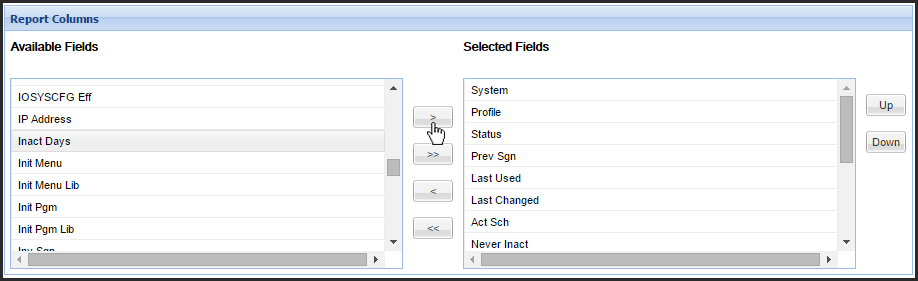
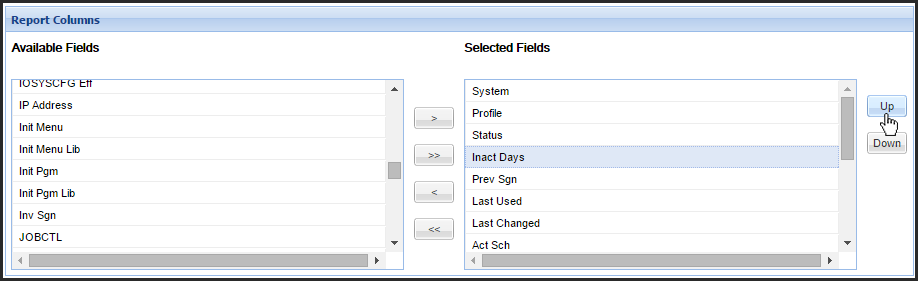
- First, let's include a column that shows the number of days since the last sign-on. Click
 to show the Report Columns options.
 - Under Available Fields, select "Inact Days" then click
 to add it to the Selected Fields list.
 - It appears at the bottom of the Selected Fields list. Use the
 button to move it to the desired position, in this case, between the "Status" and "Prev Sign" columns.
 - Click
 to display the report with the new column.
 - Click
 .
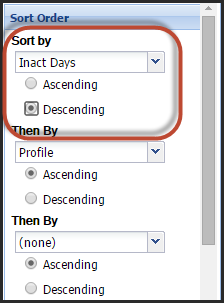
. - Under Sort Order, choose Descending, then, from the Sort By drop-down menu, choose Inact Days.
- Click
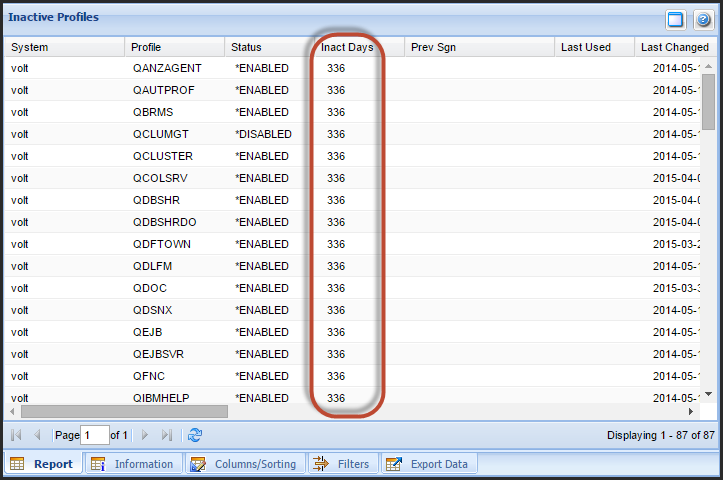
 to view the report, now ordered by the number of inactive days, highest to lowest. Next, we'll exclude the IBM system profiles from this list.
 - Click
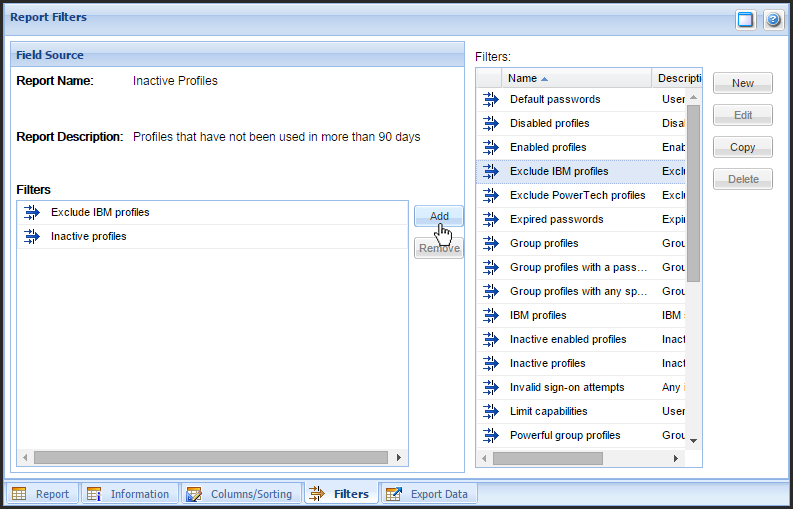
 .
. - Choose the Exclude IBM profiles filter and click
 . (This is a Powertech-provided filter that removes common IBM profiles.)
 - Click . The results now exclude the IBM profiles.
Next, we'll sort this report by the number of days inactive, highest to lowest.

Further reordering, editing, and filtering of this report can be done either in Powertech Compliance Monitor for IBM i, or by exporting the report to a spreadsheet. Click the  tab and click
  to export the report as a spreadsheet, then open the file in a program like Excel to organize the data as required.
Report Filters
A report filter tells Powertech Compliance Monitor for IBM i what information belongs in a report. You can apply a filter to a report when you define or modify the report to restrict the data that it contains. Powertech Compliance Monitor for IBM i includes predefined filters, like the one used in the previous example, that tackle the most common IT control deficiencies. Some of these filters are used in the predefined reports shipped with Powertech Compliance Monitor for IBM i. Additional predefined filters are available to add to predefined or custom reports. You also can define your own custom filters to specify exactly the criteria for a report.
You can create new filters, copy existing filters and edit them to define a new filter, and edit custom filters. A simple way to create a new custom filter is to copy an existing filter and edit the filter definition.
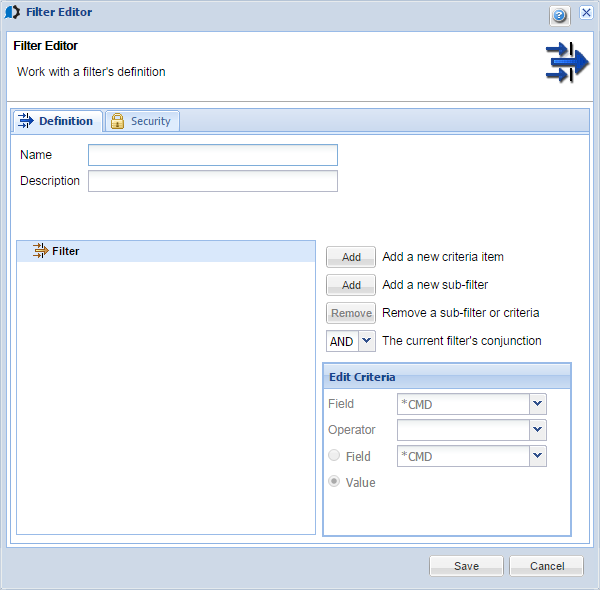
The Filter Editor window allows you to work with the filter definition. The Filter Editor makes it easy to create customized filters using standard SQL query rules and logic.
Use the Filter Editor window to define or modify a report filter.
To define a filter
- Select the report you would like to filter, then click .
- Click
 in the upper right. The Filter Editor appears, with the
  tab open.
 - Enter the desired Name and Description in the Filter Editor window.
- Use the Edit Criteria section in the lower-right to define the filter criteria.
- Click the appropriate
 button
to add a new criteria item or sub-filter. Select a conjunction from the
drop down, and use the Edit Criteria section to define the item.
button
to add a new criteria item or sub-filter. Select a conjunction from the
drop down, and use the Edit Criteria section to define the item.- Value/Field: Click a radio button and specify a field value or select a field from the drop down.
- Operator: Select an operator.
- Field: Select a field from the drop down; the fields available vary depending on the type of filter you are defining.
NOTE: Select a current filter criteria item or sub-filter and click if you would like to remove it.
 - Choose the
 tab.
tab. - Enter the following information on the Security tab:
- Owner: The owner of the report group and the owner's authorities. Select a user name from the drop down menu to change the report group owner. To set authorities and privileges for more than one user, specify a primary group.
- Primary Group: Specifies an authority group; all users in the group have the same authorities.
- Public: Specifies the authorities of all users that are approved to use the product.
- For each option on the Security tab:
- Use authority allows read-only access to the report group.
- Change authority allows read and write access to the report group.
- Click
 to display the Authorized Users windowAuthorized
Users window, which allows you to define or modify the users and groups
that can access the Consolidator system.
to display the Authorized Users windowAuthorized
Users window, which allows you to define or modify the users and groups
that can access the Consolidator system. - Click Save to save your changes.