Working with Entities
When you run a penetration test with Core Impact, information acquired from target systems, end-users or web applications is stored in the system as entities. Entities are then accessed in a single and centralized repository by users or by any Core Impact module.
Any finding by a module that can be shared is represented in Core Impact as an entity and will be visible in the Entity View Panel. Modules use the target entities' properties to gather information needed by the module to execute properly. For example, a module requiring an open TCP port might query the target host's properties for information about target ports. In this example, the target host is an entity.
The Entity View Panel provides the functionality for you to access the various entities in the system. The panel includes three "views" that allow you to see and work with different target information resulting from your various tests:
You access these views using the tabs at the top of the Entity View Panel.
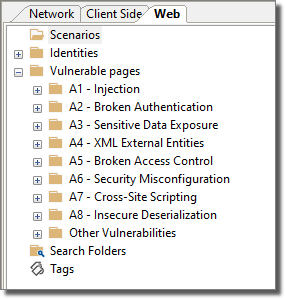
figure 28 - Entity View Panel Showing View Tabs
The following types of items are stored in the Entity Database:
- Hosts: Host entities represent target systems. The entity contains information such as IP addresses, operating systems, architecture, ports, and vulnerabilities found.
- Wireless Access Point: Wireless Network entities represent individual wireless access points. The entity contains information such as SSID, security method, wireless channel and signal strength. Additionally, you may create Fake Access Points using the Fake Access Point Module - these will also appear in the entity database.
- Wireless End Station: Wireless End Stations represent individual devices (PCs, hand-held devices) that are connected to a wireless access points.
- Agents: Agent entities represent agents running on remote systems. An agent entity holds information about an agent's state and its communication channel.
- Tags: Tags are user-defined labels that can be attached to an entity. This allows for custom grouping of entities for easy access and management. There are several pre-defined tags for each entity type. For example, the Network Tags include Camera, Network Device, Database, and Web Server.
- Search Folder: Search Folders are designed to be dynamic lists of entities. The search folder will automatically be populated with (and updated to include) entities that match your search criteria (such as "Windows hosts"). The search folders in the entity database allow for multiple search criteria, making them another way for users to organize and manage their targets.
- Emails: Email entities are email addresses used for client-side attacks. An email entity contains an email address and, optionally, a person's name.
- Scenarios: Scenarios are repositories for WebApps test objects.
- Vulnerable Pages: Vulnerable Pages are the outcome of a successful WebApps Information Gathering session. These are pages that are associated with a web application that may be susceptible to one of various vulnerabilities. The Web Entity view is organized according to the OWASP Top 10 vulnerabilities (see the OWASP web site for more info).
- WebApps Agents: WebApps Agents represent the knowledge of how to exploit a SQLi, PHP or XSS vulnerability in a web page.
- Identities: For Network and Web views, the Entity Database will list all existing Identities, which can include usernames, IDs or other identifying properties of a system.
In addition, the following two entities are created and added to the database when you create a workspace:
- A host entity representing the local console host (localhost).
- An agent called the localagent that represents the Core Impact software running on the local console host.
Each icon displayed in the Entity View Panel represents a different entity type. These icons are described in the table below.
| Icon | Description |
|---|---|

|
Windows Host |

|
Linux Host |

|
OpenBSD Host |

|
FreeBSD Host |

|
Mac OS X Host |
|
|
Unknown Host |

|
Network Device |
|
|
IOS Host |

|
IOS Agent |
|
|
Agent (Refer to Controlling Agents for more info on agents) |
|
|
Network folder |
|
|
Folder |
|
|
Search Folder |

|
Tag |
|
|
|

|
Scenario (Web View only) |

|
Page (Web View only) |

|
SQL Agent (Web View only) |

|
RFI Agent for PHP (Web View only) |

|
XSS Agent (Web View only) |

|
Web Browser Agent (Web View only) |

|
WebDav Agent (Web View only) |

|
OS Command Injection Agent |
|
|
LFI Agent |
|
|
A wireless device (station) connected to a wireless access point |

|
A Fake Wireless Access Point, created from executing the Fake Access Point module. |
Network View
The Network View Tab displays the entire entity hierarchy of the target network that results from a Network RPT. You can use it to view the current state of all the entities in the active workspace's database. By providing access to all entities in the target network, the Network View allows you to assess the state of the overall penetration test.
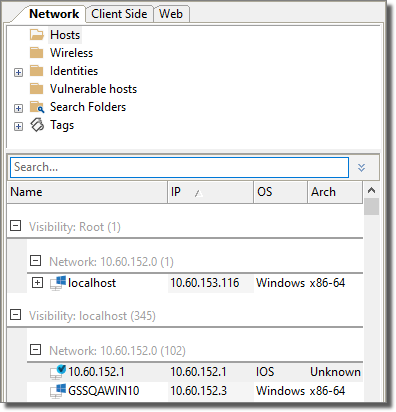
figure 29 - Entity View - Network View
The Network view will contain all of the systems (host machines, network devices, or wireless devices) that have been identified by a test. Each type is shown in its respective folder.
Understanding Visibility Changes
As with all of the entity tabs, the views are simply lists of entities that are organized and grouped by certain attributes. By default, the Network view shows entities grouped by Visibility and Network, as illustrated in the below figure.
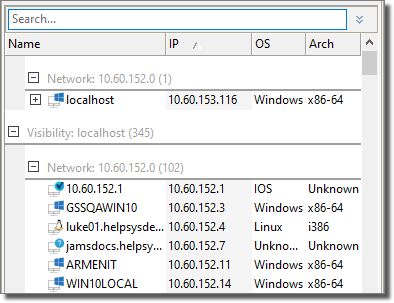
figure 30 - Network View
With the default view, hosts are organized primarily by what host they are visible from and, secondarily, by their network. The grouping can of course be changed by right-clicking on the column headers and selecting a new Arrange By value (see Grouping Entities). Users can also change the view and quickly focus in on a specific host as a visibility level by right-clicking on the host and selecting Show Hosts Visible from Here. This action is the same as using the search function to filter the view by visibility (see Entity Search).
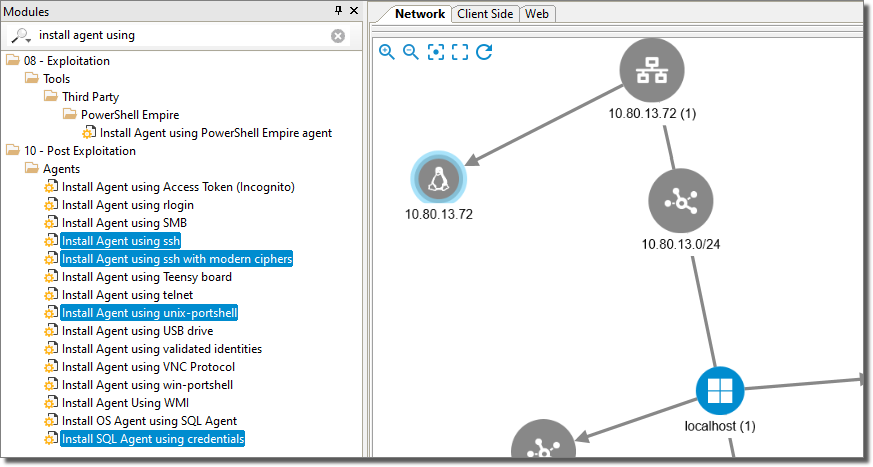
Entities Map View
Network entities can now be viewed in a dynamic, interactive map. Select View -> Show Entities As -> Map or press the Map  button on the toolbar.
The Entity View Panel expands and changes from the default list view to a map.
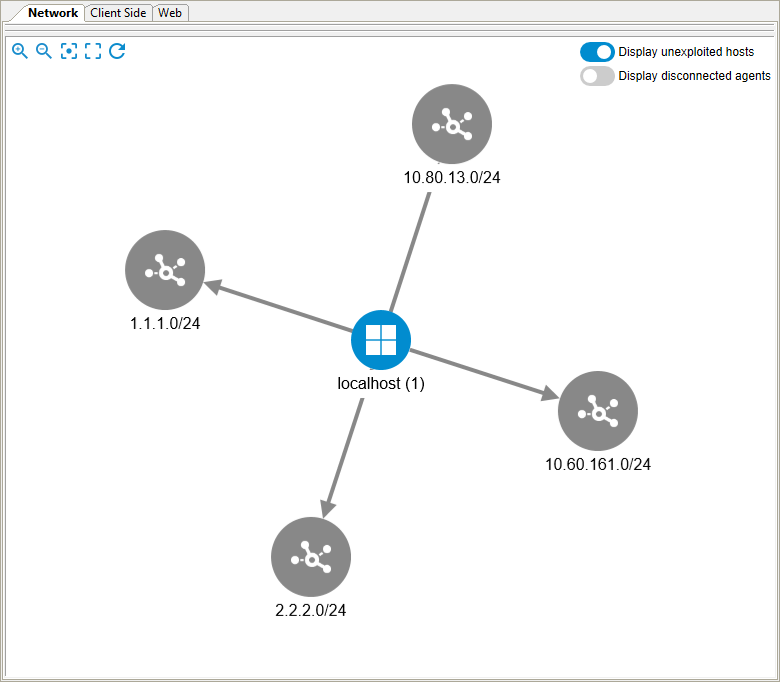
The following features are available:
- Controls in the upper-left of the panel
 provide functions to: Zoom in, Zoom out, Focus on selected node, Fit the network map in the panel, and Reload the map.
 - Switches in the upper-right of the panel are used to: Show/Hide hosts that were not exploited and Show/Hide disconnected agents (they are in Impact inventory, but their status is not connected).
- Users will be able to expand nodes by clicking or double-clicking them or collapse them by double-clicking previously expanded nodes.
- Use the mouse wheel to zoom in or out.
-
You can also run module on selected entities by clicking on the in the map. For example, Linux 10.80.13.72 is selected in the map, and modules can be run by double-clicking them in the Modules list on the left.