Get Started
WAS Quick Start
Follow these steps to start using WAS:
Do you have an account?
If you do not have a Fortra VM account, contact Fortra Technical Support.
Create or Modify a Web Application Configuration
Before scheduling a scan, you will need to create or modify a Web App configuration. See Create or Modify a WAS Configuration for more information.
Configure Scanner Profile
To scan external IP addresses, enter those addresses when configuring the external scanner profile. See Scanner Profiles for more information.
Install your RNA
Make sure your RNA is properly installed and activated. See Install WAS Virtual Scanner Appliance for more information.
The Reconnaissance Network Appliance (RNA) is a physical or virtual appliance installed on your network for the purpose of running vulnerability scans against your assets. The comprehensive data gathered by the RNA is presented to you on Fortra VM, a web portal that helps you understand and manage your vulnerabilities without requiring on-site staff.
The RNA utilizes a hardened Linux-based distribution to scan every IP accessible device including servers, printers, routers, switches, etc.; and transfers detected data through a secure connection to Fortra VM. This secure connection allows for the execution of internal testing on a client’s network. The RNA is wholly owned and maintained by Fortra. It must be returned upon completion of the Service Agreement.
- Internal network profiles define all internal facing assets including workstation, Intranet servers, printers, etc., and require an RNA attached to a client’s internal network.
- External network profiles define all external facing assets including routers, perimeter security devices, web servers, and email servers, and do not require an RNA attached to the network.
An internal RNA resides inside the client perimeter security devices and performs security assessments on all internal client assets as configured in the Fortra VM Interface.
Contact Fortra Technical Support if you have questions or need assistance.
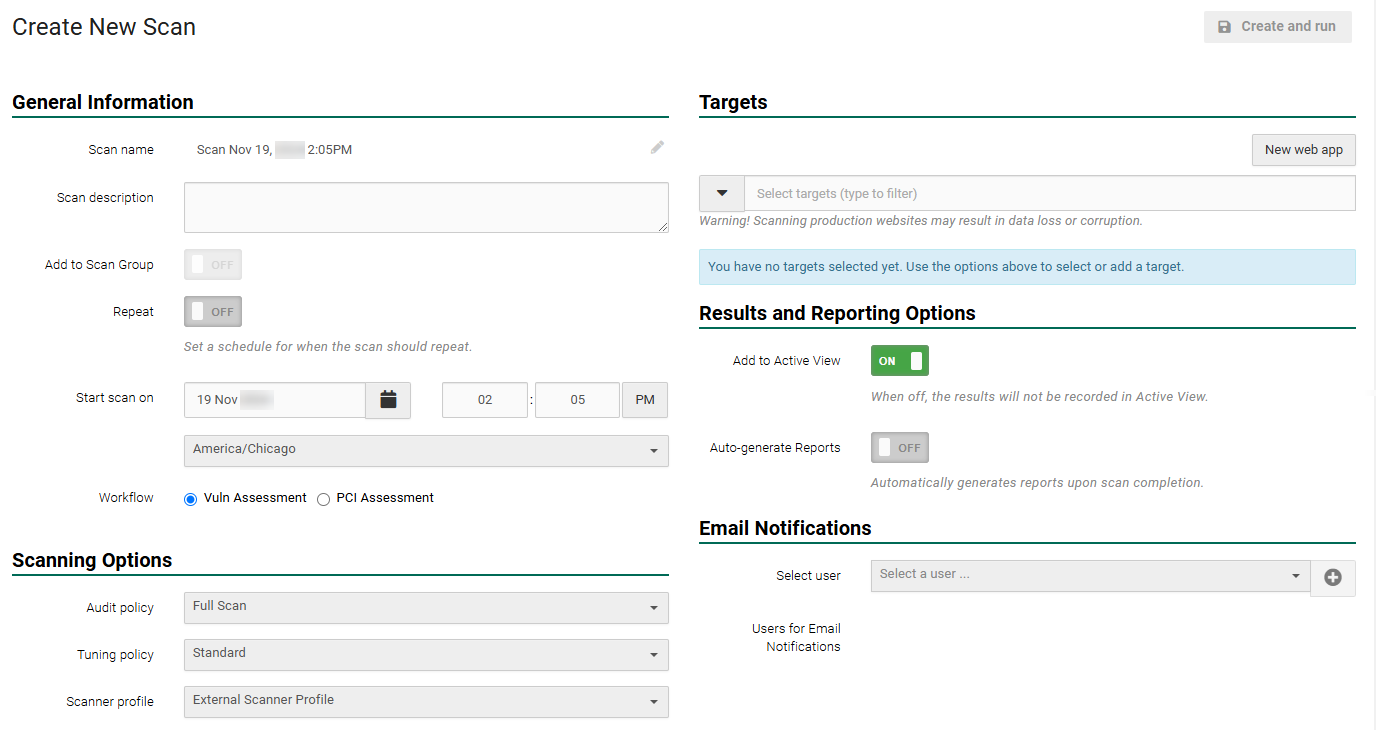
Schedule a Scan
To schedule your first scan, from the , select Scans > Scheduled Scans, and then select + New scan. See Create and Run Scans for more information. If you encounter errors, such as when you include Ad Hoc IP Ports, contact Fortra Technical Support.
Check the Scan Results
Once your scan completes, select Scan > Scan Activity and then select your scan to see its detailed results. See Understand Scan Activity for more information.

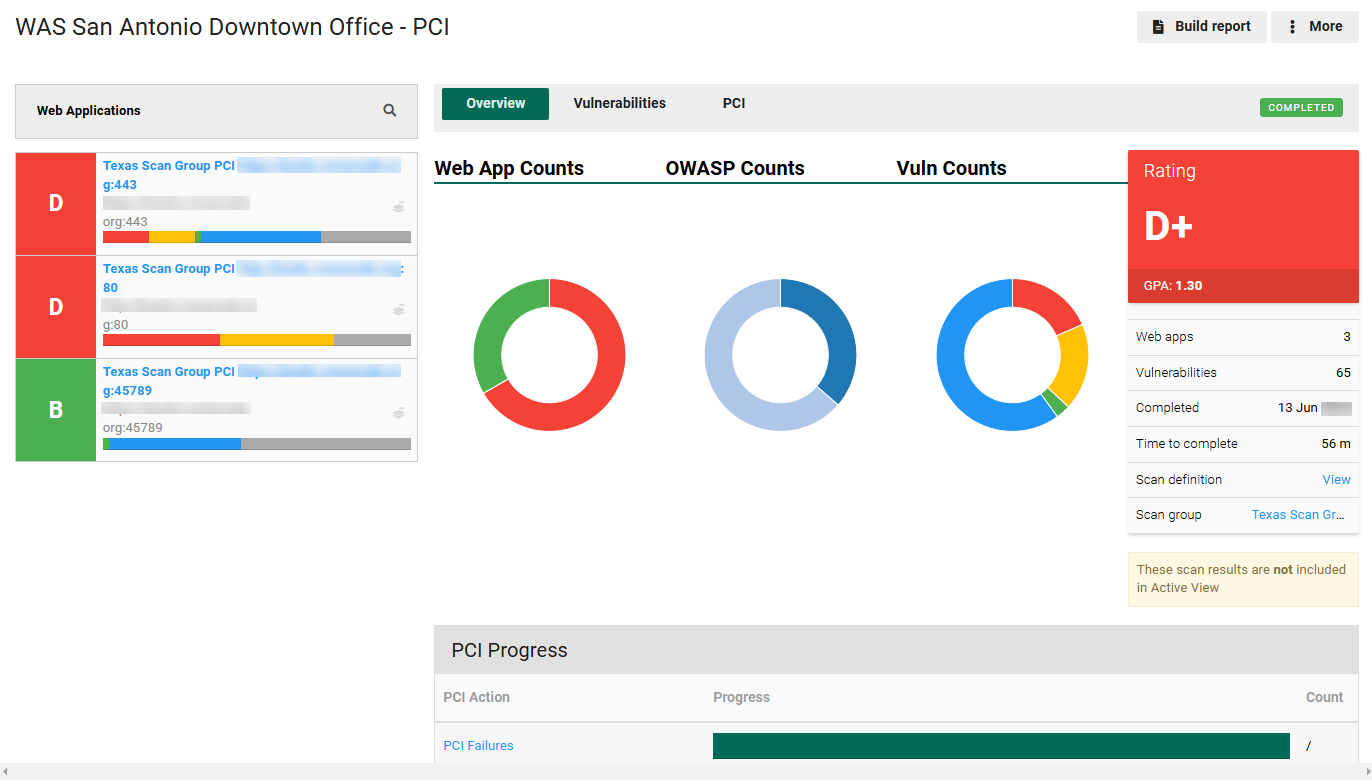
Create a Report
On the scan results page, select Build report. See Create a Report for more information.

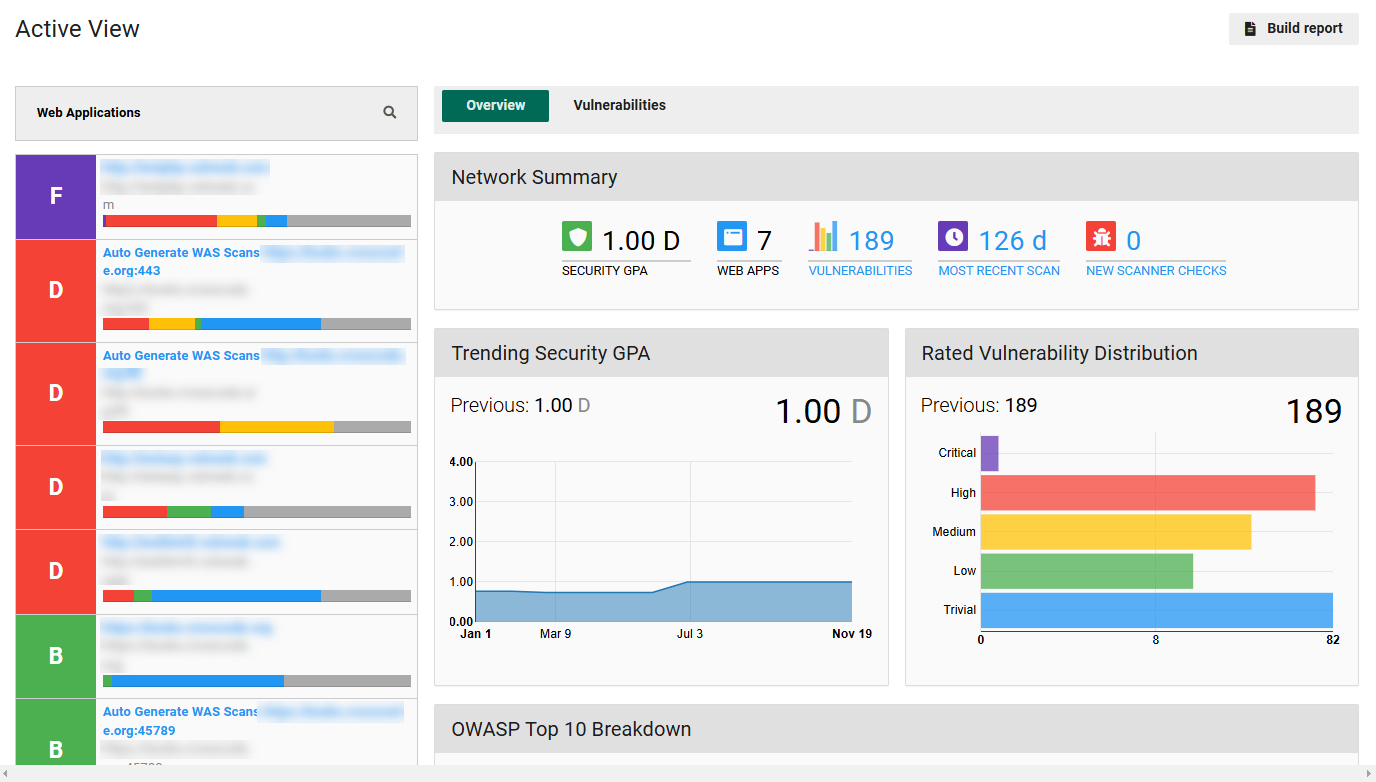
Create Progress in Active View
To see your environment’s security posture and learn how to improve it:
- From the navigation menu, select Active View.
- Choose one of the following tabs: Details, Overview, Assets, or Vulnerabilities.
Active View aggregates data from all your scans and also includes your Security GPA. See Active View - Overview for more information.