
Editing Task Steps |
Along with the ability to edit the Properties of individual task steps, many adjustments can be performed on any step once they are added to the Task Builder's Steps panel. You can move, indent, disable or delete one or more existing steps. You can perform cut/copy/paste commands as well. Commands are conveniently located on the Ribbon or via a context menu that appears when right-clicking a specific element. Certain commands become active on the Ribbon only for the items that they apply to, making it easier for you to discover/detect relevant commands. The Quick Access Toolbar contains Undo and Redo commands that apply to the various edit operations allowing you to undo an operation in case you make a mistake or redo an operation in case you change your mind.
The properties of any task step can be easily viewed or modified once it is added to the Steps panel of the Task Builder.
To view or modify the properties of a step:
In the Steps panel of the Task Builder, select the step that contains the properties you wish to view or modify and click the Edit command on the Ribbon (shown below).
OR
Double-click the step
OR
Right-click the step and select Edit Step from the context menu that appears.
The properties dialog of that step opens. Make appropriate changes to any parameters.
Click OK to save changes and close the properties dialog box. If you decide not to save changes, simply click Cancel.
A developer may want to indent or move task steps up or down, or to some other position. Task Builder allows you to increase/decrease indentation of one or more steps or you can use an auto-format command to format the indentation of a block of steps automatically. In addition, Task Builder supports various methods of moving steps up/down a specific number of lines.
To increase or decrease indentation:
In the Steps panel of the Task Builder, select the step(s) you want to indent. To select a block of steps, hold down CTRL during selection.
Do one of the following:
From the Ribbon's Home tab, click the Indent button to increase indentation or the Decrease Indent button to decrease indentation (as shown above).
Right-click the highlighted step(s) and select Indent/Decrease Indent from the context menu.
On your keyboard, press CTRL + RIGHT to increase indentation or CTRL + LEFT to decrease indentation.
NOTE: The indentation value can be modified via Task Builder Options - Formatting. |
To move steps up/down using Move Command:
In the Steps panel of the Task Builder, select the step(s) you want to move up/down the step sequence. To select a block of steps, hold down CTRL during selection.
Do one of the following:
To move up one step, click the Move Up command from the Ribbon, enter CTRL + UP or right-click the step(s) and select Move Up from the context menu.
To move down one step, click the Move Down command from the Ribbon, enter CTRL + DOWN or right-click the step(s) and select Move Down from the context menu.
To move steps up/down using Cut & Paste:
In the Steps panel of the Task Builder, select the step(s) you want to move up/down the step sequence. To select a block of steps, hold down CTRL during selection.
Click the Cut command from the Ribbon (shown below), enter CTRL + X or right-click the step(s) and select Cut from the context menu.
Select the step you wish to paste the previously cut step(s) and click the Paste command from the Ribbon (shown below), enter CTRL + V or right-click the step(s) and select Paste from the context menu. The step(s) are pasted directly above the selected step.
NOTE: Indentation or movement of multiple sequenced steps (e.g.,steps 3, 4 and 5) or non-sequenced steps (e.g.,steps 3,6 and 8) are supported. |
To enable/disable auto-formatting of steps:
From the Ribbon's Step command group, click the Format Steps command (shown below). This enables/disables auto-formatting of steps. When enabled, blocks of steps contained within a conditional (If) statement or Loop process are formatted (indented) to improve distinction (this command is enabled by default).
Steps of a task can be disabled or re-enabled so that you can use or test different versions of the same task. The Disable button on the ribbon or context menu acts as a toggle to disable an enabled step or re-enable a disabled step. When a step is disabled, it is greyed out by default in the Steps panel and it is treated as a comment and ignored when the task runs.
To disable or enable a task step:
In the Steps panel of the Task Builder, select the step(s) you want to disable. To select more than one step, hold down CTRL during selection.
Do one of the following:
Click the Disable button on the ribbon under the Home tab.
Right-click and select Disable from the context menu.
NOTE: To re-enable, follow the same instructions. |
To delete a step:
In the Steps panel, select the step or steps you wish to delete. To select more than one step, hold down CTRL during selection.
Do one of the following:
Click the Delete button located on the Ribbon under the Home tab.
Right-click and select Delete from the context menu.
By default, the Steps panel displays numbers to represent each step in the task are displayed for each step in the Task Builder's Steps panel along with an icon designating the type of action used. Also the text (or AML code) that appears in this panel is word wrapped by default allowing all text to be visible in the window regardless of its size. Nonetheless, these options can be customized according to each user's preference. For instance, one may d
From the Ribbon, select the Home tab.
From the Layout command group, click the Word Wrap button to toggle Word Wrap on/off (shown below).
To disable/enable step numbers :
From the Ribbon, select the Home tab.
From the Layout command group, click the Step Numbers On/Off button to toggle step numbers on/off (also shown below).
The Task Builder offers two ways in which to view the steps of a task. The default appearance displays a plain-English, easy to comprehend text description of each step. They can also be displayed in AML (Markup Language) format. When set to this view, those who understand AML can edit their code directly from the Task Builder's Steps panel or copy the code onto an external text editor such as Notepad.
To switch from plain text to AML or AML to plain text:
From the Ribbon, select the Home tab.
In the View command group, select AML to switch to AML code view or Visual to switch to plain text view (shown below).

To edit code in AML view:
From the Steps panel, select the step to edit.
Click the step again to make the code editable.
Make the appropriate changes.
To allow easy creation and editing of tasks, an Undo and Redo option is included on the Quick Access Toolbar (shown below).
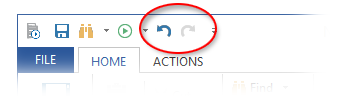
To undo Changes:
Click the Undo button on the Quick Access Toolbar or press CTRL + Z. You can perform as many Undos as you like.
To redo a change after an undo:
Click the Redo button on the Quick Access Toolbar or press CTRL + Y. The Redo button is normally grayed out and becomes active only if an Undo is performed.