
How to Get There
Click the Captured Transactions tab on the navigation pane on the left side of the Insite window.
What it Does
The Captured Transactions screen allows you to view, sort, and delete Captured Transactions. The list is ordered chronologically by time stamp with the most recent transaction at the top of the list. Captured transactions are displayed in pages with 200 records to a page (or 100 when viewing with a mobile device).
Exit Point Manager caches captured transactions on the web server to facilitate speedy page viewing and navigation. The cache is created upon the initial page load, on refresh, or when a filter search is submitted (even if the search query is the same). The cache is used only for navigating through pages (i.e. when using the previous button, next button, or page select drop-down menu). The cache expires 10 minutes from creation. After cache expiration, a message appears indicating the cache has expired, after which the cache is recreated with the same page displayed (or the closest possible page).
See Capturing Transactions for details on how to capture a transaction.
Options
Choose a transaction record to open the View Transaction screen where you can view and memorize a captured transaction.
Selection, sorting, filtering, deleting, and navigation features on this screen are described in Using the Web Browser Interface.
Refresh

Choose this button to refresh from the server to display the latest captured transactions.
Page Scroll

Select the left and right arrows to move forward and backward through pages.
Search and filter box

Select the records you want to filter (choose the check box next to the Search field to Select All), then enter text in the Search box and press Enter to query captured transactions. Use the  button to identify other Search Filter and Sorting criteria.
Memorize
Click  next to a record and select Memorize.
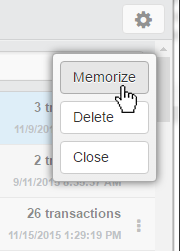
This opens the New Memorized Transaction screen, which allows you to memorize the transaction for a user or location. See also Memorizing a Transaction.
Field Descriptions
The Captured Transaction screen allows you to change some of the values for the captured transaction to fine tune it to your specification before you memorize it.
Server > Function

A Server in Exit Point Manager is a controlled entry point into your system. These entry points are determined and defined by IBM. Exit Point Manager has assigned easy-to-remember names to these controlled entry points.
A Function, or Server Function, in Exit Point Manager represents a class of operations that a given Server may perform. For example, the *SIGNON Server classifies its operations as those pertaining to changing passwords, generating authentication tokens, and retrieving sign-on information. Exit Point Manager has assigned easy-to-remember names to these Functions, such as CHGPWD, GENAUTTKN and RETRIEVE.
User/Location

User represents the identity of the person initiating a transaction as a user profile. The special value *PUBLIC, when used on a rule, means that the rule applies to any User lacking a specific rule. when used as a subset or selection parameter, *PUBLIC means to select all such rules for display or printing. This is the User that initiated the transaction.
ASP Group

This is the name of an ASP Group. It is used in rule evaluation to determine if an object referenced in a transaction is the one specified on the object entries for this list.
Possible values are:
- *SYSBAS The Object List entries refer to those objects in *SYSBAS.
- *ALL The Object List entries refer to those objects in any namespace.
Count
![]()
The number of times this exact transaction has been captured.