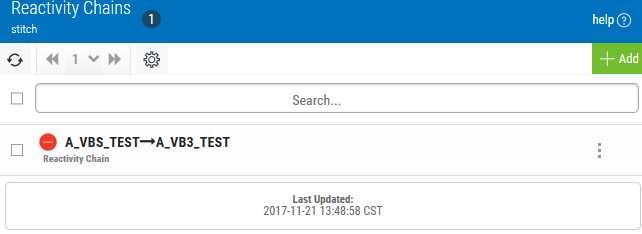
Reactivity Chains
Reactivity chains are quite similar to job flow diagrams. However, because you select a starting and ending job for the chain, it allows you to focus on just a segment of the overall reactive job flow. This can help you troubleshoot problems in your job schedule.
After you create and validate a reactivity chain, you can diagram the job flow for it. Reactivity chain diagrams work in the same way as other job flow diagrams. You can even make the reactivity chain's diagram live so you can watch the progression of the job flow.
Viewing Reactivity Chains
In the Navigation Pane, clicktap Reactivity Chains under the Robot Schedule menu. If the menu is hidden, hover over the Navigation Pane to expand it.
Things to know and do:
-
The total number of reactivity chains in the list and the server they're on is displayed at the top of the page.
-
ClickTap
 Refresh to refresh the information in the display.
 -
ClickTap the page number and select the page you want to view. Or, clicktap the previous and next arrows.
-
Start typing in the Search field to find a specific chain. It will find everything that contains what you're typing. See Sorting and filtering below to learn how to filter your search.

Actions you can take:
ClickTap  Show Actions by any reactivity chain to display the following actions that you can take:
- Select Diagram Reactivity Chain to create a job flow diagram for the reactivity chain.
- Select Edit to open the page where you can edit the reactivity chain.
Sorting and Filtering the Display
There are settings for the Reactivity Chains page that allow you to choose how to sort the list, and what types of data will be searched when you do a search.
Follow these steps:
-
ClickTap
 Settings.
-
Select how you want the lists sorted (Sort By). ClickTap your selection again to change the sort order to
 ascending or
  descending.
 -
ClickTap
 Settings to close the settings.
Add or edit a reactivity chain