Format Menu
The Format menu contains commands that affect the appearance of individual items in the map. Items can be either devices (routers, servers, hosts, and so on) or networks (ovals, by default).
| Menu Command | Description |
|---|---|
| Icon (Pg. 1) | Specifies the icon to associate with the selected items. |
| Label (Pg. 1) | Modifies the label of one or more items from the map. Devices and networks have text labels that identify the item. These labels can be generated automatically from information gathered from the device or contain static text that you manually enter. |
| Label Position (submenu) (Pg. 1) | Changes the position of the label relative to an item. |
| Align (Pg. 1) | Aligns the selected objects in relation to each other. |
| Rotate (Pg. 1) | Rotates the positions of the selected objects in relation to each other. |
| Scale (Pg. 1) | Scales the positions of the selected items in relation to each other. |
| Arrange (submenu) (Pg. 1) | Rearranges the selected items into a cycle, bus, or star. |
| Context menu (Pg. 1) | Sets the font, size, and style of the selected devices from the Context menu. |
Icon
![]()
Use the Icon command to select an icon for a device or network as it appears on your map. The Select an Icon window is displayed.
- Click an icon in the left box. It is displayed in the preview box on the right.
- Click OK to assign the icon to the selected devices or networks.
- From the menu at the top of the window, select a group of icons. The Built-in Shapes are displayed below.
- Click Import to import an image as an icon.
- When viewing groups of icons other than Built-in Shapes, click Reload to refresh the icon list in the left box.
- Drag an image to the window to import it as an icon.
- Drag a folder of images to the window to import the contents as a new icon group.
For more information, see Custom Icons.
Built-In Shapes
You can use the icons in the Built-in Shapes icon group.
|
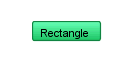
Rectangle and Oval |
Rectangles and Ovals contain the text label within them. Rectangle is the default shape for a device. |
|
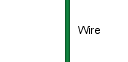
Wire |
The Wire item is drawn as a straight line. Connections to the wire are drawn at right angles to the wire if possible.
|
|
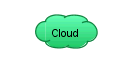
Cloud |
Contains the textual label. |
|
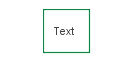
Text |
From the Format menu, you can configure font, style, and color of the text. The border of the item appears only when the item is selected. |
|
|
Icon |
Select an icon from a set of default icons or create your own. For more information on adding icons to Intermapper's set, see Custom Icons. |
Label
Each item in your map has a label. You can use the Label command from the Format menu to edit labels for the selected items.
Default Labels
- Device - The Smart Name of the device.
- Network- IP address or range of the network.
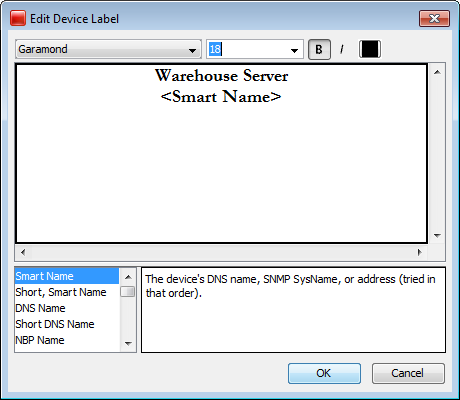
Edit Device Label Window
The following example shows the window for editing an item's label:
-
Top pane - Lists the label as it is displayed.
The entries in <...> are variables, which are filled in with the values from a particular device or network.
Press Enter to move text or variables to a new line.
- Lower-left pane - Displays a list of variables that can be used in the top pane; the lower-right pane shows the definition of each variable
To insert a variable into the item's label:
- From the top pane, place your cursor where you want to place the variable.
-
From the lower-left pane, double-click variable you want to insert. The variable appears in the top pane, enclosed in <...>.
Tip: To move text or a variable to a new line, place the cursor where you want the new line to start and press Enter on your keyboard.
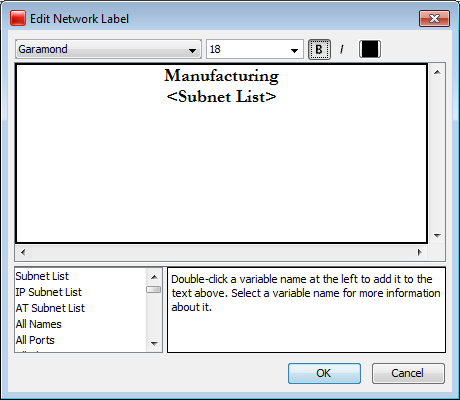
Label Variables
You can use label variables to help you see information about the item you consider most important.
Device Variables
Network Variables
Label Position
The following positions are available for labels:
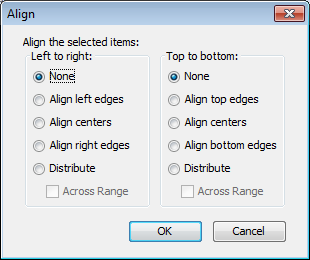
Align
You can align the selected items relative to each other. The Align buttons work like other drawing programs.
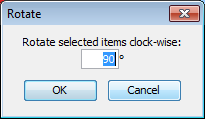
Rotate
|
|
Rotates the positions (but not the text or icons) of the selected items as a group. Items are rotated clockwise by the specified number of degrees . The example on the left shows the window for rotating items. |
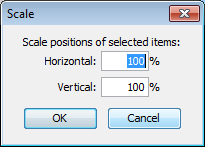
Scale
|
|
Specifies the amount (percentage) to change the positions both vertically and horizontally. Change the relative spacing of the selected items. This is useful after arranging items in a star to increase or decrease the diameter of the circle. The example on the left shows the window for scaling items. |
Arrange (Submenu)
If no objects are selected, Organic and Tree commands work on all objects on a map. For Star and Bus, you must select at least one object. For Cycle, you must select at least two objects. All commands can work on two or more objects.
Organic
Arrange items with a minimum number of crossed links and overlaid objects.
Tree
|
|
| Tree - left | Tree - right |

Tree - up |

Tree - down |
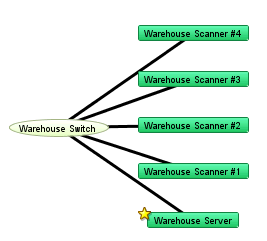
Cycle
You can move selected items into an oval around the edge of the window. This allows you to easily see the interconnections between devices on your network. The Cycle example in Using the Arrange Commands illustrates the Cycle command action.

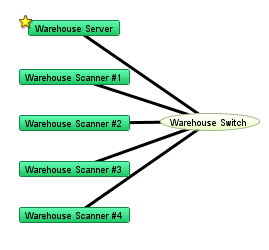
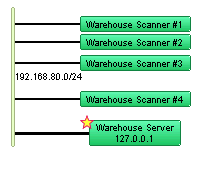
Bus
You can arrange items into a vertical column, changing the item that connects them into a vertical bus shape. This can represent a group of devices connected by an ethernet or other broadcast medium. The Bus example in Using the Arrange Commands illustrates the Bus command action.
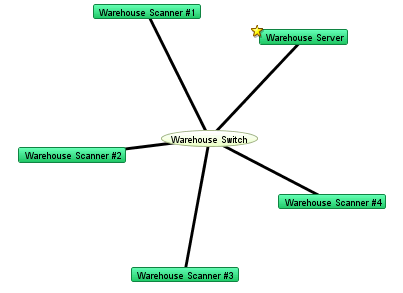
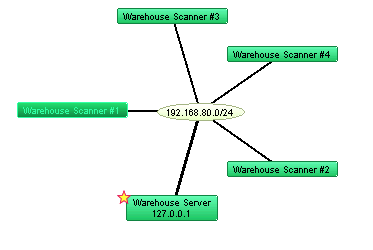
Star
You can arrange items so they surround a network or device that connects them. The devices are spaced equally around the circumference of a circle. The Star example in Using the Arrange Commands illustrates the Star command's action.
Grid
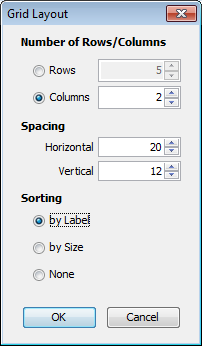
You can arrange items to form a grid with a specified number of columns or rows. You can sort the grid by Label, Size, or None. If you sort by None, the grid is created relative to the upper-left icon in the selection.
Features Available Only From the Context Menu
Font, Size, and Style
To change the attributes for each label in your map:
- From the Context menu, select Font, Size, or Style.
- Make your changes.
- Click OK.