Work with Roles panel
Use the Work with Roles panel to change, copy, or delete existing user-defined roles, display and add role users, and define access rights for the role.
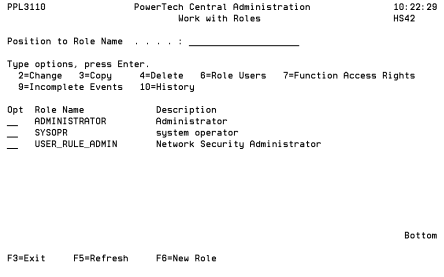

How to Get There
From the Product Security Menu, choose option 1, Work with Roles.
Options
2=Change: Displays the Change Role panel, which allows you to change the name and description of a role. If you select the ADMINISTRATOR role, you can change its description, but not the role name.
3=Copy: Displays the Copy Role panel, which allows you to copy the selected role. Enter a description and name for the new role. The settings from the original role are copied to the new role, which you then can modify as needed.
4=Delete: Allows you to delete the selected role. A confirmation panel displays so you can confirm the deletion.
6=Role Users: Displays the Role Users panel, which lists all users assigned to the role. You can add new role users or delete a user from the role.
7=Function Access Rights: Displays the Function Access Rights panel. Enter a 5 to view the currently defined access rights for a function.
9=Incomplete Events: Displays the Work with Incomplete Events panel, which lists events that have failed or not completed yet.
10=History: Displays the History Browser panel for the selected role, which lists all events that have occurred for the role.
- Only user-defined roles can be deleted.
- You also can use the
following commands to add or delete a user from a role:
- Add Product Security Role User (PPLADDPSRU)
- Remove Product Security Role User (PPLRMVPSRU).
- To define a role, press F6.
Command Keys
F3=Exit:Exit the program.
F5=Refresh:Refreshes the panel with the most current data.
F6=New Role: Creates a new role.